Lesson 10: Connected Finger Exercises
One of the most important concepts to learn when developing the right hand for Fingerstyle guitar laying is the concept of “connecting” your right hand fingers together when playing. What this means is that there should never be a space between one finger playing and another finger touching the string for the next note to be played. In short, there should never be a time where your right hand fingers are completely off the strings, unless the piece is finished.
In these exercises, the goal is to learn how to play one note with one finger, and then simultaneously place the next finger on the next string, and to continue this pattern throughout the exercise. For example, if the thumb plays a bass note on the 6th string, the index finger should immediately be placed on the 3rd string to prepare to play, and this alternation continues with each finger as needed.
This way, you are always “one note ahead” of the music in your right hand, so the next finger in the sequence is ready to play the next note in the exercise.
Practice the following exercises to develop your connected finger technique to further develop this concept in your right hand. We will start by using open strings only to keep the focus on our right hand for now.
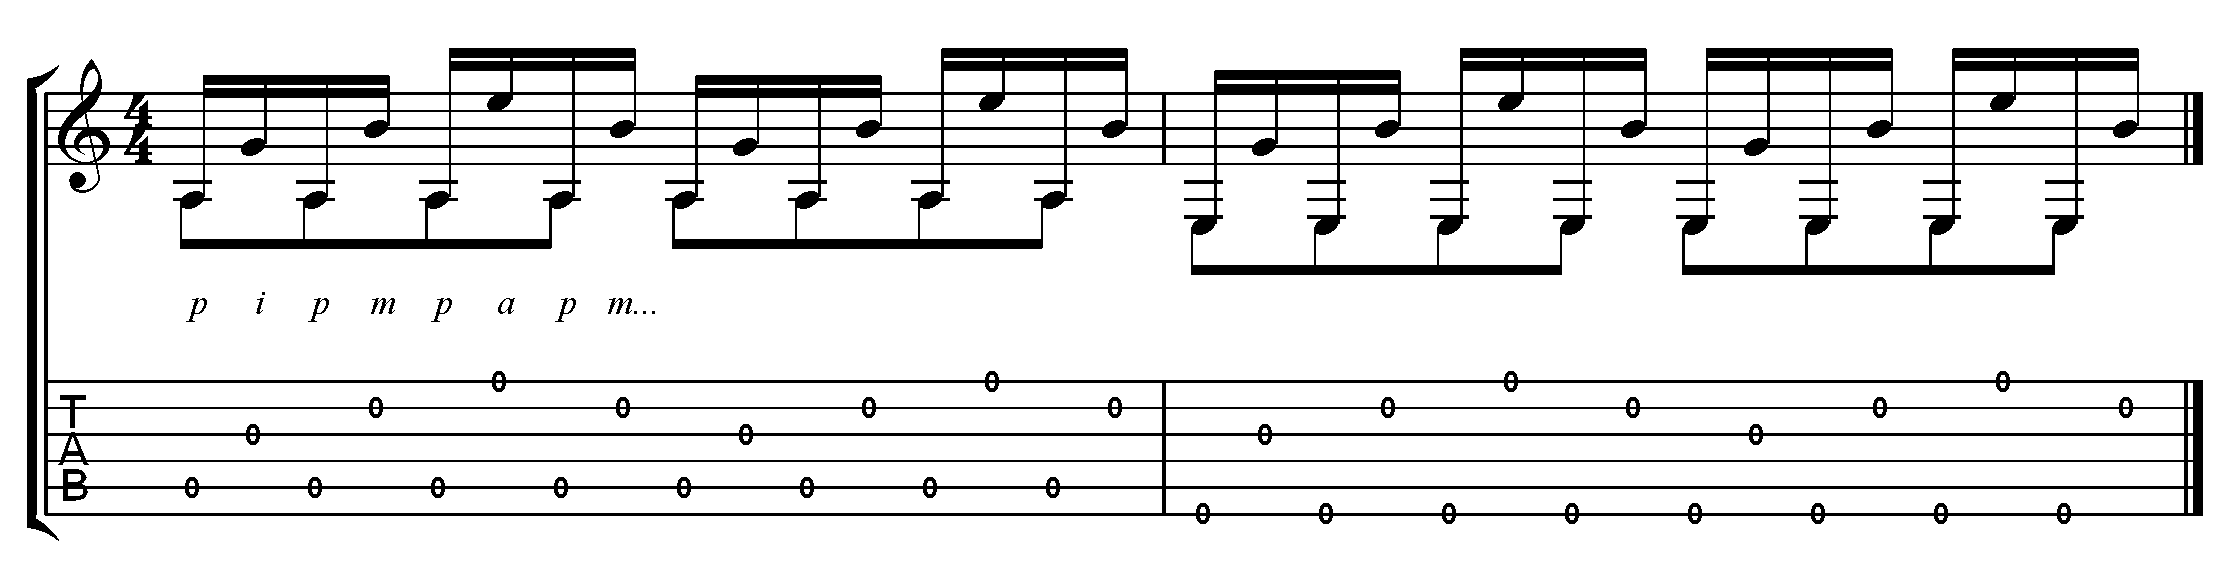
Exercise 3.1 - Open Strings Forward
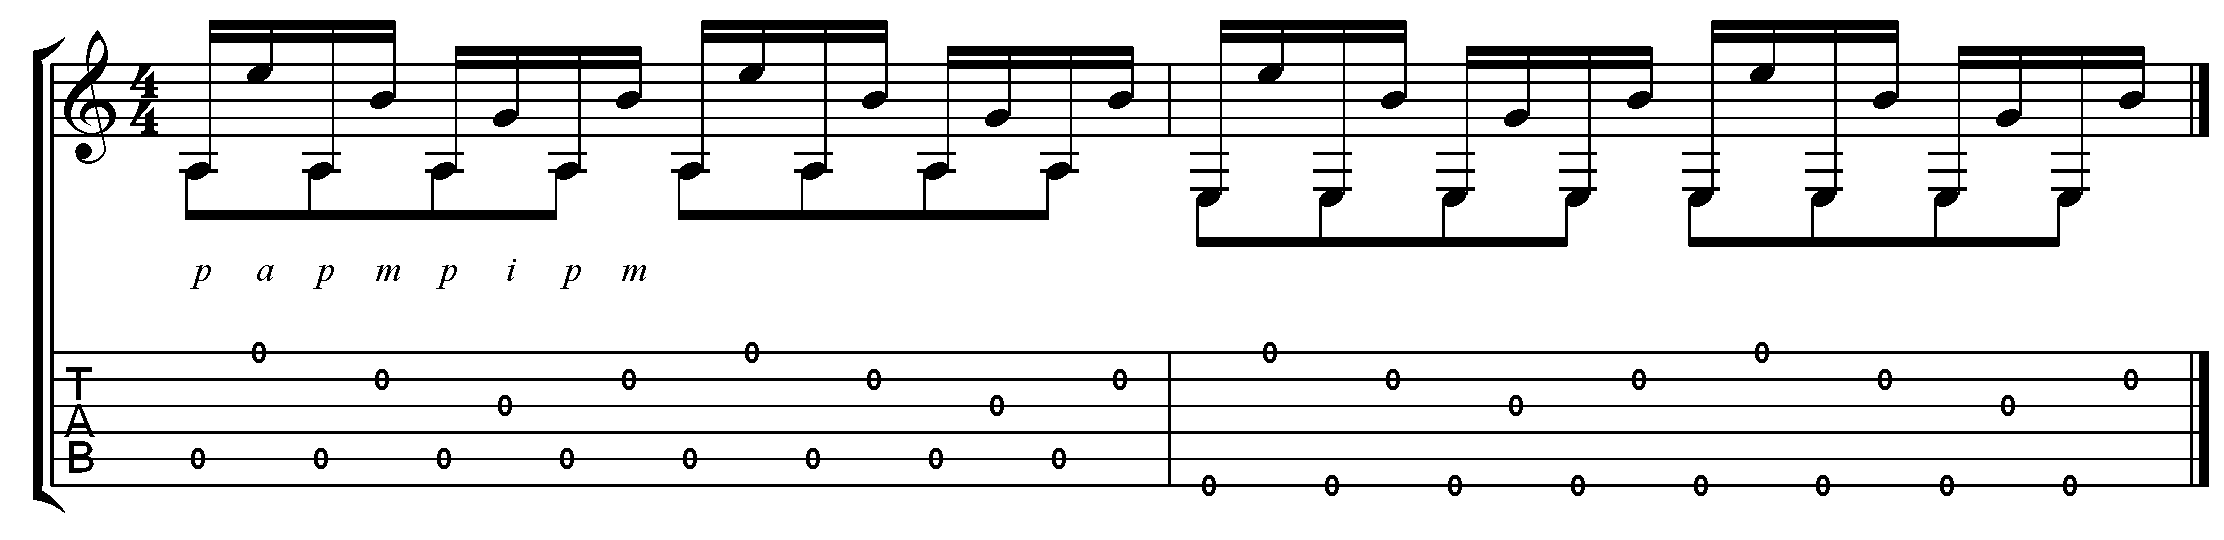
Exercise 3.2 - Open Strings Reverse
Adding Chords in the Left Hand
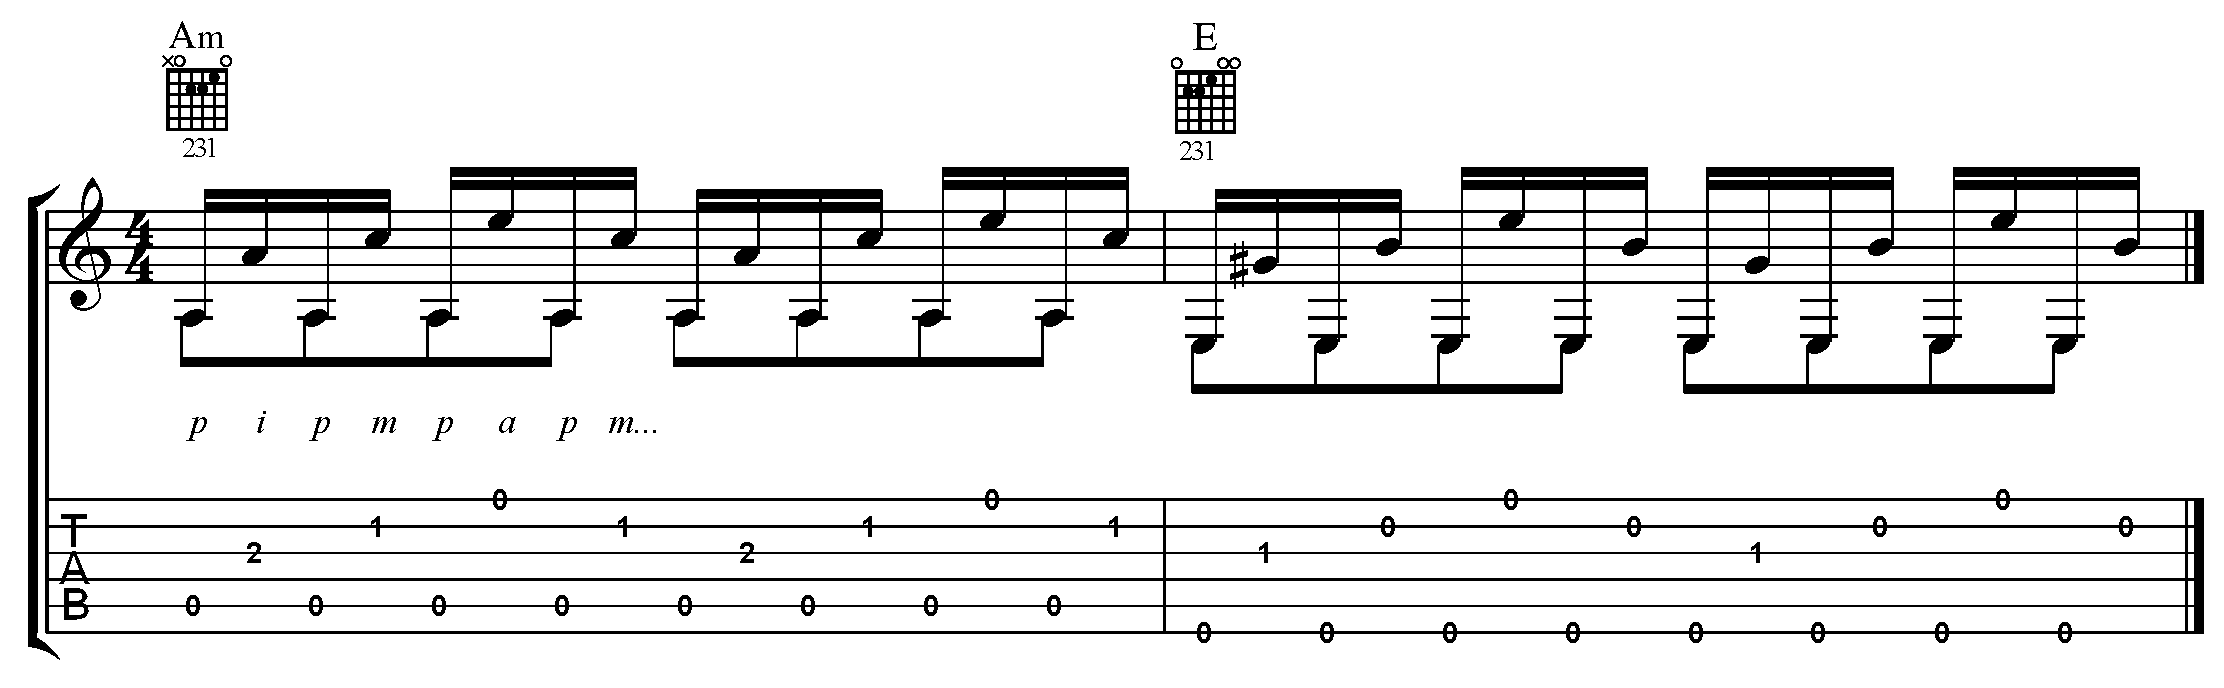
Now that we are familiar with the concept of the supported finger exercise, we will add chords in the right hand for the next exercises. When adding chords, place the fingers in the order that they are played by the right hand progression, this means that you do not want to put the chord down in its entirety as you would in pick-style playing and strumming, but rather we will build the notes in the chord as needed by the order of the right hand pattern. This will take some getting used to, but its an extremely important part of our left hand technique.
Exercise 3.3 - Am and E Chords
Exercise 3.4 - C and G/B Chords

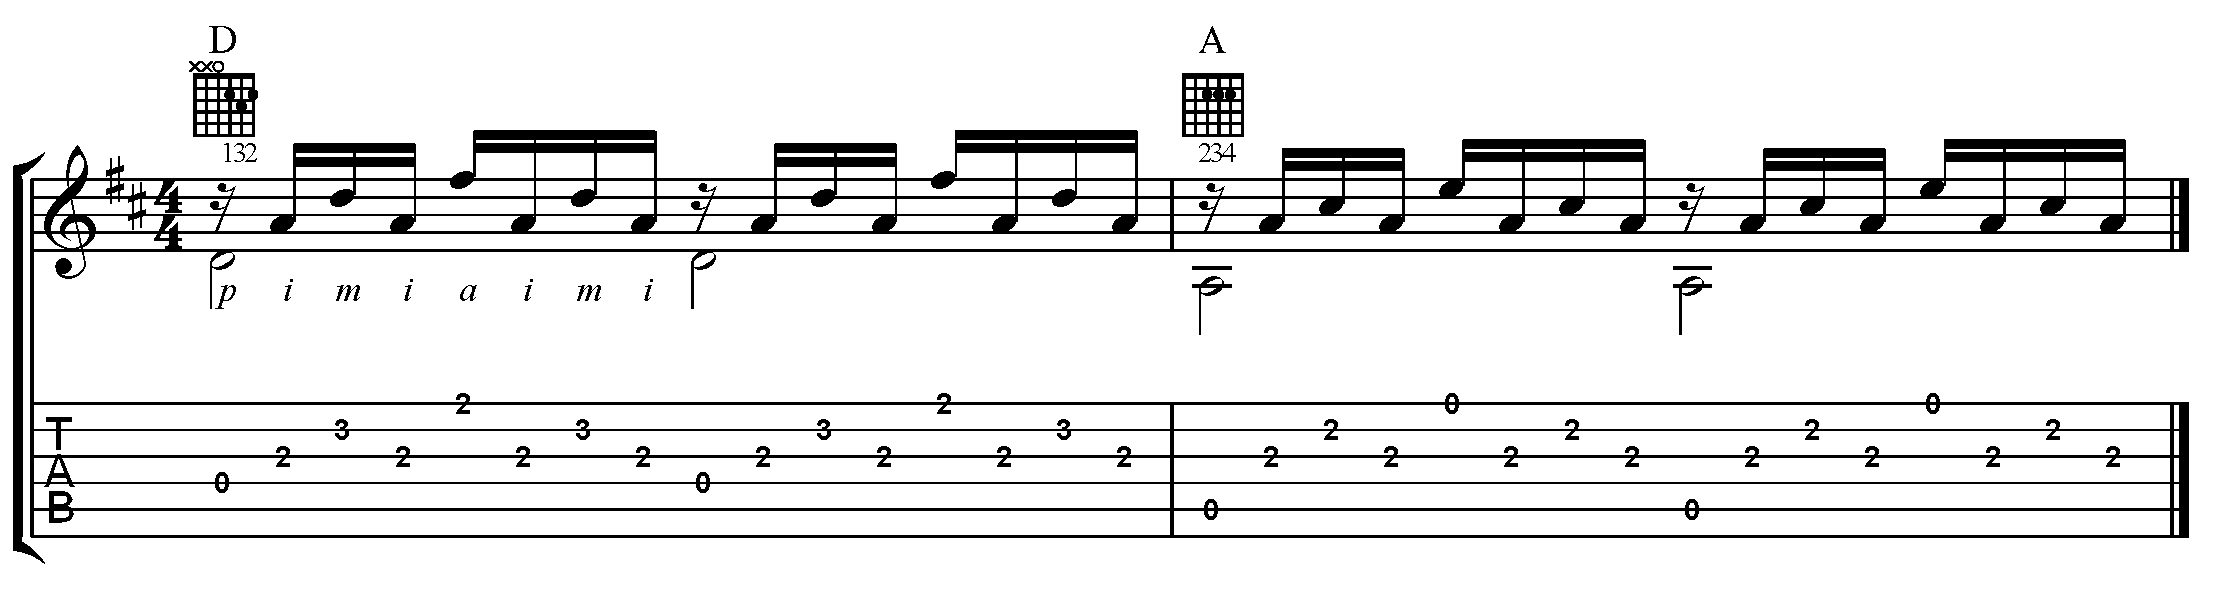
Exercise 3.5 - D and A Chords