Fingerstyle Guitar Basics
Getting started with Right-Hand Fingerstyle Guitar Technique


Course Homepage
Fingerstyle Guitar Basics
New To Fingerstyle? Start Here!
Getting started with Right-Hand Fingerstyle Guitar Technique
Fingerstyle Guitar Basics: Lesson 1
Introduction to Fingerstyle Guitar
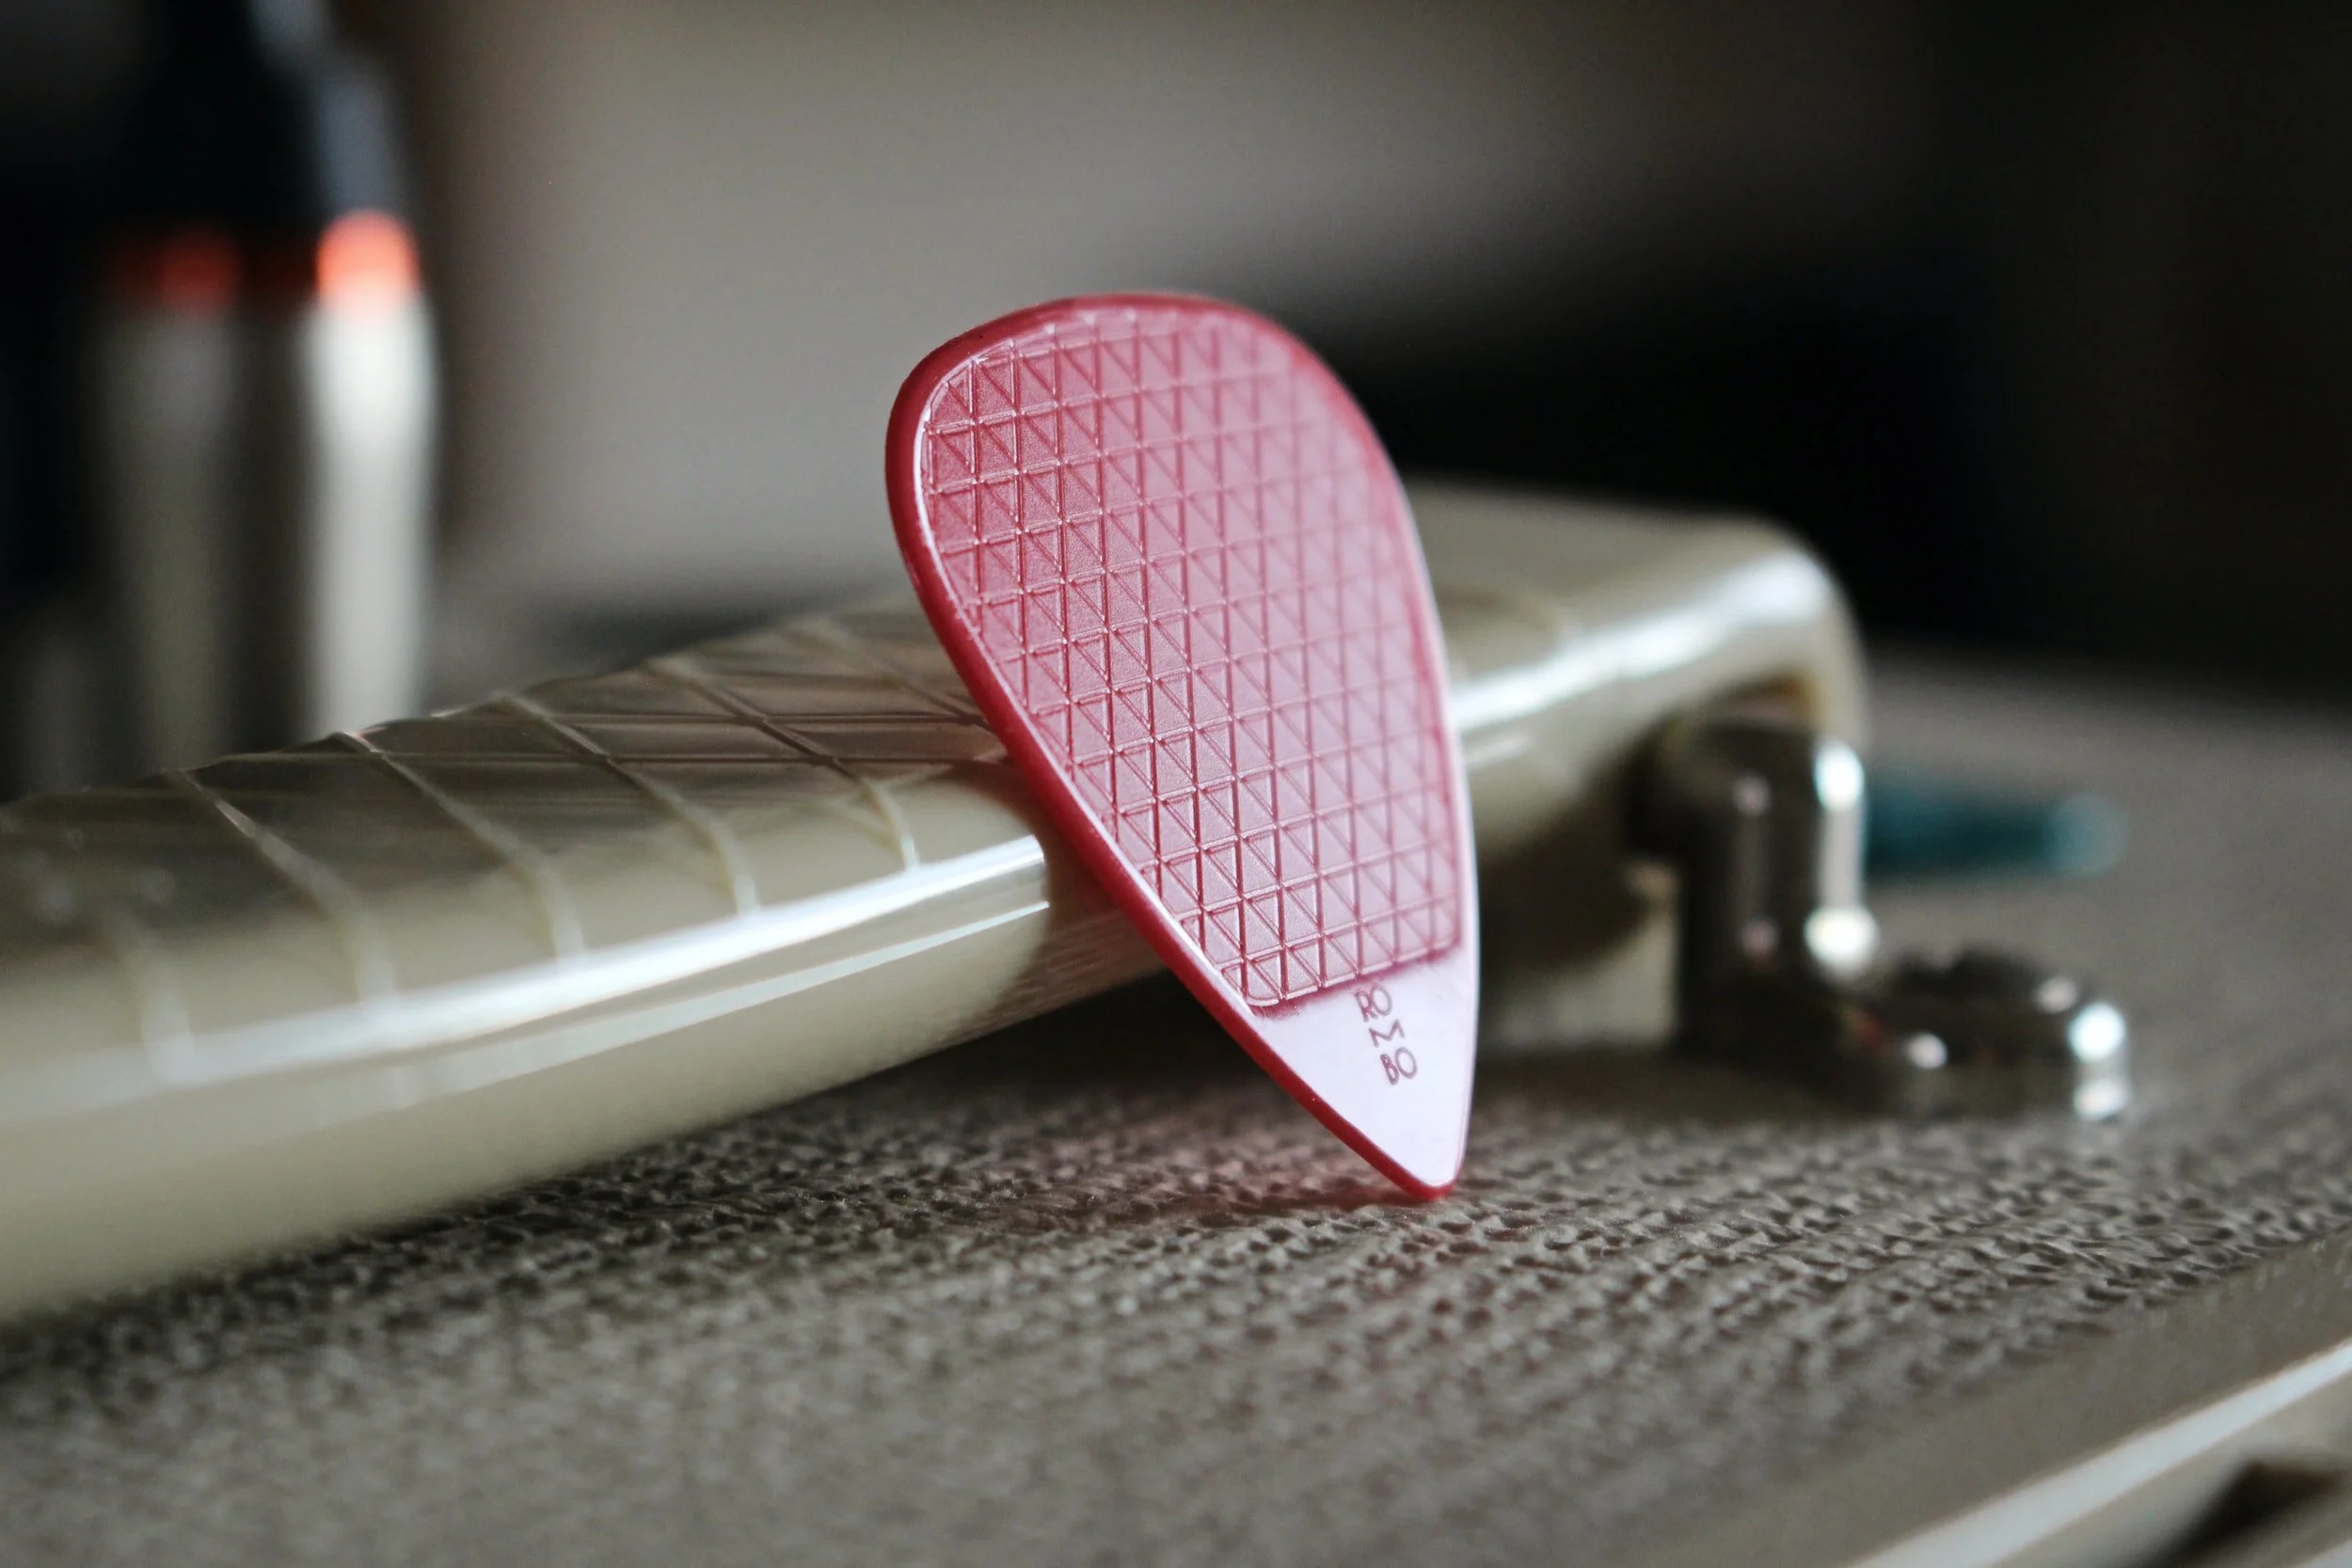
”Fingerstyle” guitar is one of the most challenging and rewarding styles of guitar playing. Fingerstyle guitar differs from traditional “pick-style” guitar playing in several ways, most notably the absence of a pick (though a thumb-pick is often used) and the ability to play two or more independent lines simultaneously. This technique is found in all musical styles from jazz to rock to Classical and beyond.
In the last 40 years, the Fingerstyle guitar genre has expanded from the traditional Classical guitar model into the use of alternate tunings, fingerboard tapping, percussive elements, and other extended techniques that have turned the guitar into a self contained ensemble of instruments, allowing the skilled player to present the melody, harmony and rhythm of the song on one instrument.
This opens up new worlds of musical possibilities for the modern guitar player to explore playing multiple lines simultaneously, but many guitar students are reluctant to throw away the comforts of the pick due to the extensive time and practicing involved in effectively developing the right hand technique. That is the main focus of this book: to introduce the correct right hand performance practices and develop the right hand in the student that already has experience playing the guitar, but very little to no experience with Fingerstyle guitar.
Many guitar students who have studied traditional pick-style playing might have a difficult time adjusting to the absence of the pick, and this book is designed with the pick player in mind, and offers several right hand exercises that will help you transition away from using the pick and developing your right hand techniques in a variety of musical styles.
The techniques in your right and left hand require a lot of patience and practice, but the diligent student will be able to effectively integrate this technique into their repertoire and explore a whole new way of playing the instrument. It is important to remember that these are new muscle movements for your right hand, and take a long time to develop in the beginning player, so do not rush through these initial steps.
Like a tree, strong roots are vital to growth, and for the Fingerstyle player, a strong foundation on proper technique will lead to successful performances.
Fingerstyle Guitar Basics: Lesson 2
Choosing a Guitar: Steel or Nylon String?
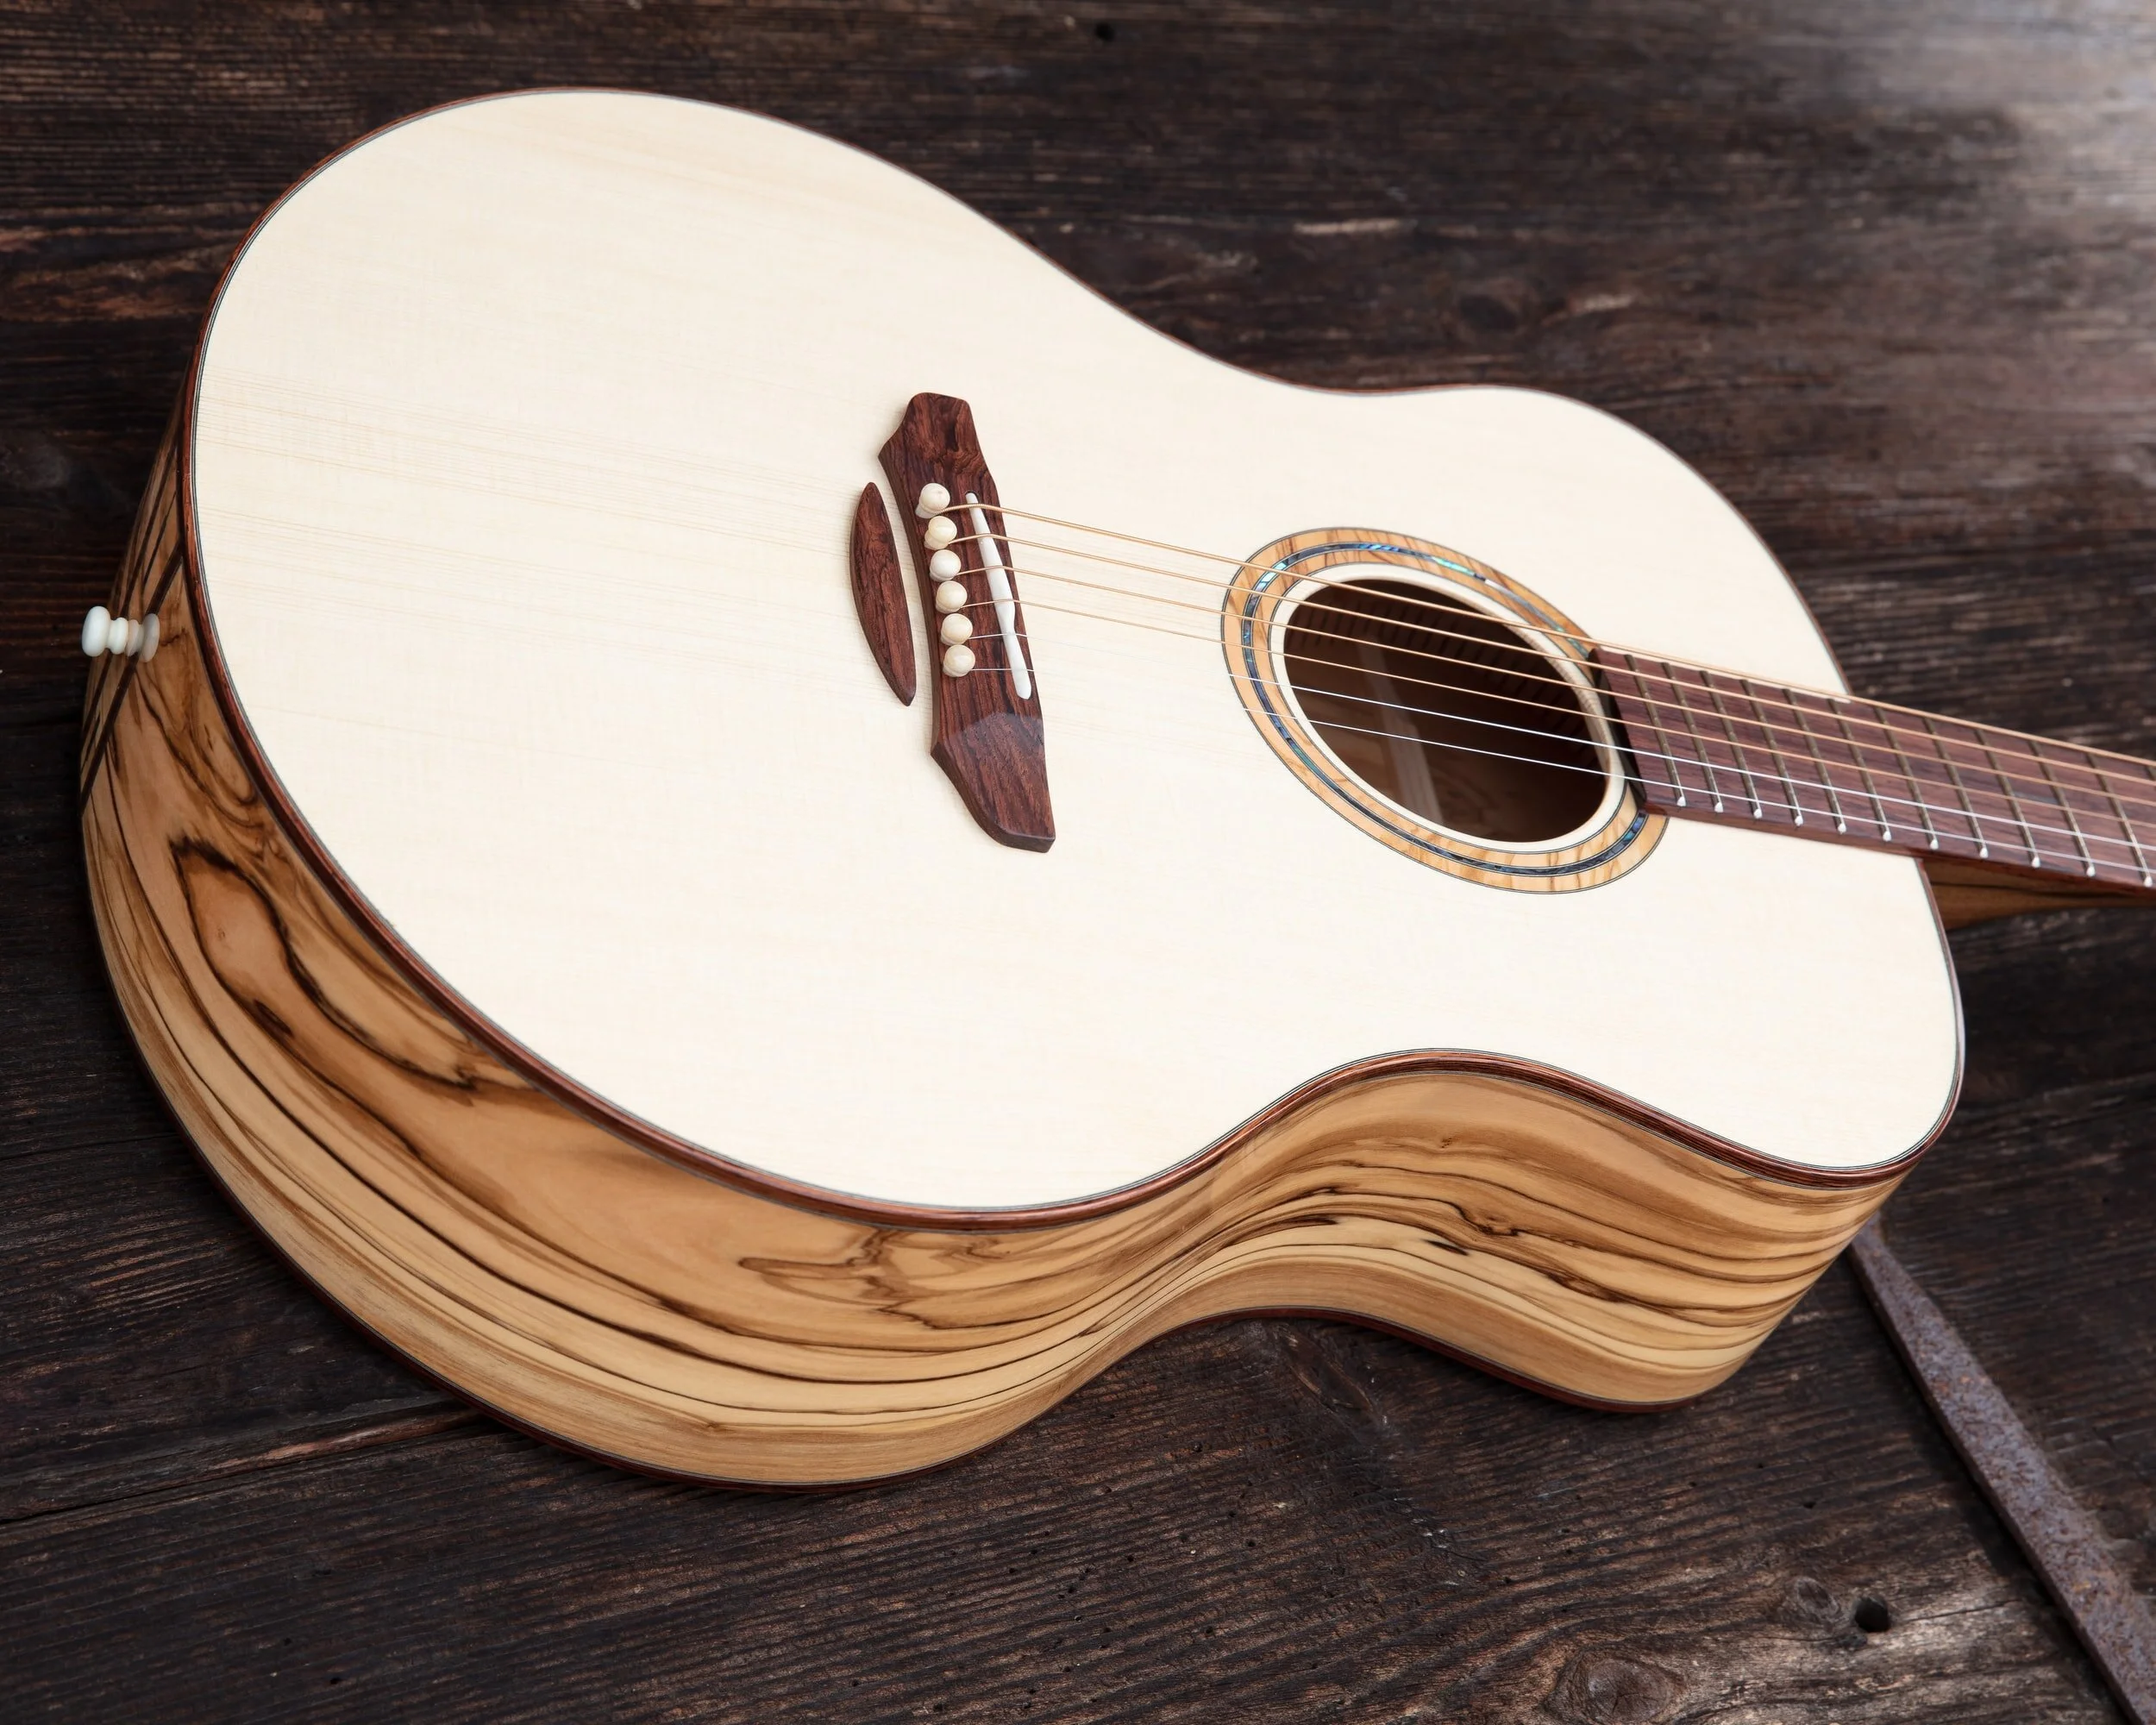
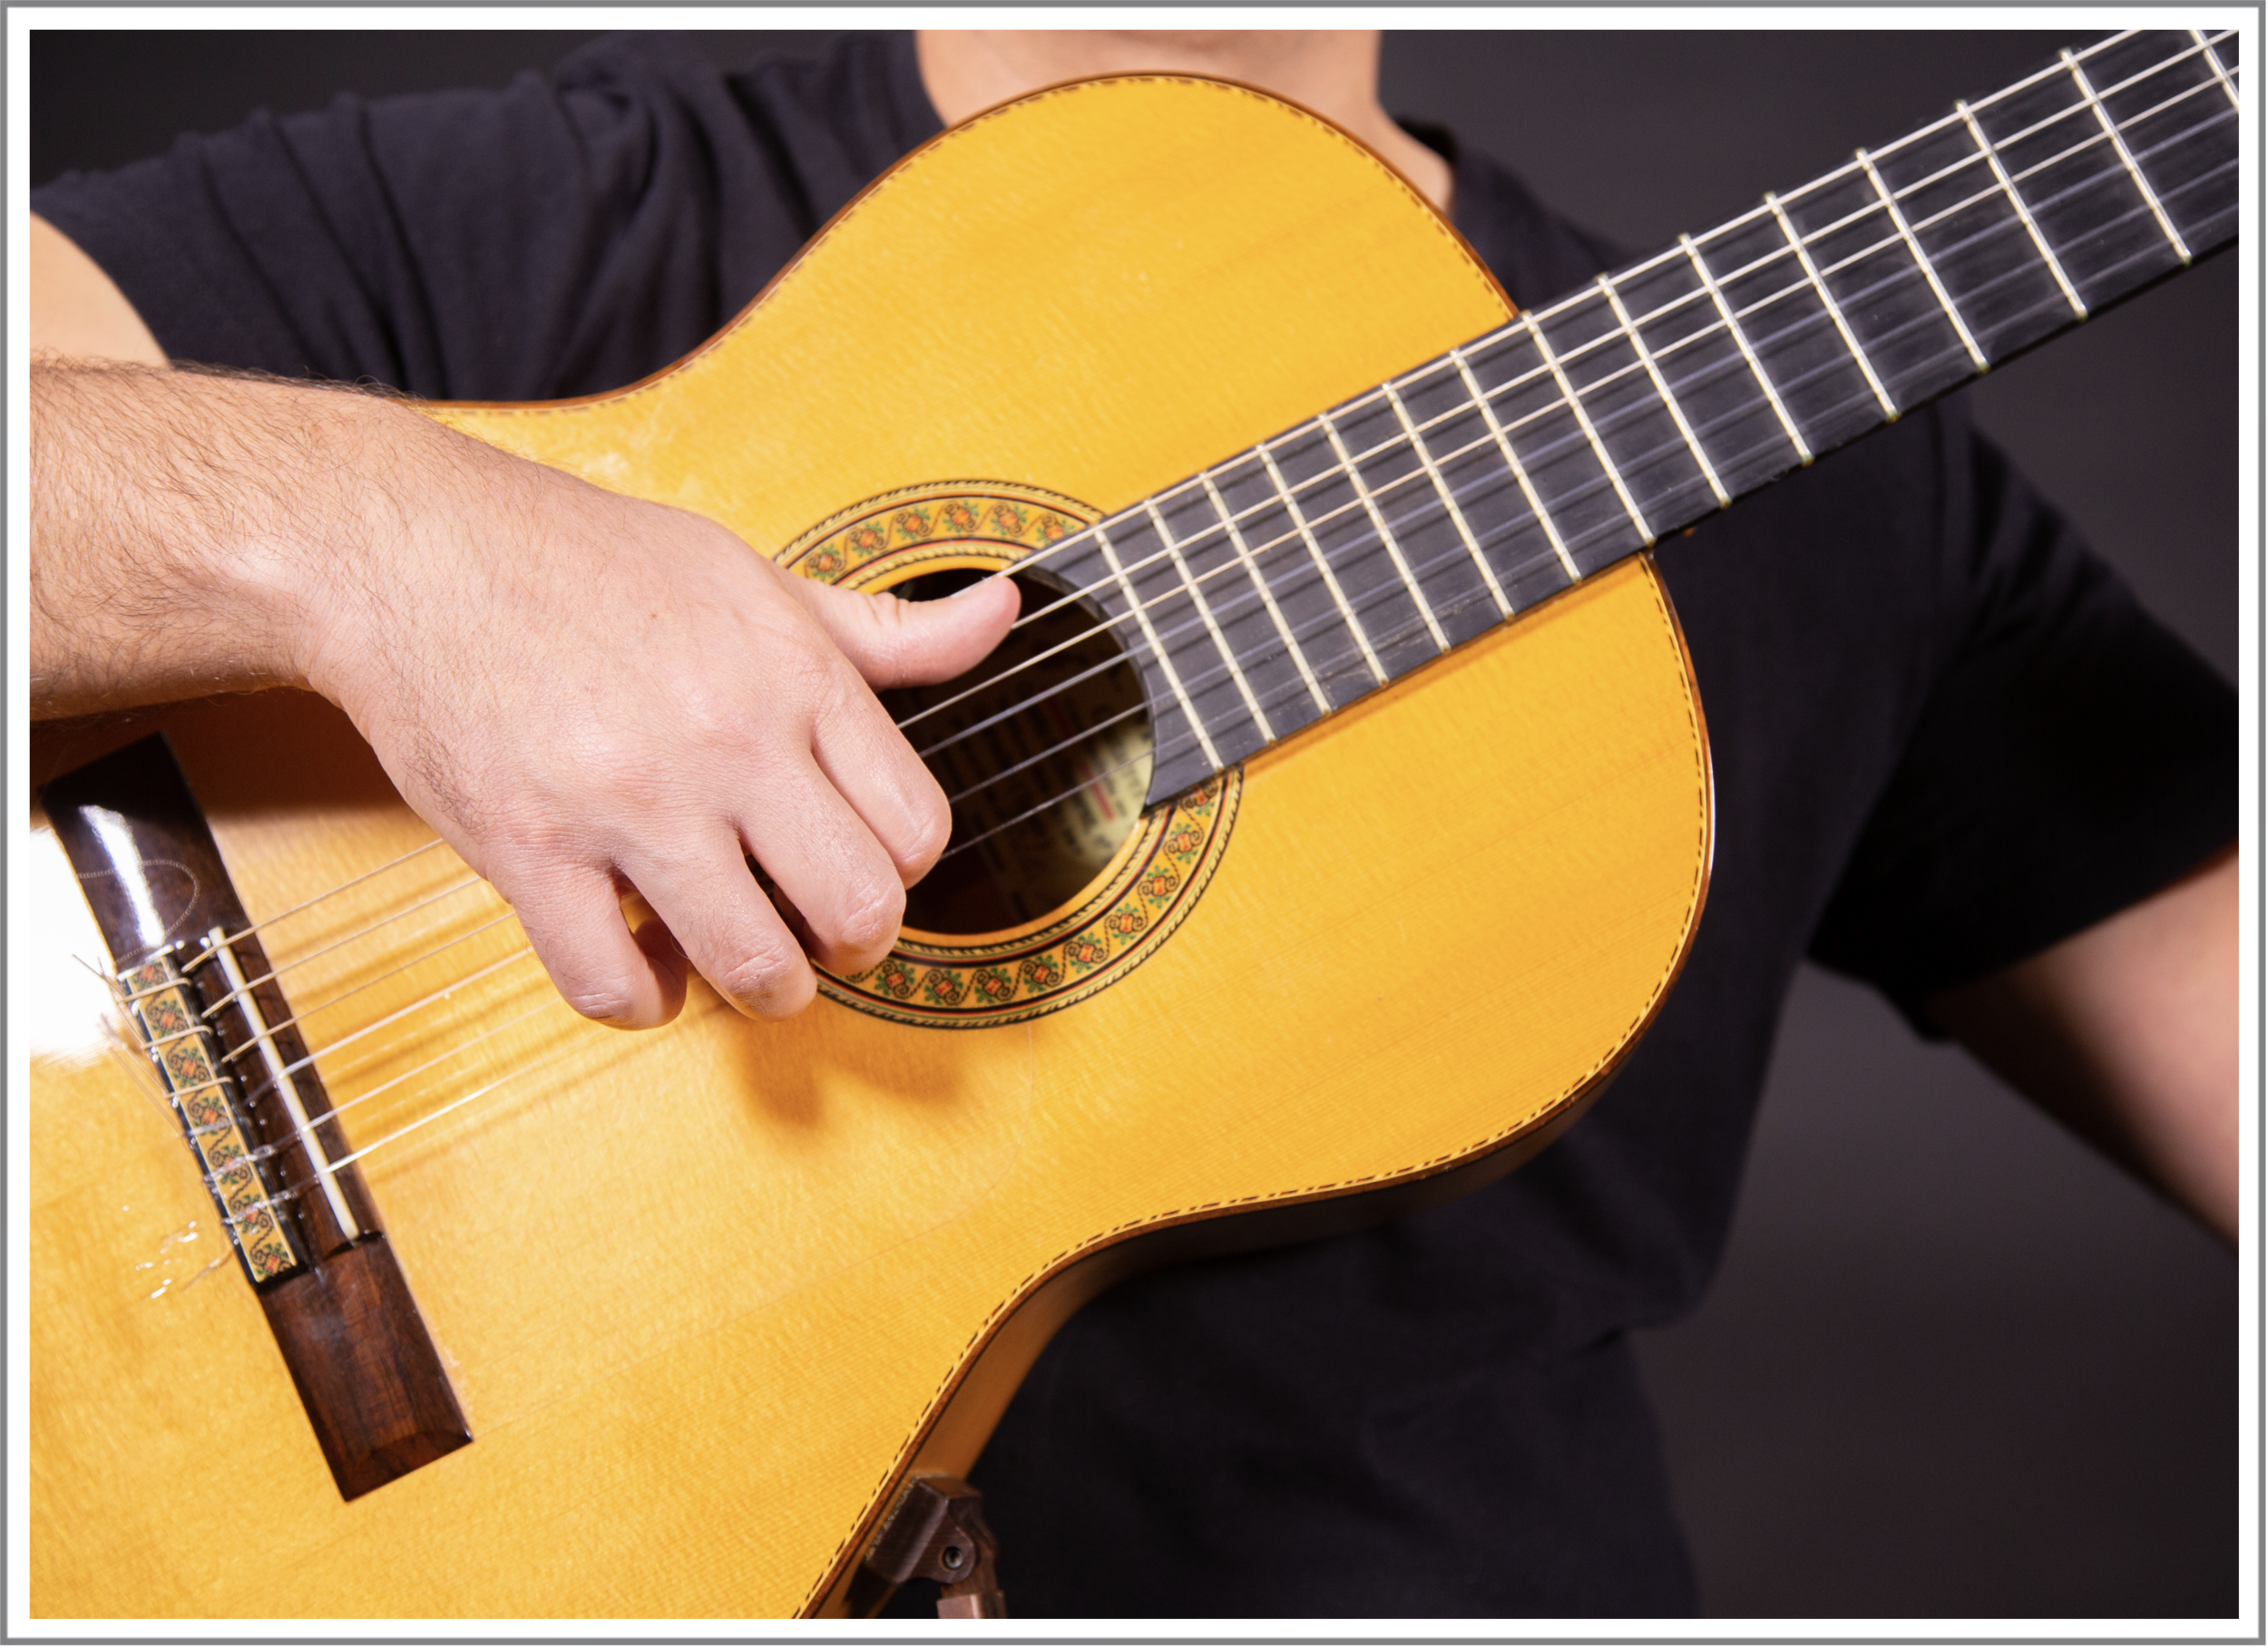
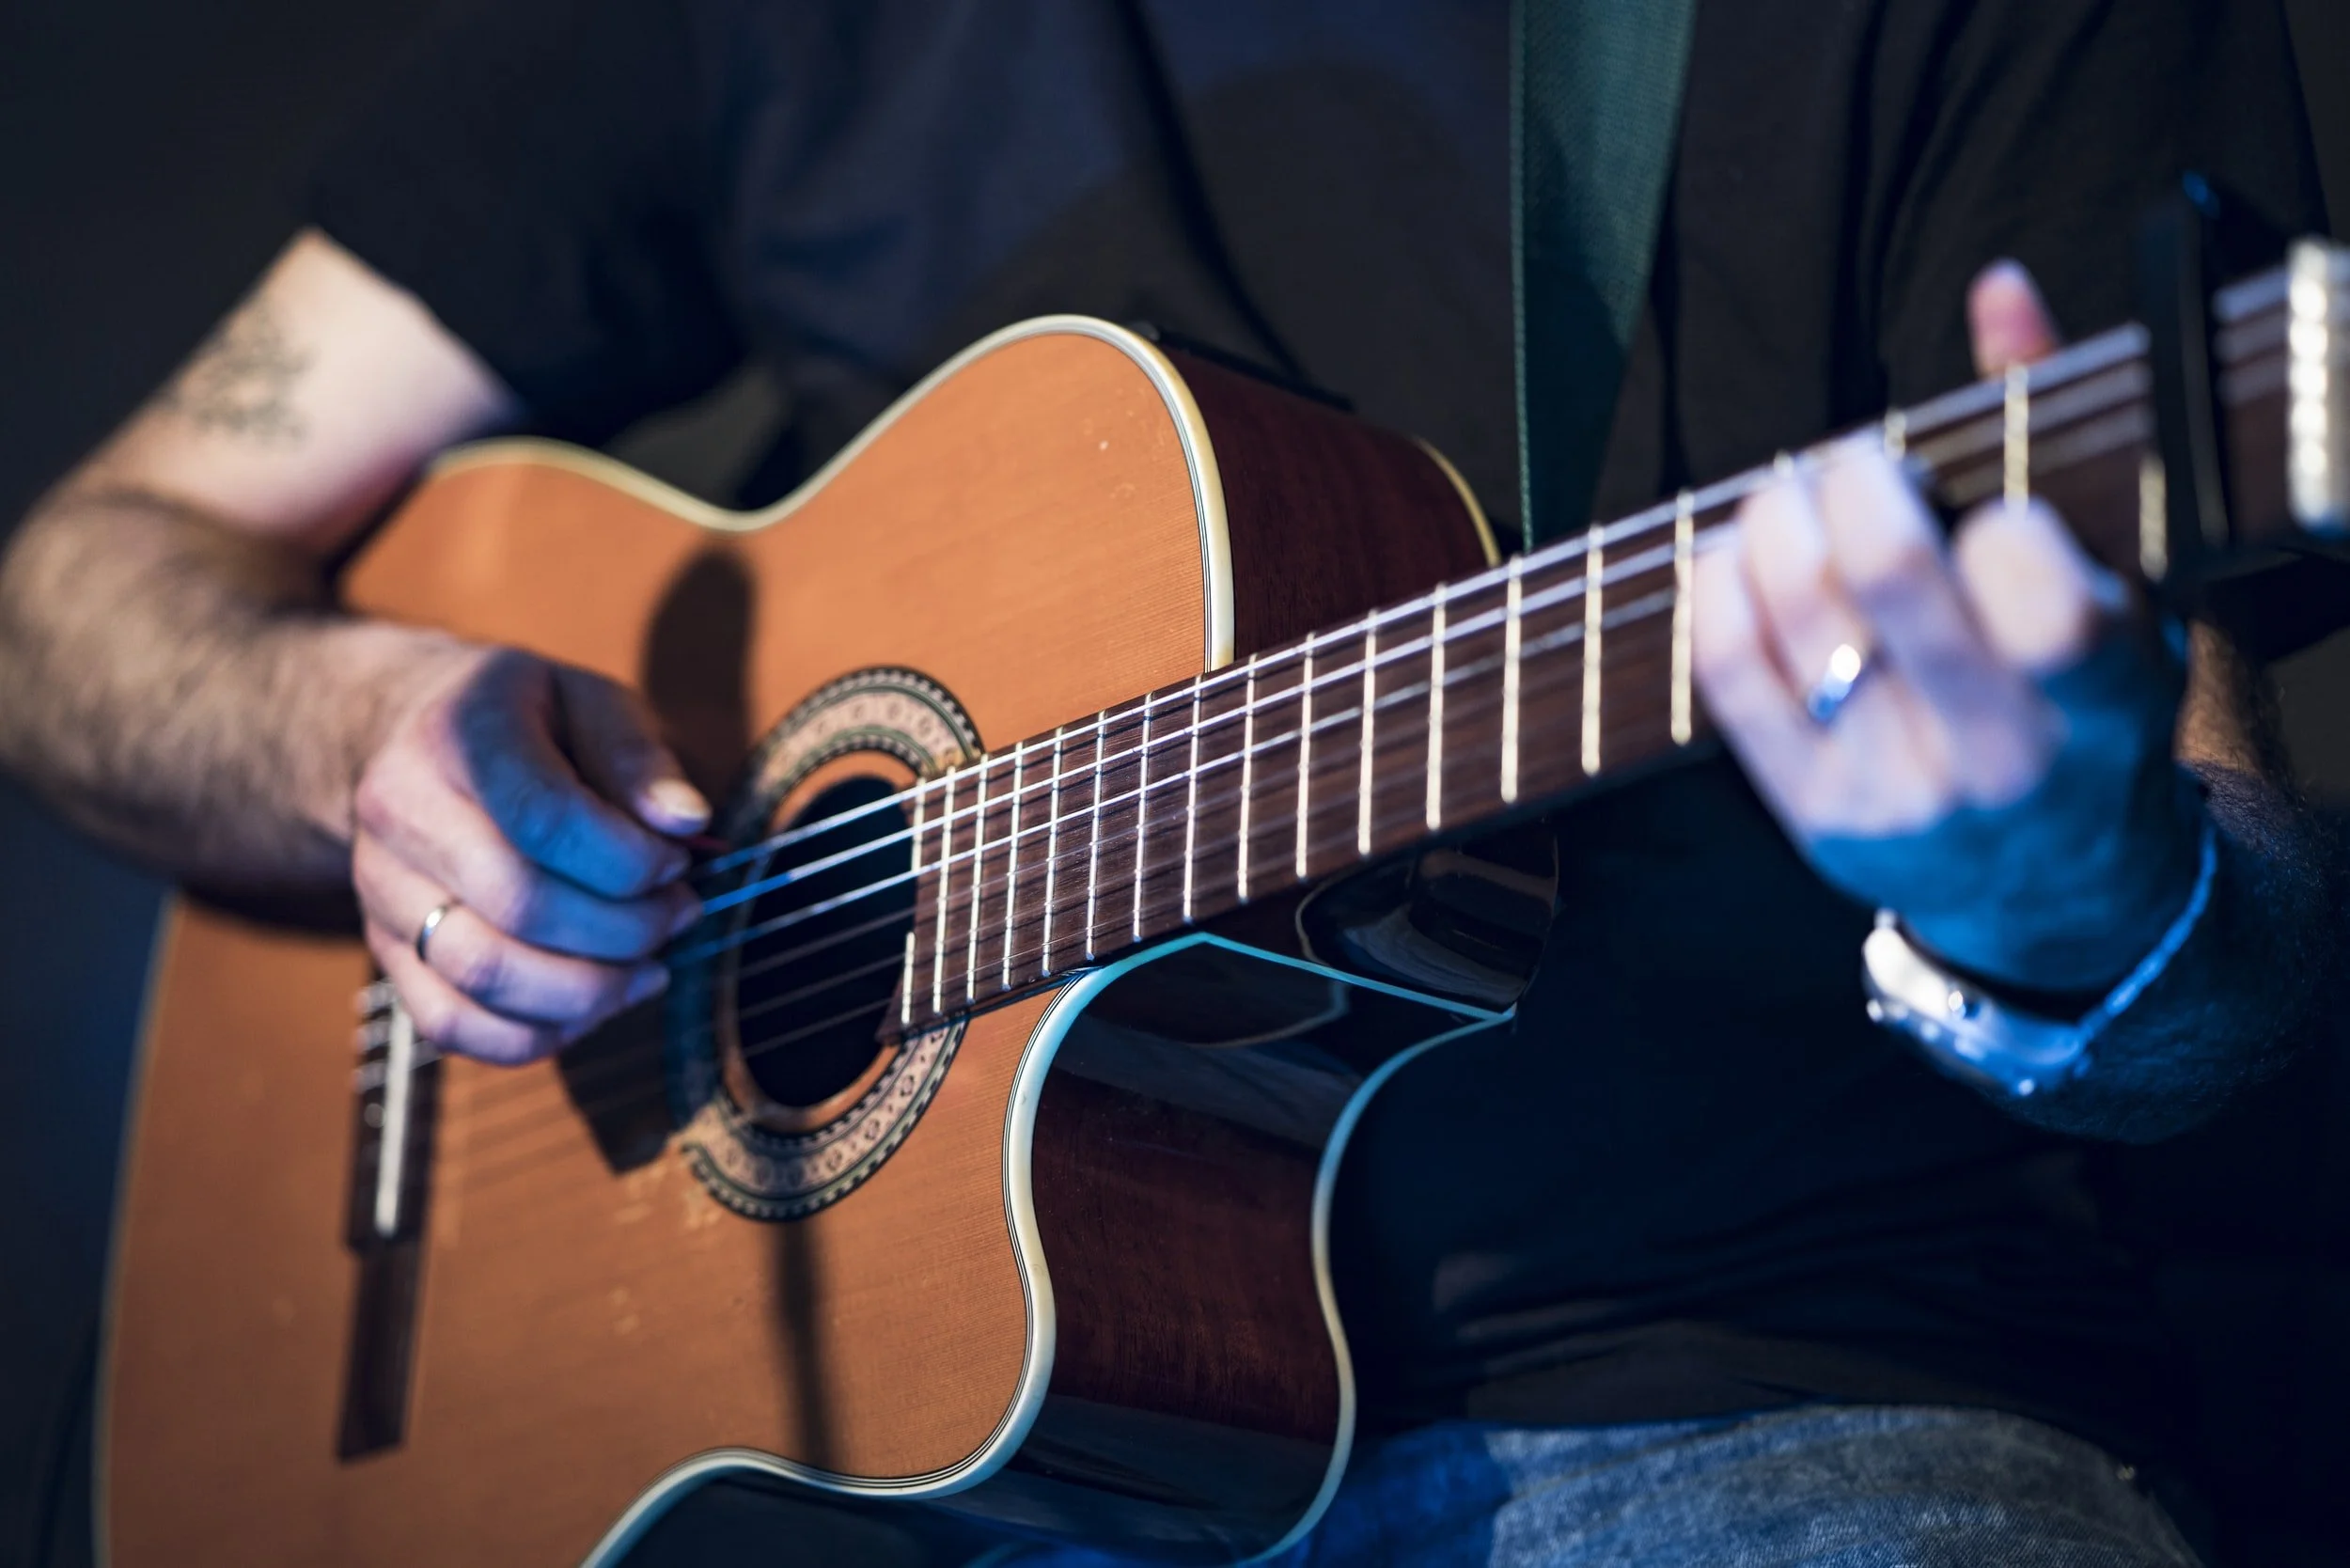
Many of the exercises found in this course are based on exercises from the Classical guitar repertoire, and a Nylon String guitar is highly recommended for beginning Fingerstyle students for several reasons. This being said, all of the exercises in this book can be played on a steel string acoustic guitar without any issues.
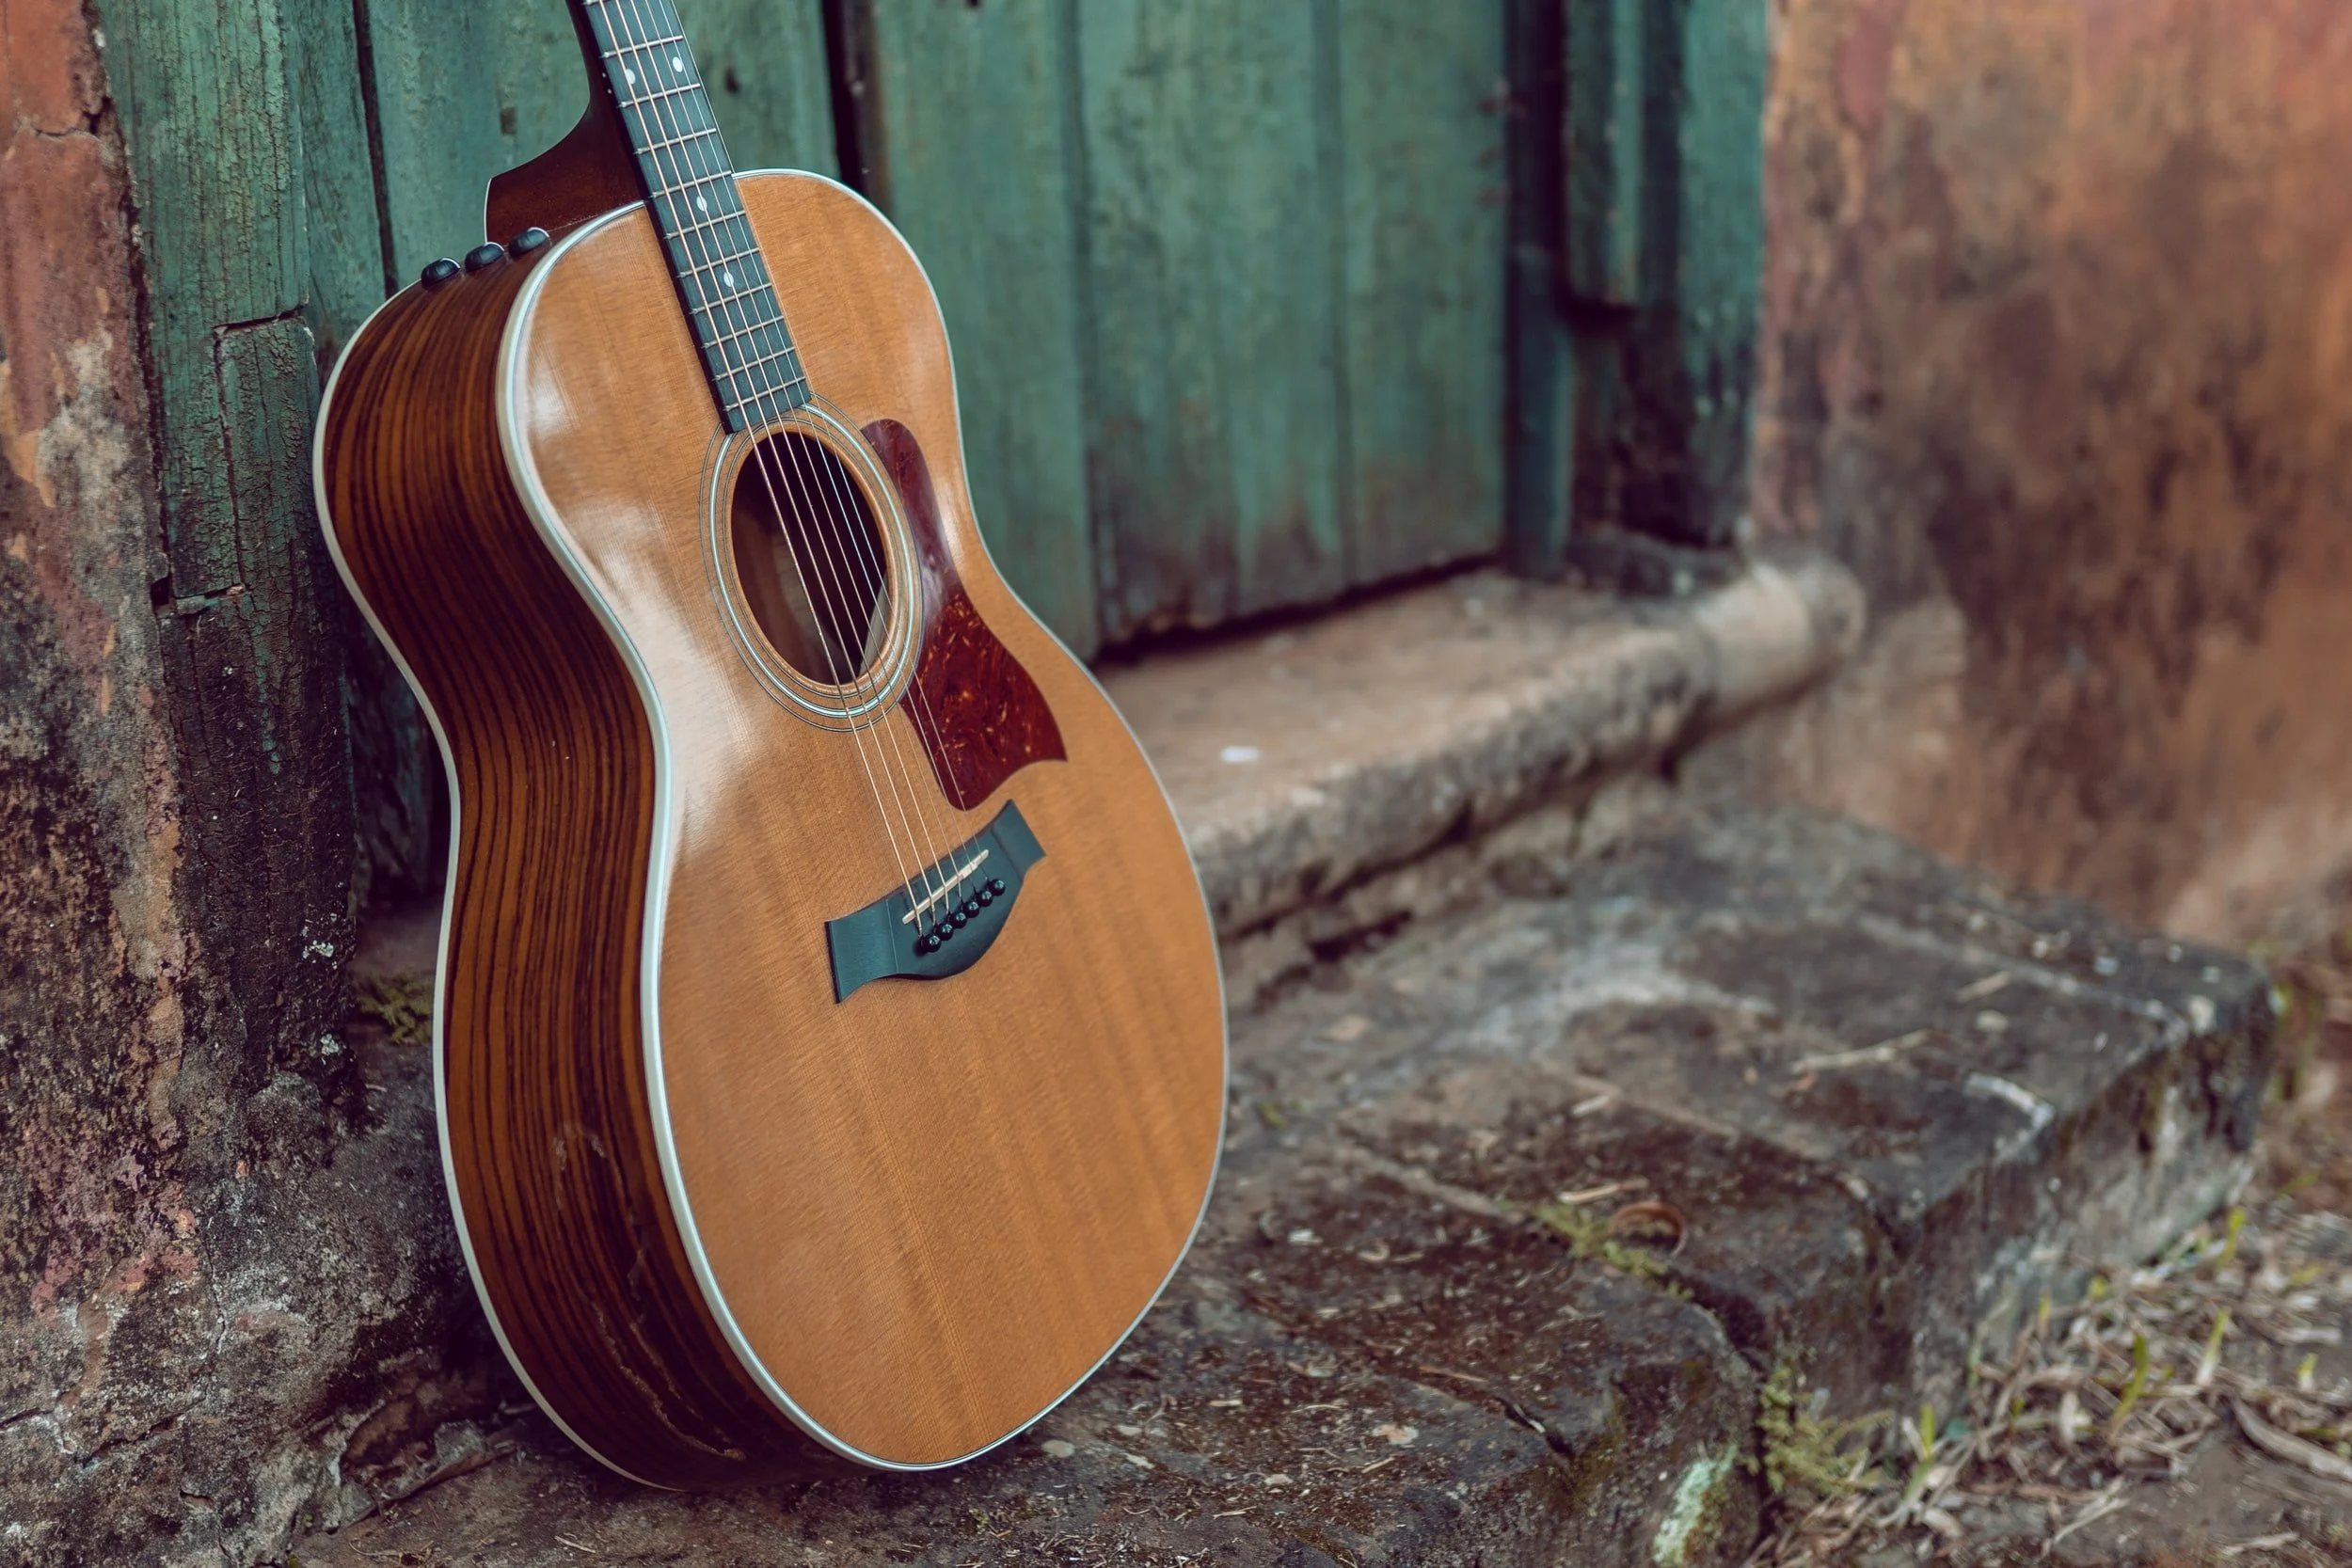
Nylon String or “Classical” Guitars will typically have a smaller body size, and a wider neck, which means there is more space between the strings for your fingers to move. This is extremely helpful for both the right and left hand to have enough space to learn how to move between strings. Classical guitars are also easier on the right hand fingers due to the softer strings, and may be easier to play while you are building your strength in the right hand.
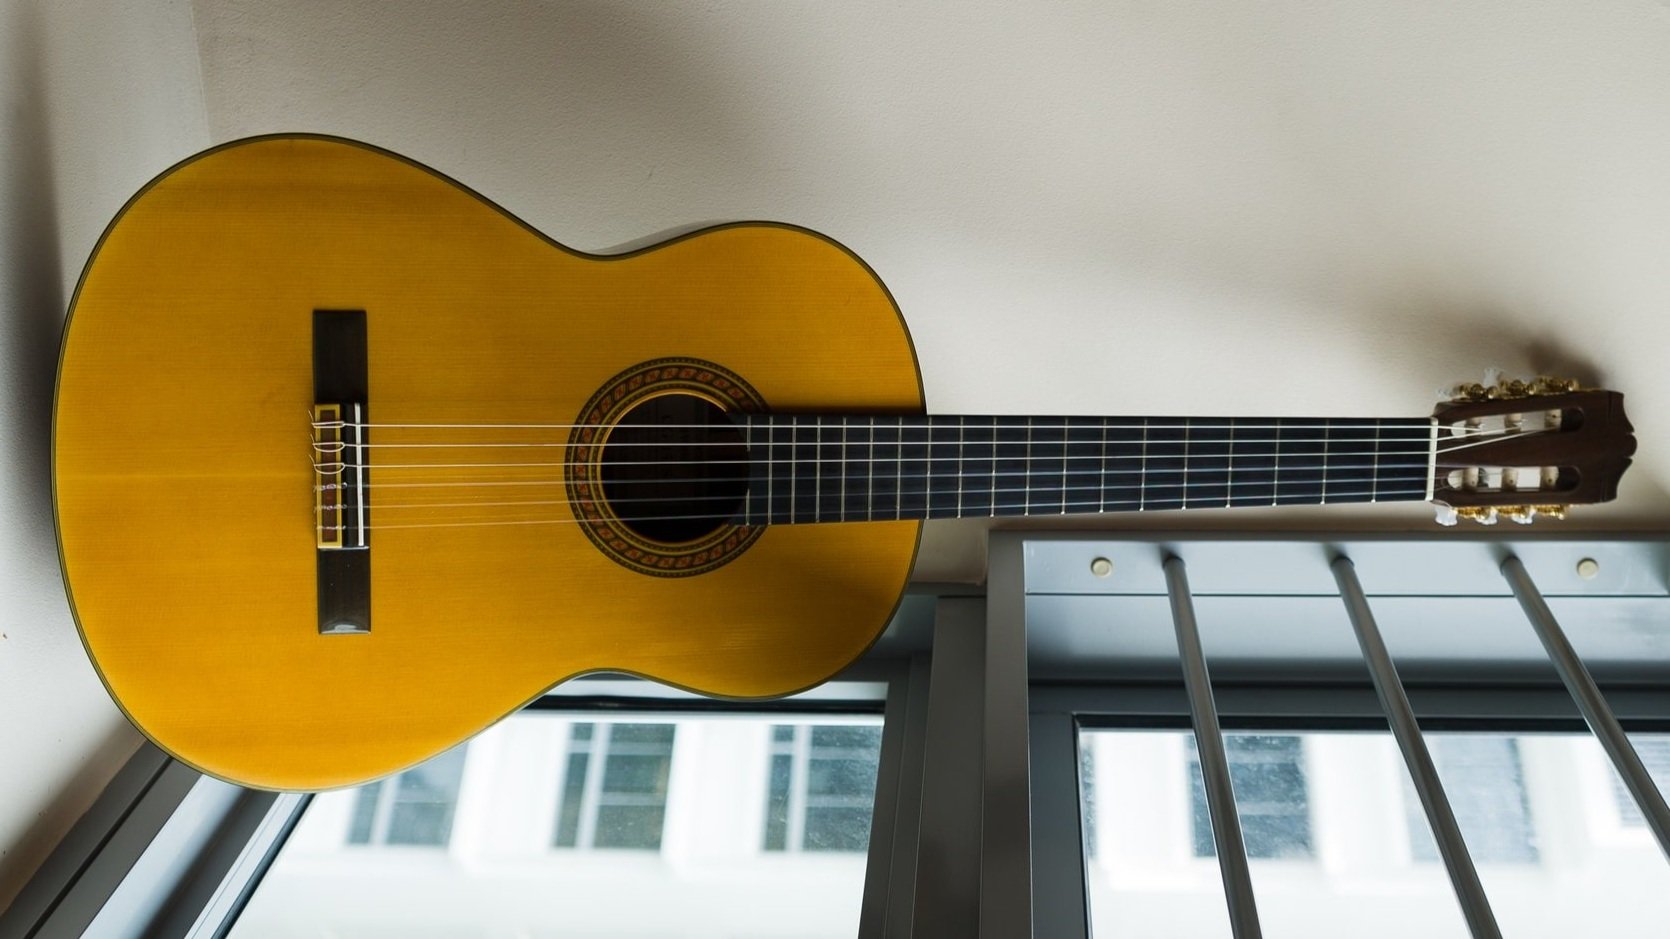
Nylon String (Classical) Guitars
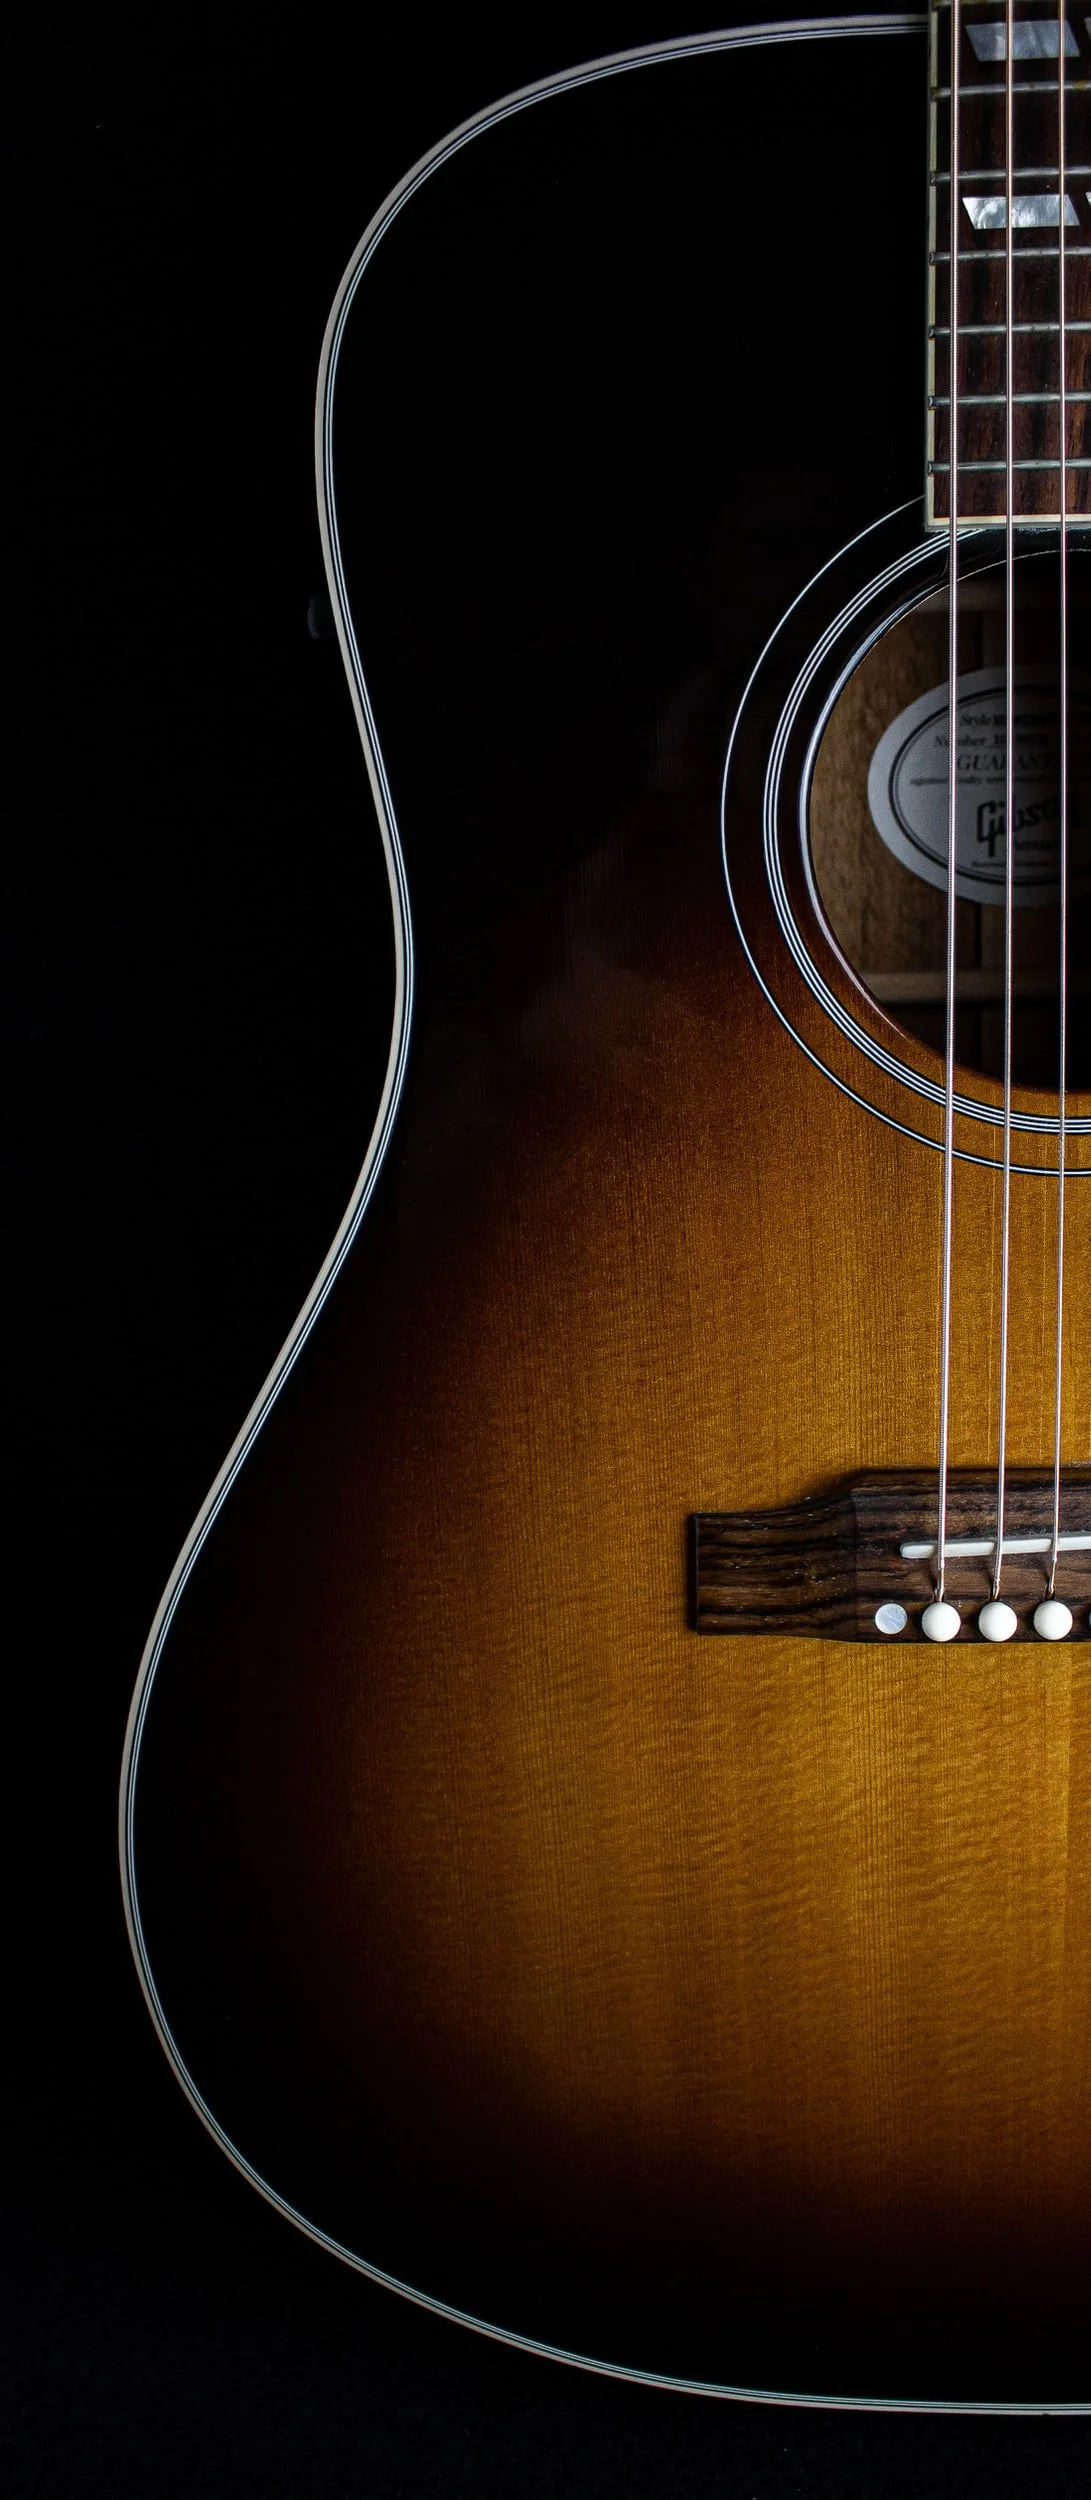
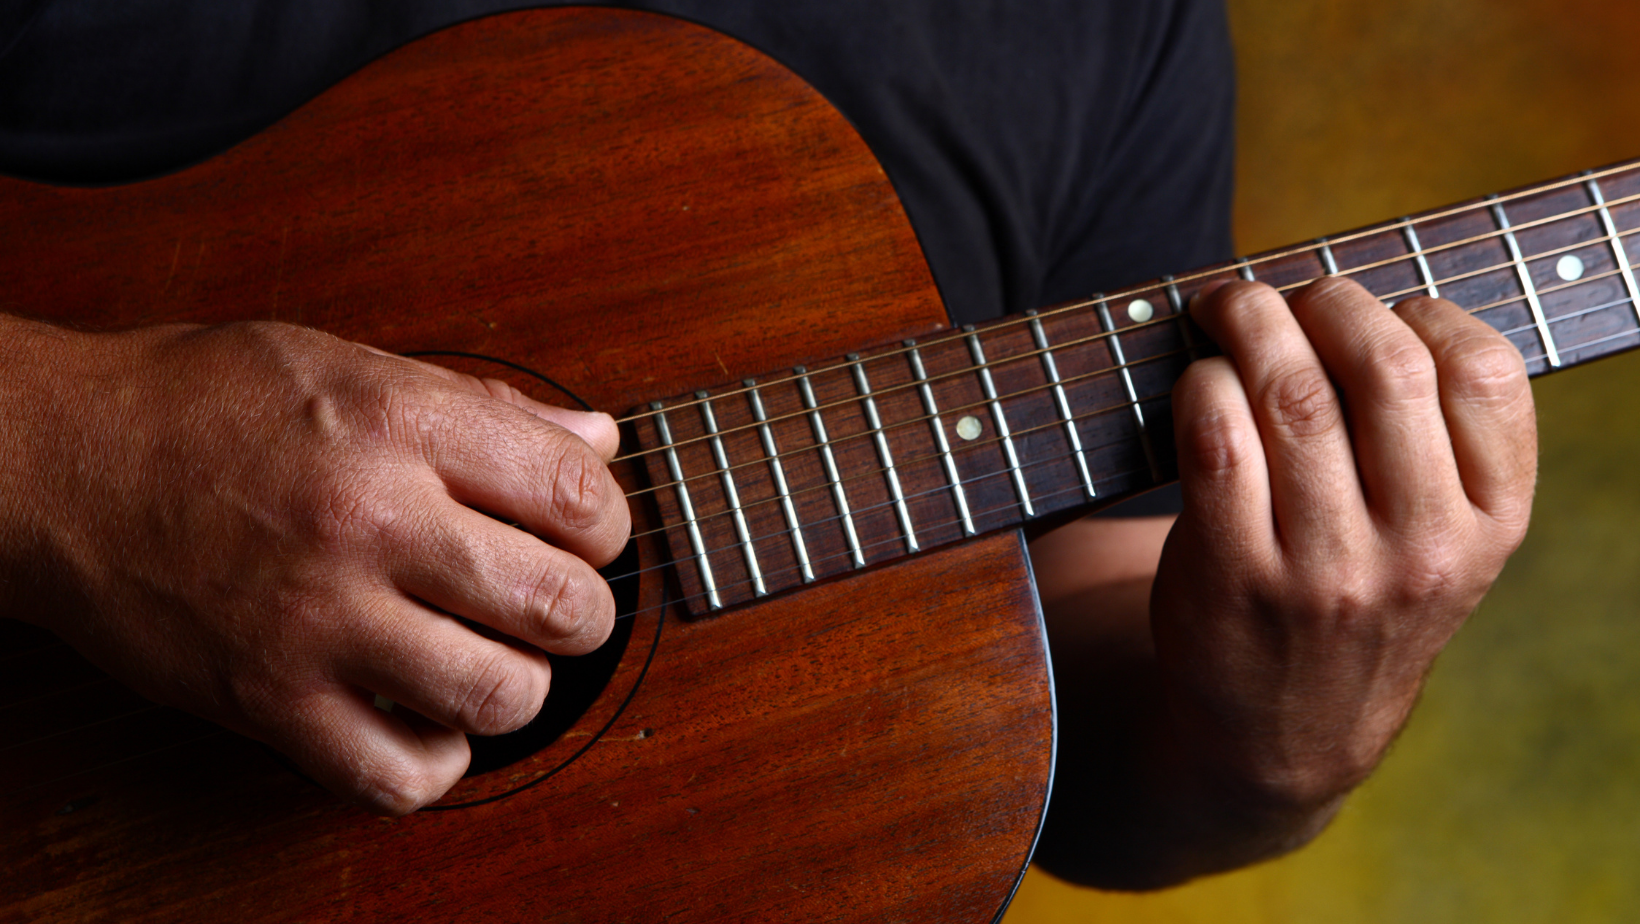
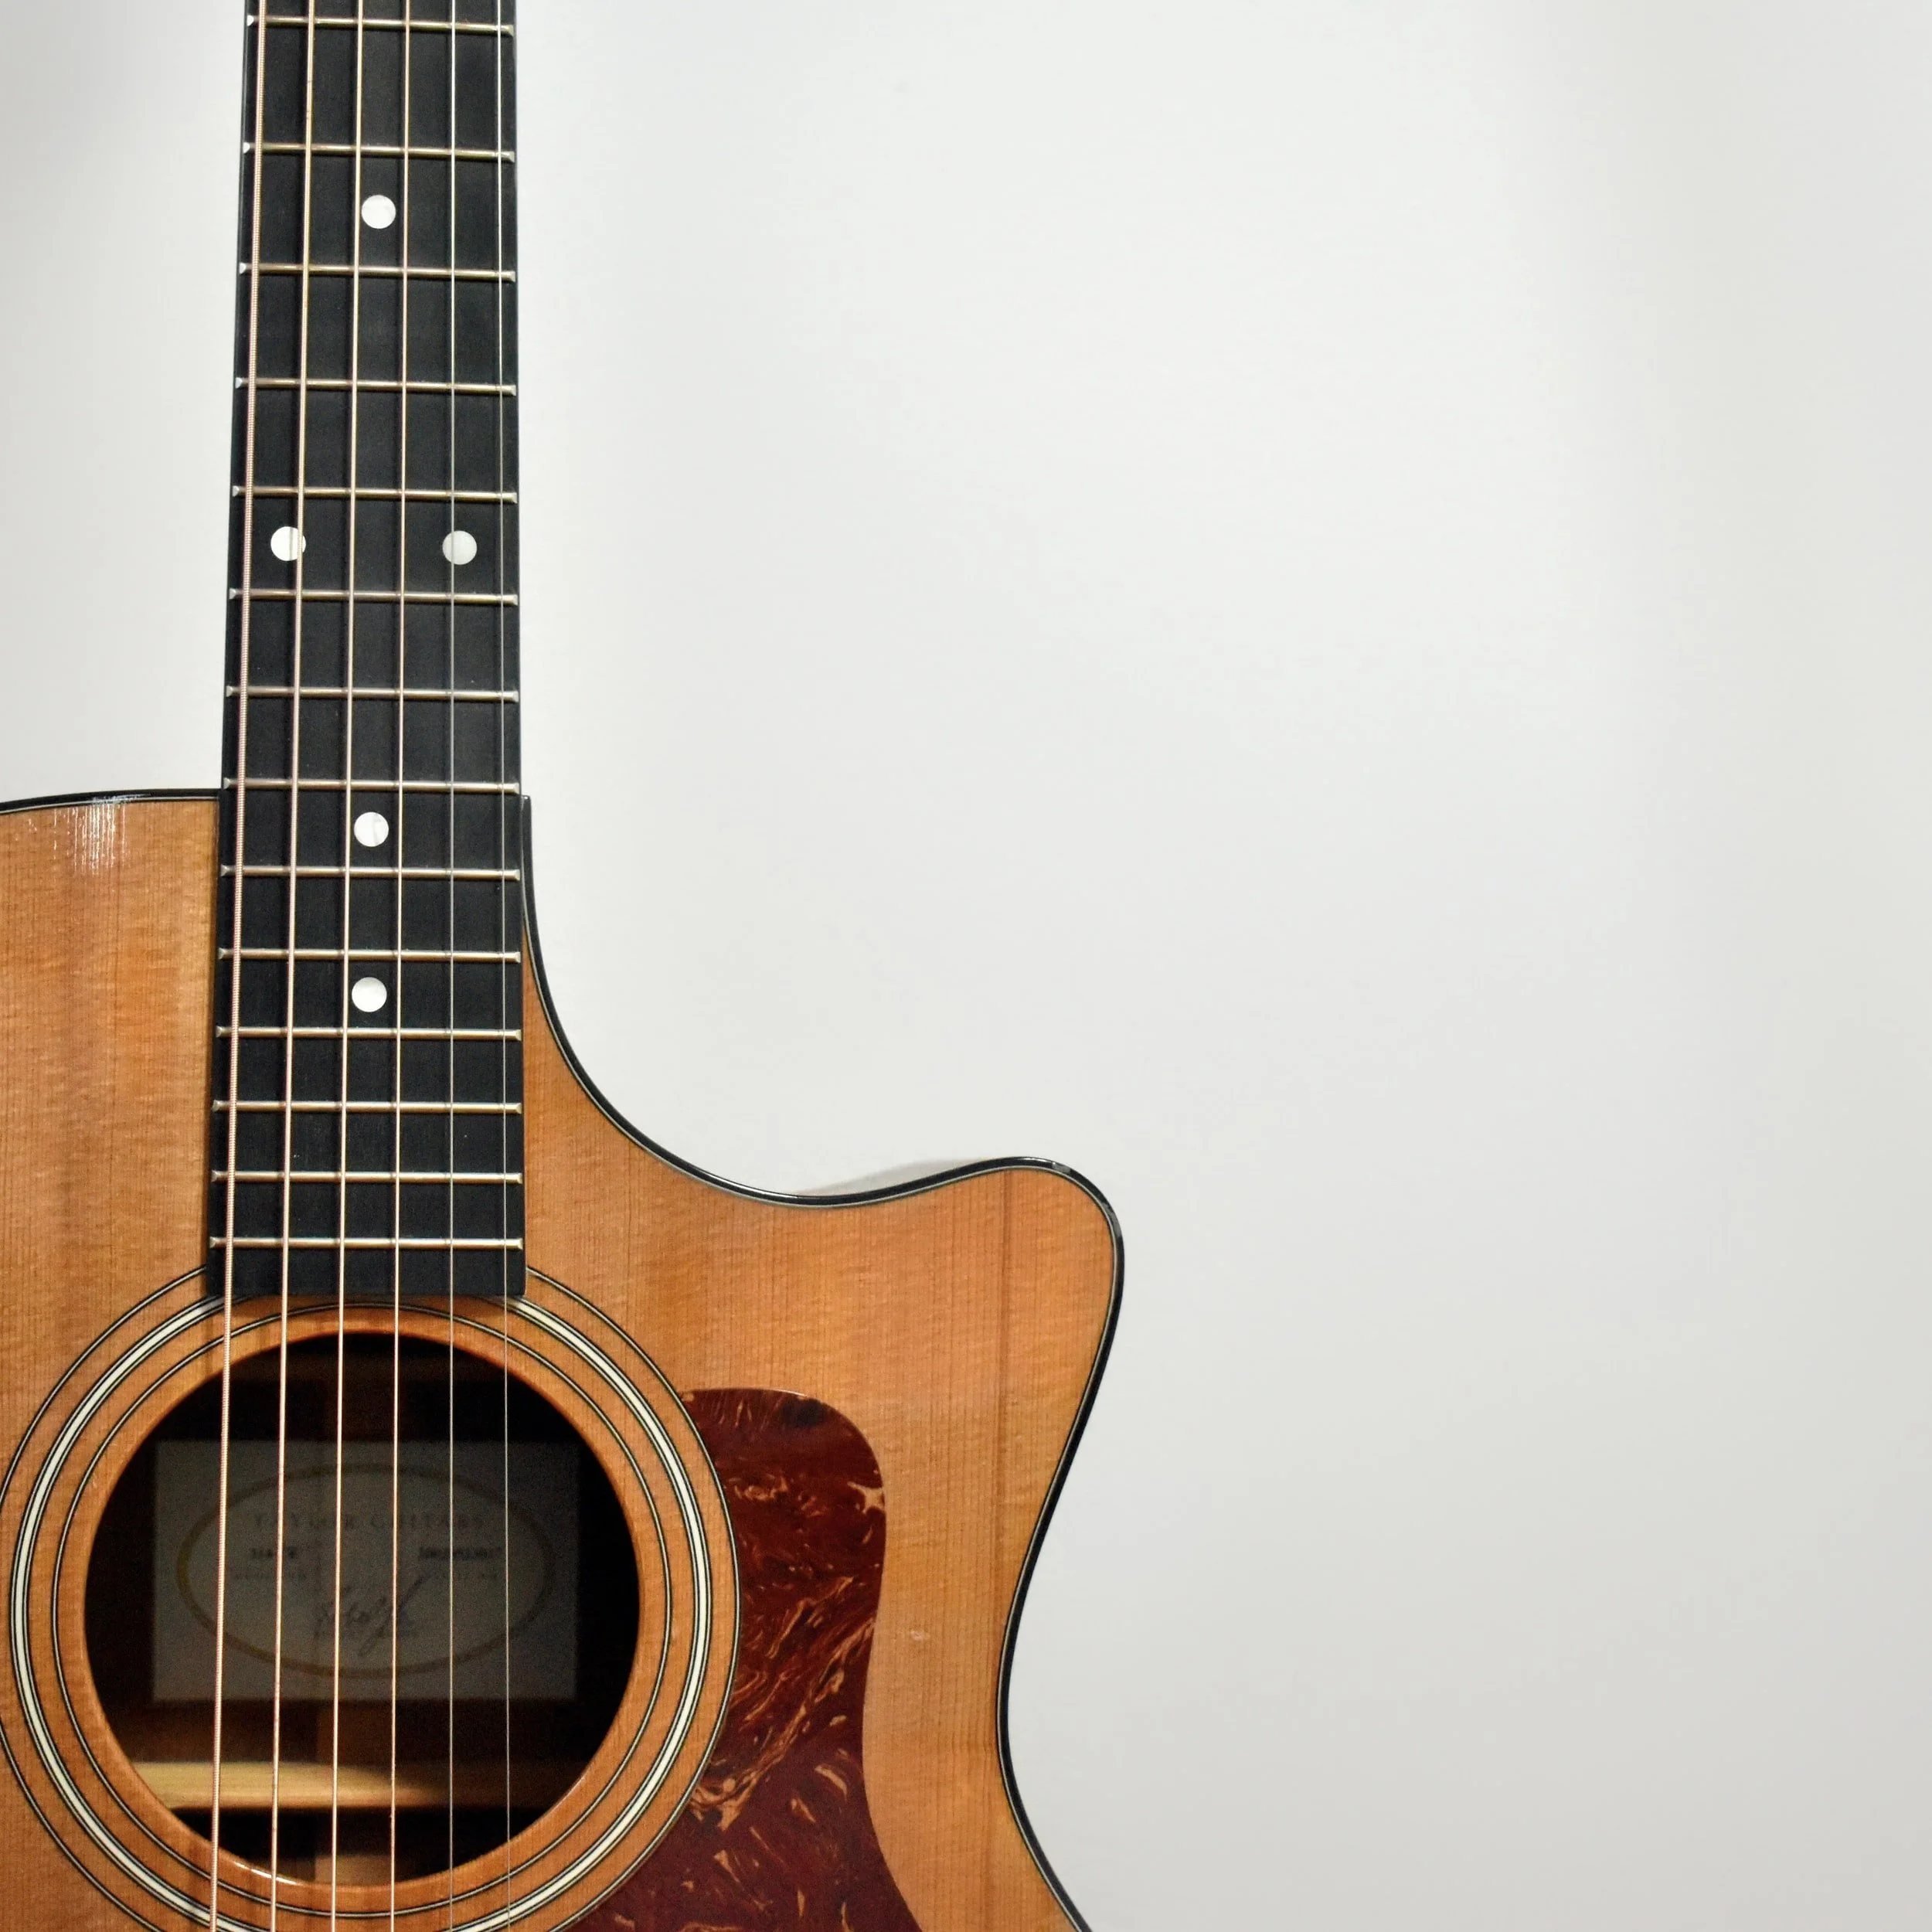
Steel String Acoustic Guitars will typically have a larger body size compared to Classical guitars, as well as a slimmer neck profile, which means there is typically less space between the strings. Also, the strings will be made out of bronze or another type of metal material (actual steel is rarely used today despite the name) which can be harder on the left and right hand fingers at first, especially when developing the right hand. The benefit to steel strings is largely in the projection of sound, as well as the tonal difference created by the different string material.

Steel-String Acoustic Guitar
Fingerstyle Guitar Basics: Lesson 3
Lesson 3: Right-Hand Fingering
In order to distinguish our right hand fingering from our left hand, we use letters to represent our fingers. These abbreviations derive from the Spanish names for your fingers, and are used throughout Classical and Fingerstyle guitar notation. The Thumb (P), Index (I), Middle (M) and Ring (A) are used commonly in fingerstyle performance, while the pinky (C) is only used rarely, mostly in flamenco music and other strumming applications.
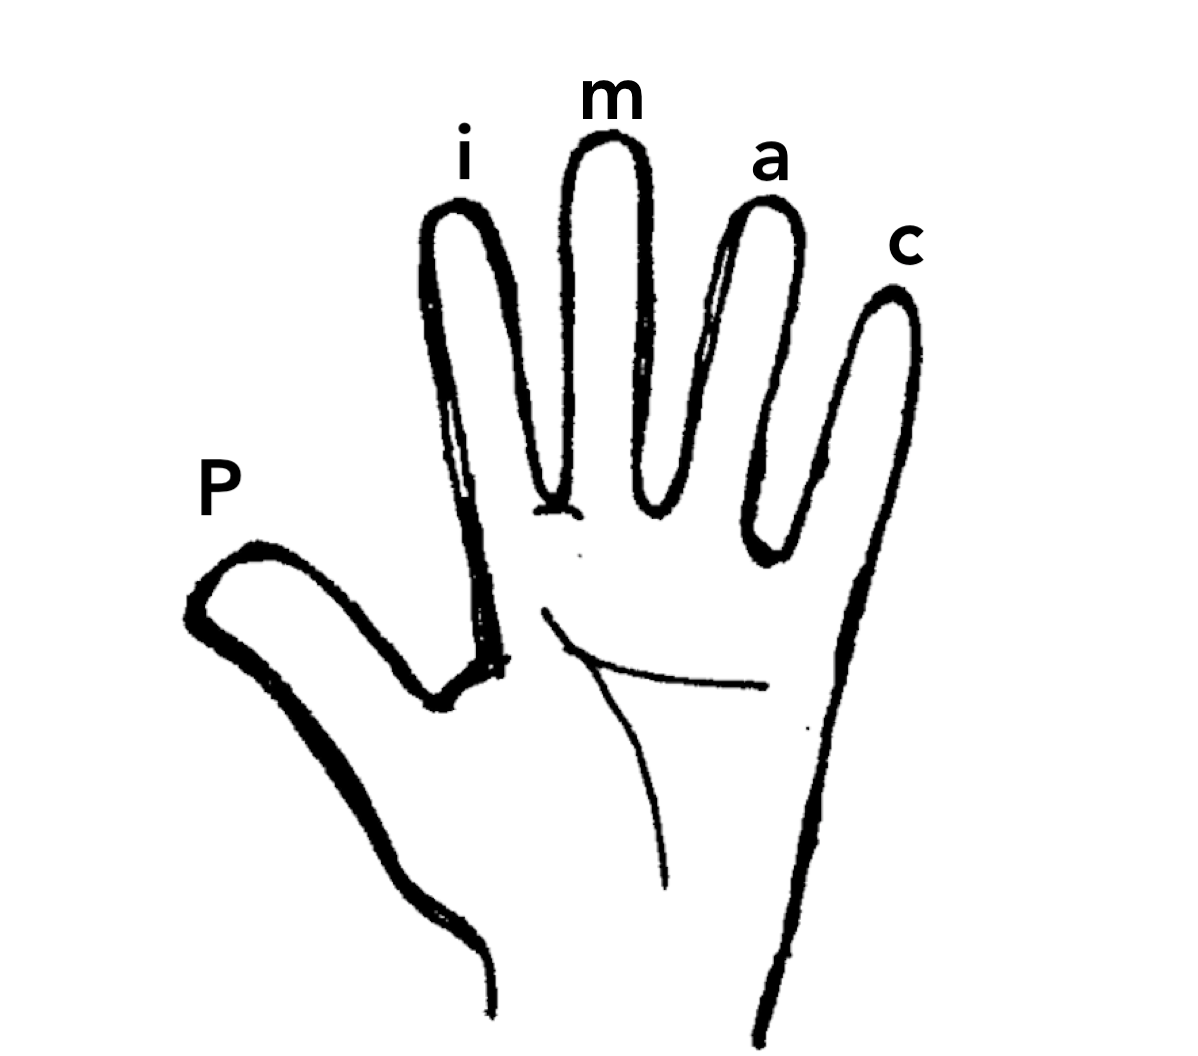
Right Hand Fingering
Fingerstyle Guitar Basics: Lesson 4
Sitting Position: The 90 Degree Rule
It is important to play with good posture as to not develop long term back and shoulder problems while playing the guitar. The ideal playing position follows the “90 degree Rule” which is an easy way to remember the correct posture. All of your joints in your lower body (ankles, knees, and hips) should be at 90º angles when seated.
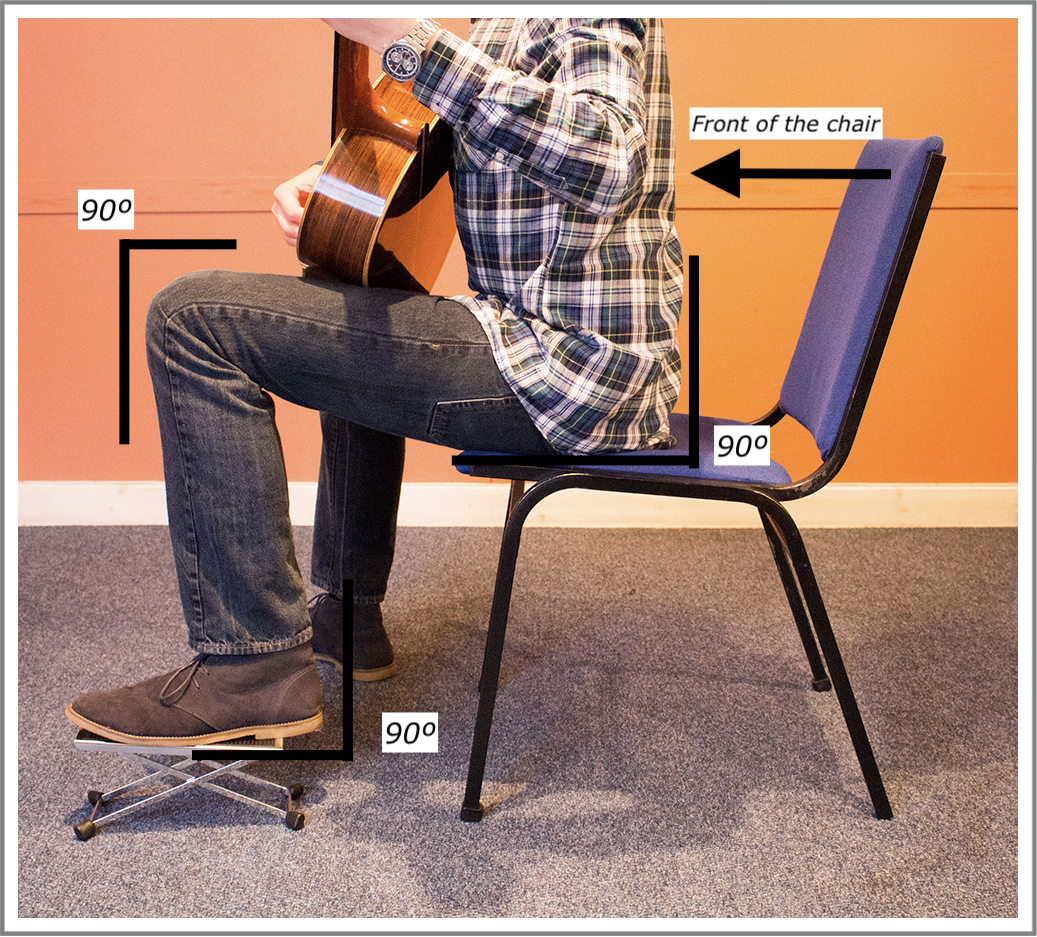
In order to create this position, your left foot should be flat on the floor, and your right foot should be at the same angle regardless of wether you use a footstool, or if you use a guitar strap or support system that will keep both feet flat on the ground.
Your chair should be at a hight where you can keep this 90º position in your feet, knees and hips. Using a piano bench or a chair with an adjustable height will be ideal for finding the proper playing height.
It is also extremely important to not sit back in the chair, but to sit forward on the chair to create a straight back and position the guitar correctly across the body. Notice the “triangle” created between the body of the guitar and the torso of the player. This will ensure the proper playing position.
Fingerstyle Guitar Basics: Lesson 5
Guitar Positioning
We also need to elevate the angle of the guitar neck upward at a 30º angle to match the natural angle of our left hand as it approaches the guitar. This can be achieved with several sitting positions, that include using a footstool, using a guitar strap or using a guitar support system. Each player should experiment with these different sitting position options to find the best option for their playing style and body type.
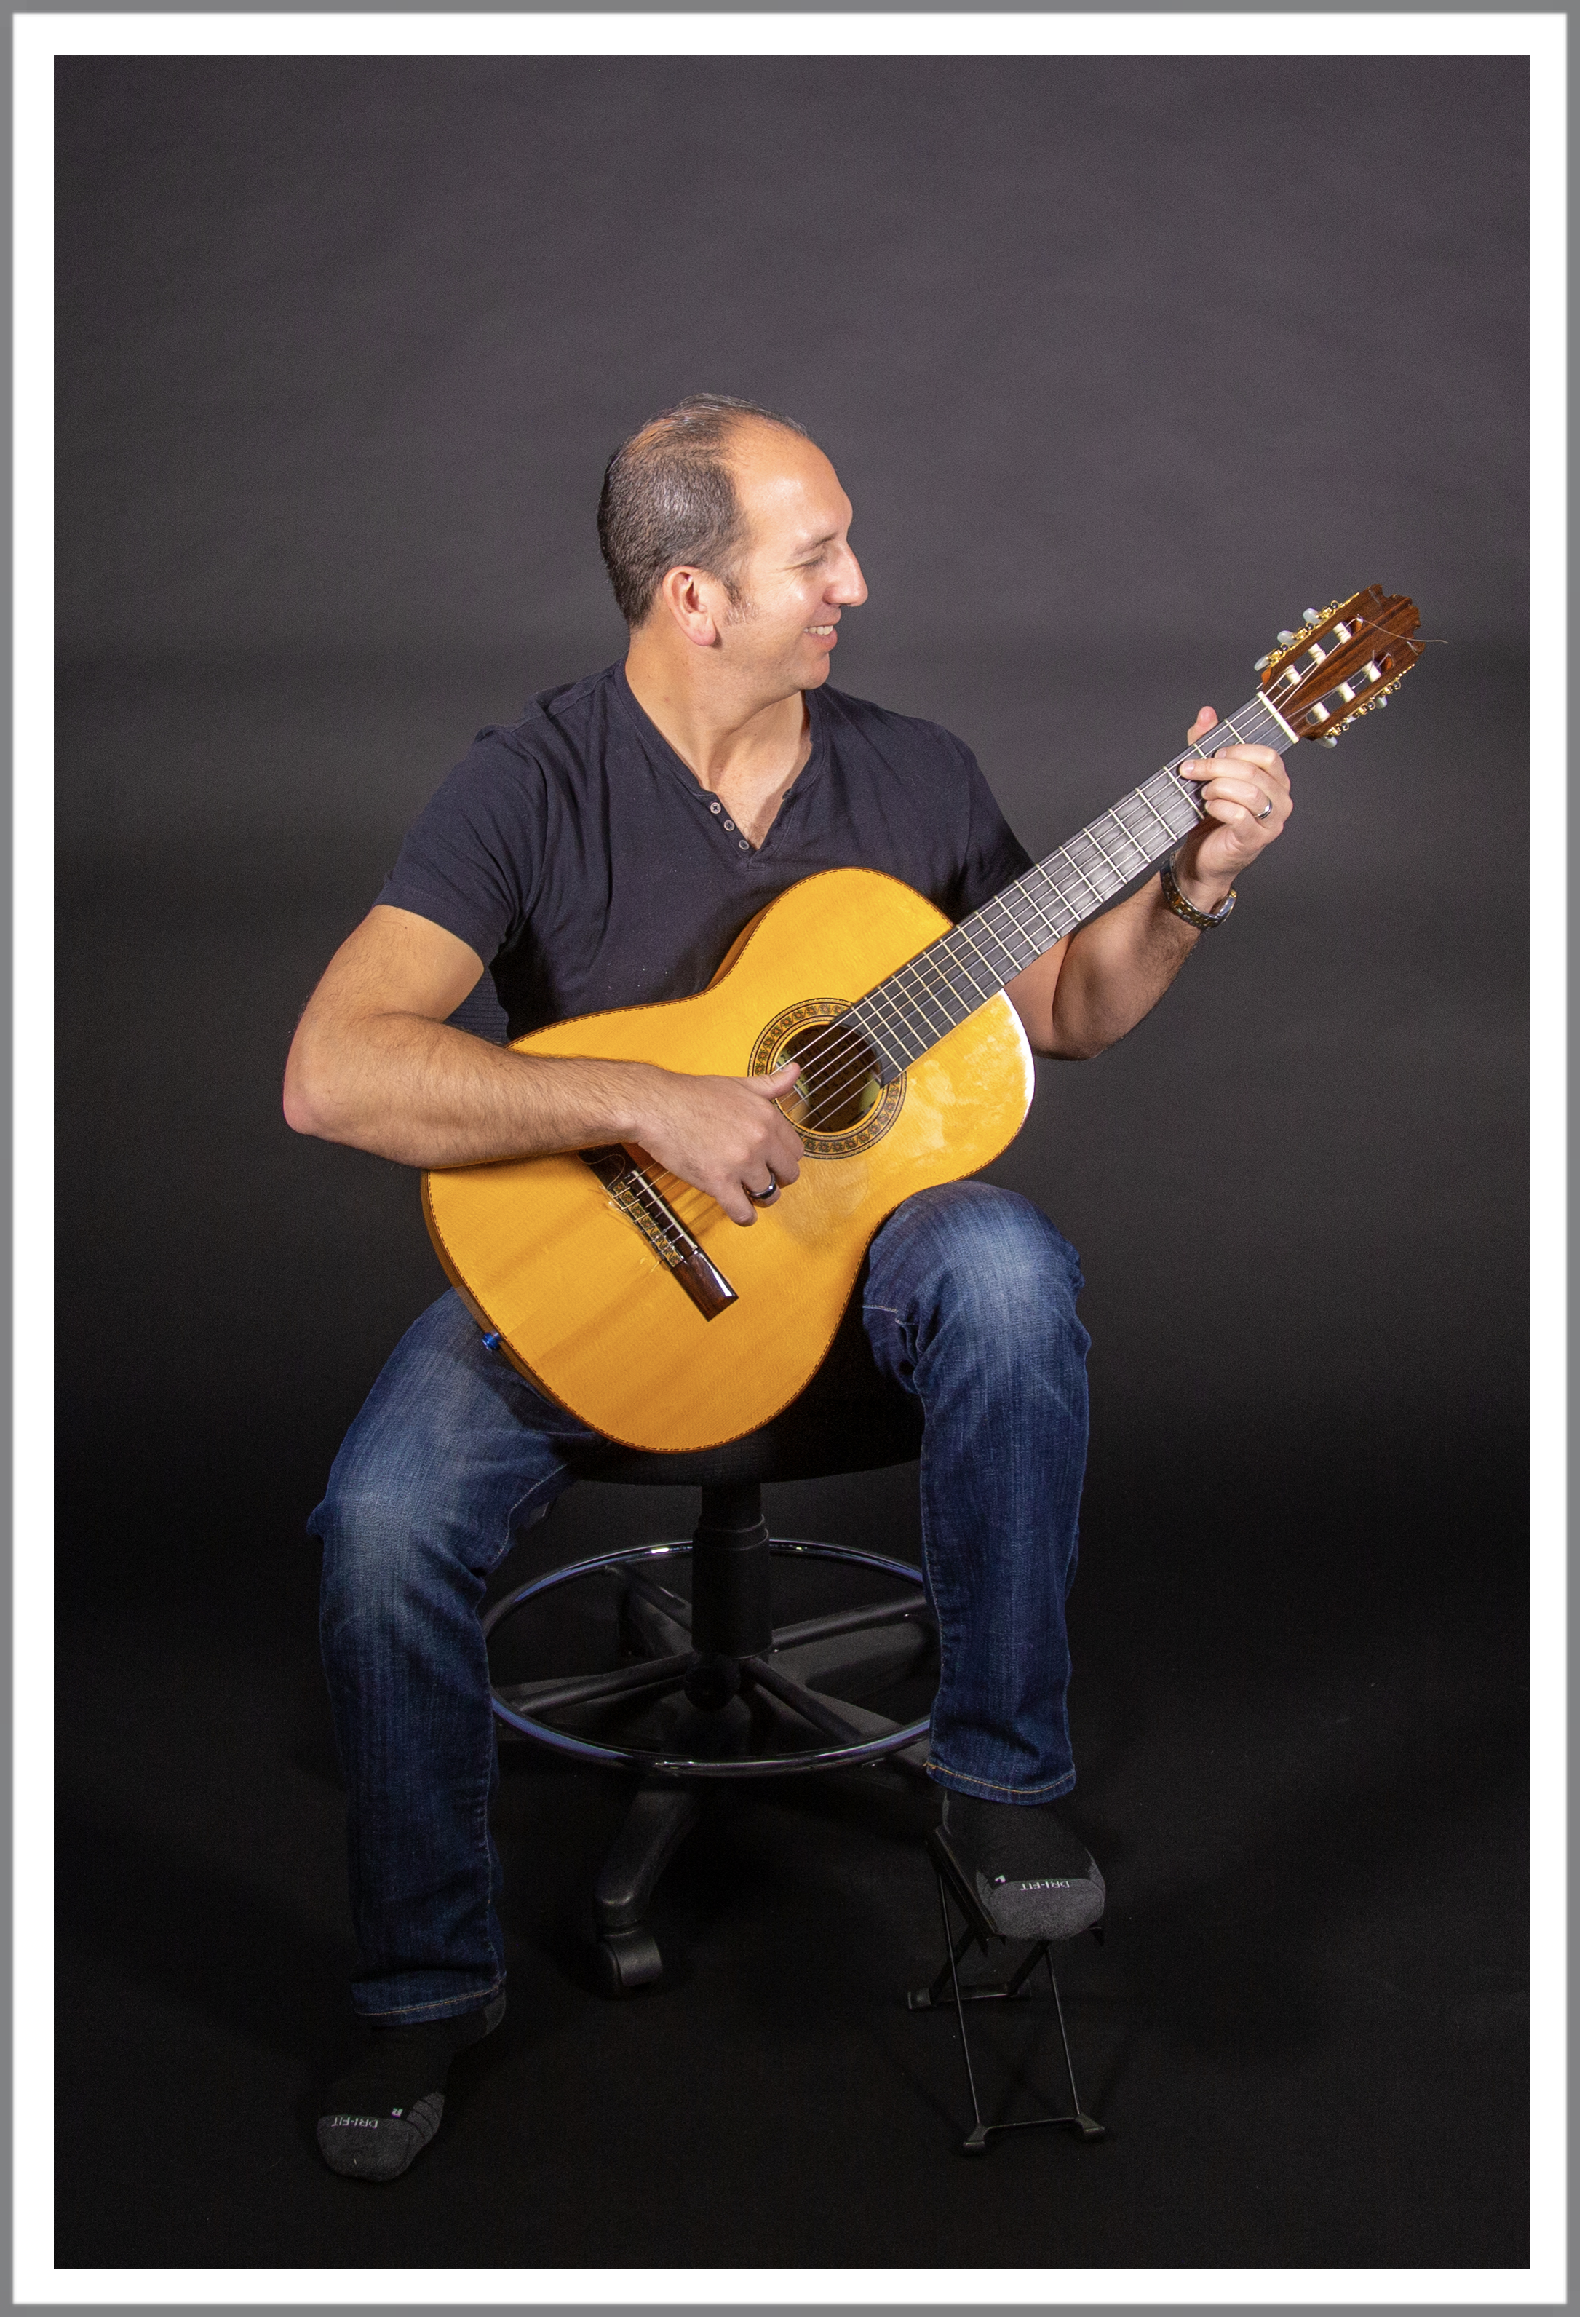
Playing Position Using a Footstool

Playing Position Using a Guitar Strap

Playing Position Using a Guitar Support
Fingerstyle Guitar Basics: Lesson 6
Setting Up The Right Hand: The “Home Position”
Fingerstyle and Classical guitar requires a specific right hand posture and technique that is very challenging to master. The first concept we want to learn is called the “home position” which is the starting position of our right hand that will allow us to effectively reach the strings with the proper finger angle and positioning, and serve as the basis for all of the techniques found in this book.
It may be necessary to spend some time developing this starting position, and that is ok. Take your time here and make sure things feel comfortable in your hand.
To start with the “Home" Position:
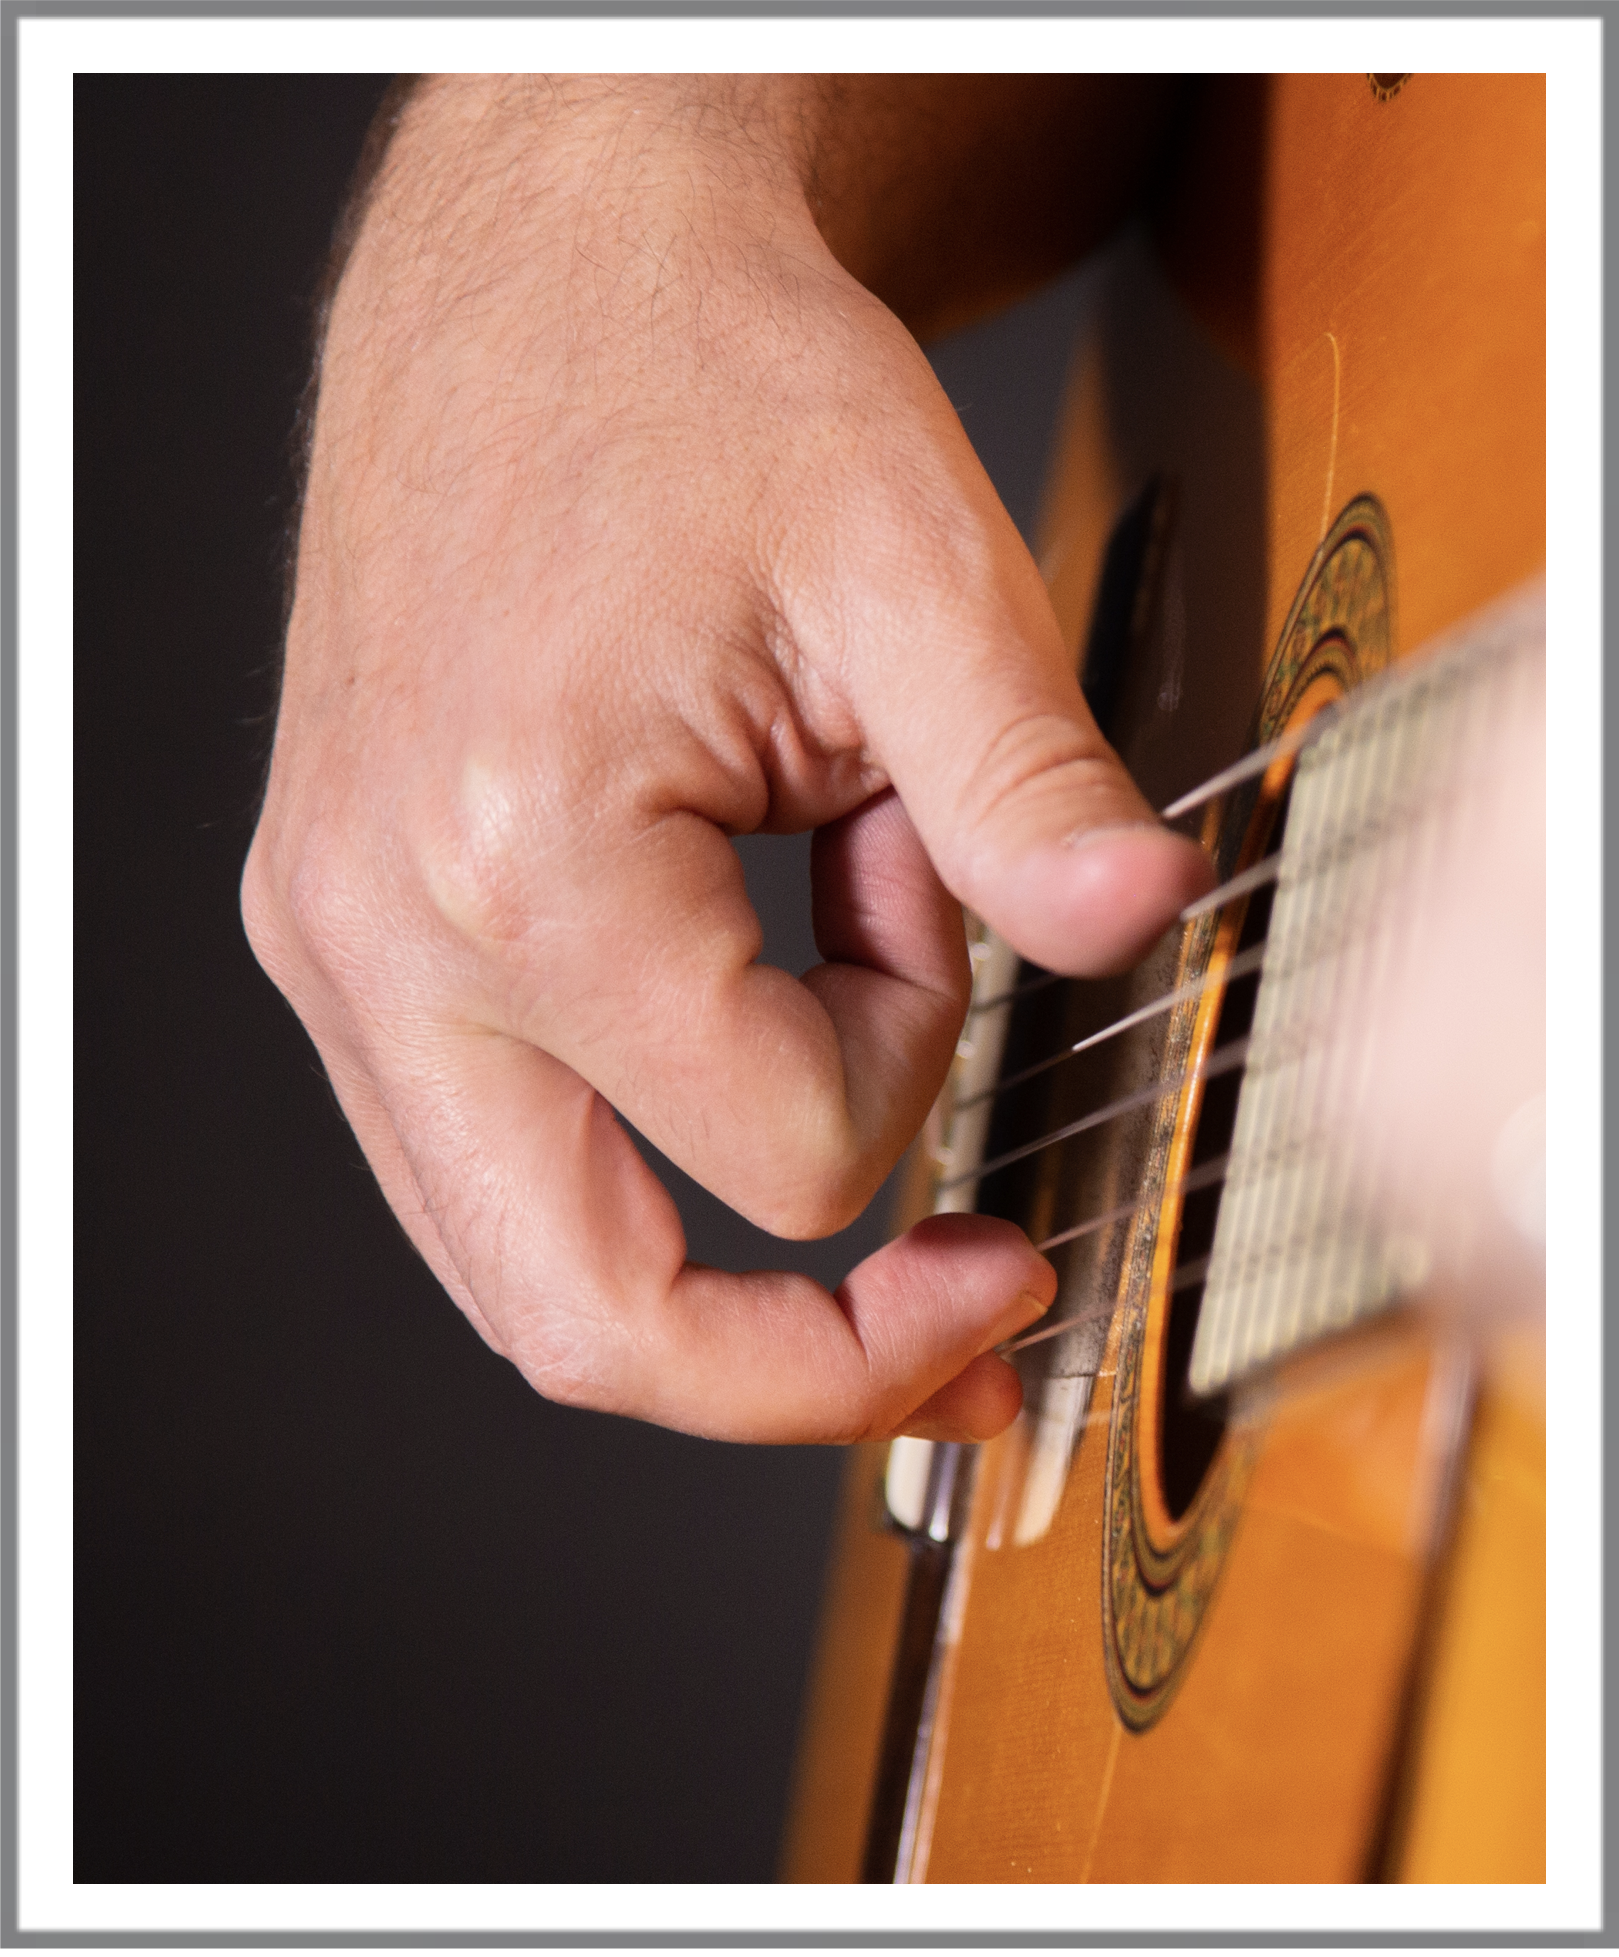
Make a Fist with Your Right Hand with your thumb on the side of your index finger, and hold it over the guitar strings: It is important not to cross your thumb over your index finger, as it will impede the movement of your other fingers.
Relax your fist, and place your fingertips on the strings: You should have your thumb (P) on the 5th string, Index (I) on the 3rd string, Middle (M) on the 2nd string, and Ring (A) on the first string.
Right Hand Fingering
Consider the following points when establishing your Home position:
Your hand should be a natural extension of your forearm: There should be no bend between your hand and forearm to allow for maximum efficiency and muscle movement.
Only touch your fingertips to the strings: Keep your arm and wrist off the guitar and leave enough space between your hand and the guitar top for your fingers to move freely. You should have enough room to be able to close your fist without touching any part of the guitar.
Extend your thumb in front of your hand: Your hand position should be a relaxed fist with your thumb straight and extended in front of your hand. Your fingers should be in a soft “C” shape and never straight.
Getting Started: Free Strokes and Rest Strokes
There are two main methods of right hand technique on the guitar, called “Free Strokes” and “Rest Strokes”. For now, we will focus on our free stroke technique” as they are more natural to learn and serve as the basis for a majority of modern finger style guitar playing. We will cover the Rest Stroke later on in this book.
The Free Stroke and The “Touch, Rest, Move” Method
As we learn our free stroke technique, the method to playing Fingerstyle guitar involves a three step method to achieve the balance between good tone and projection of sound. Practice this method with each finger while paying close attention to the technique. There should be no weight in your fingertip, as your knuckle will push your finger through the string.
The concept behind this technique is simple, yet takes a long time to develop in the player. Essentially, the goal is to relax the fingertip as we use the knuckle to “move” the finger through the string.
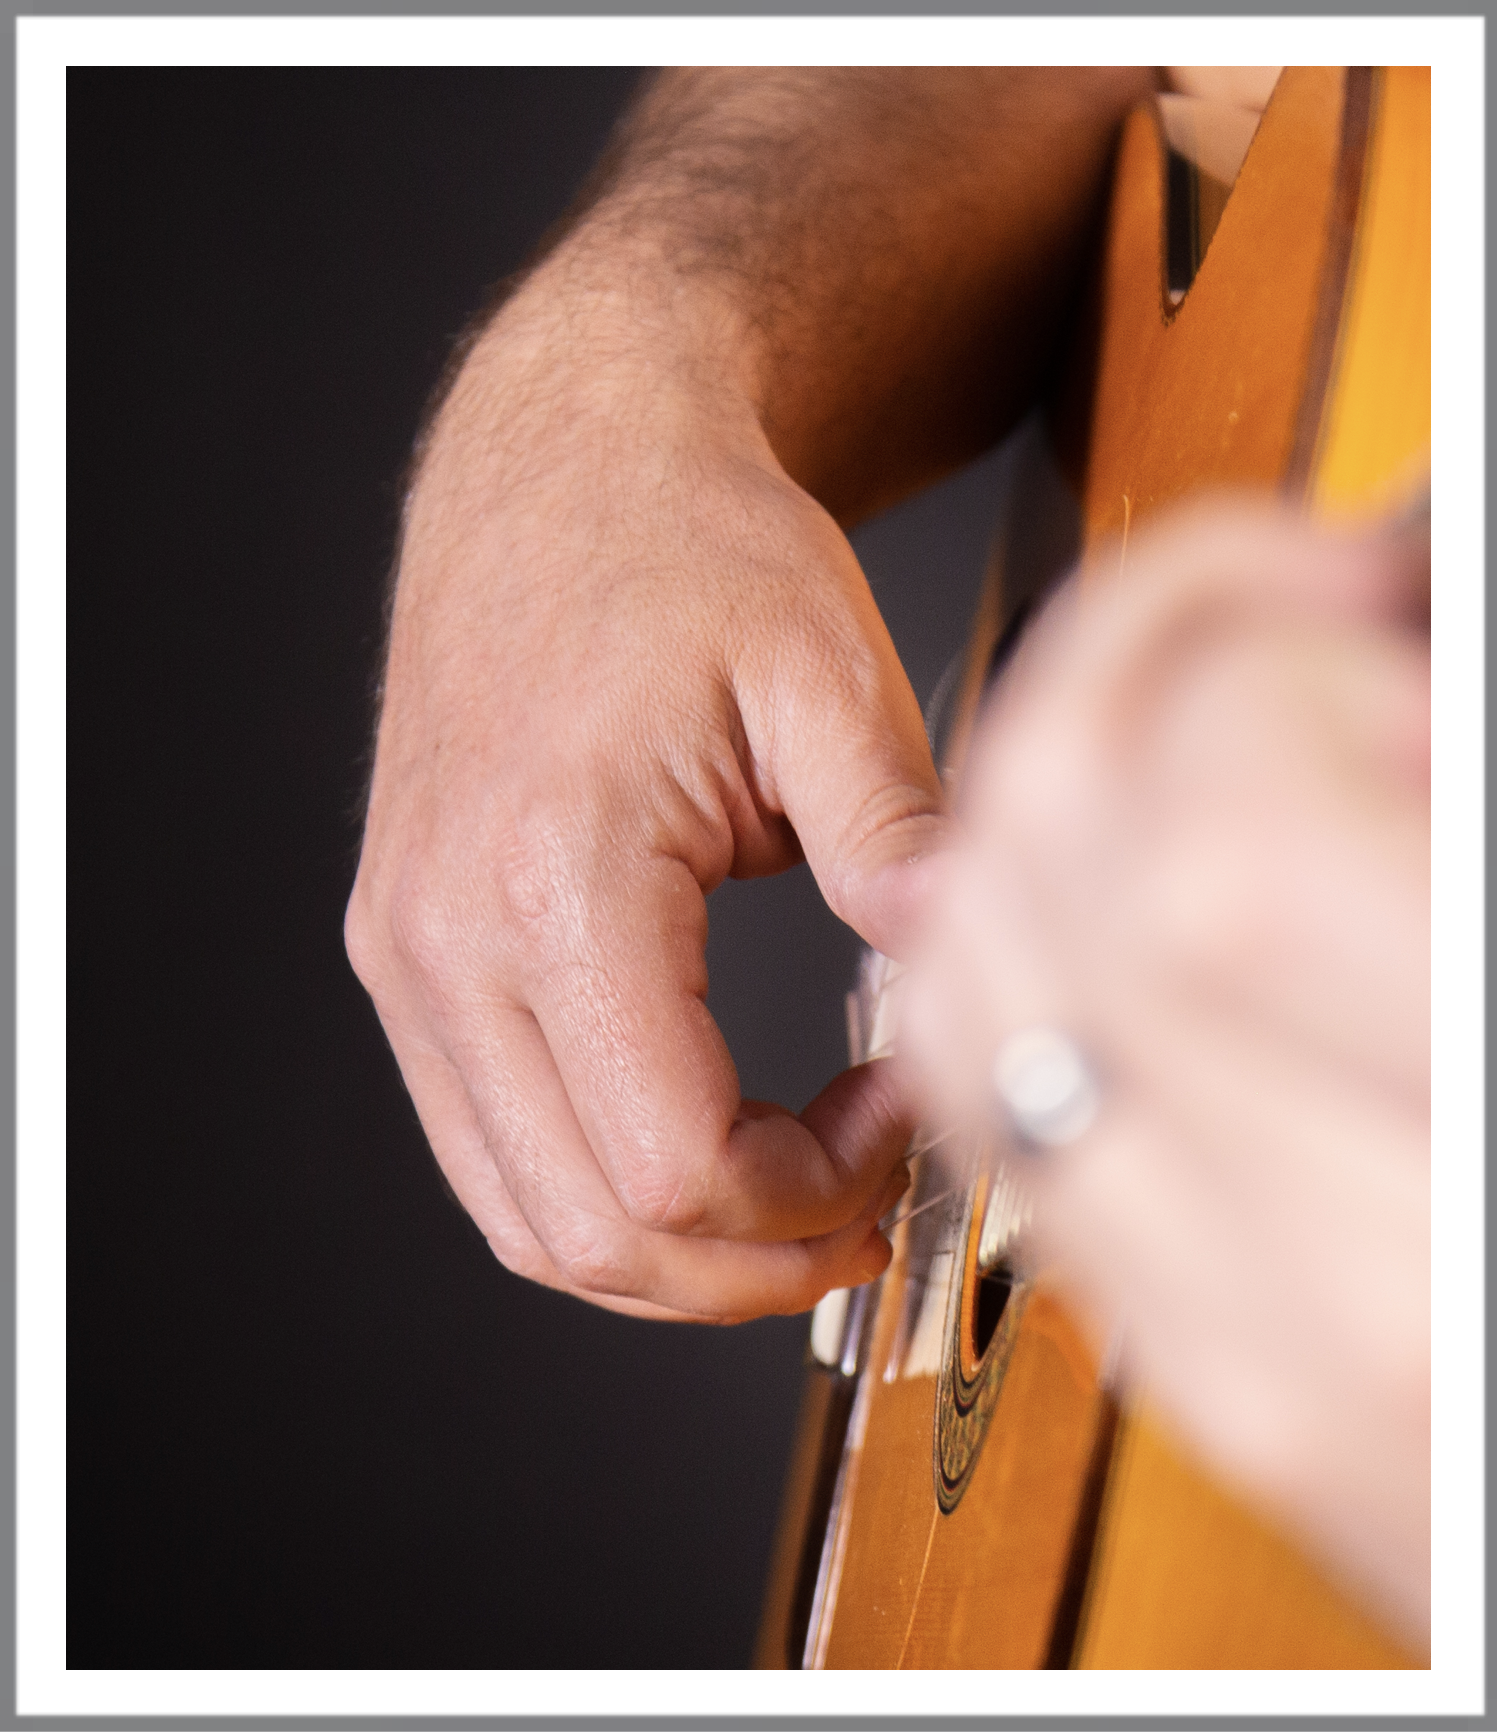
Touch: Place the fingertip and nail on the string. Your finger should be relaxed with a soft “C” shape. There should be no pressure in your fingertip and no weight resting on the string.
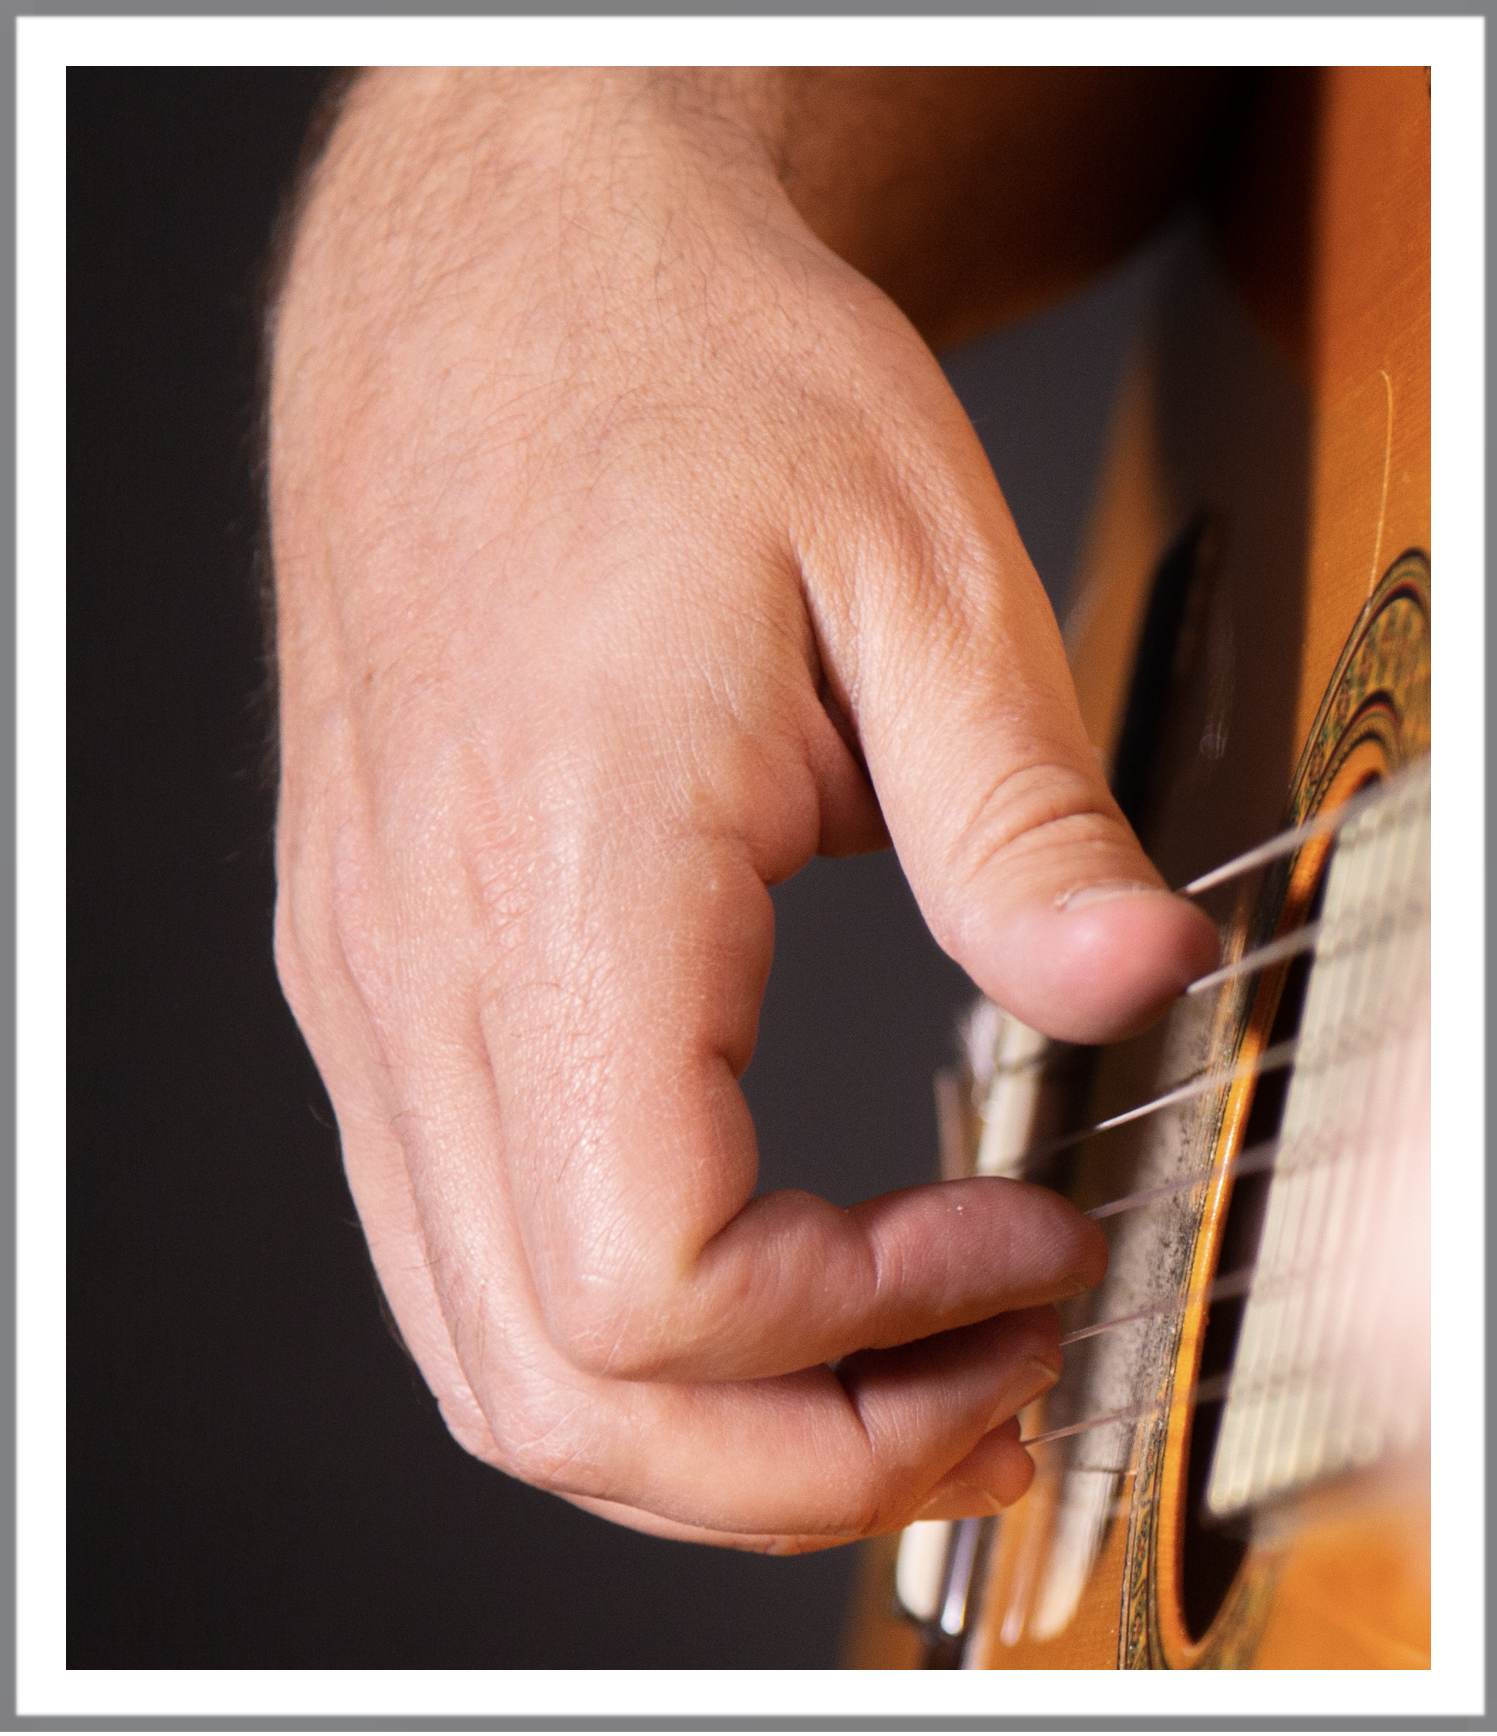
Rest: Push your finger from your knuckle and let your fingertip straighten out and rest on the string. There should be no pressure in your fingertip, and the string should not move from its resting position, but should cause the fingertip to bend, as if the string is stronger than your fingertip.
Move: Quickly move your finger through the string with your knuckle and back towards your palm. Your fingertip should be in the same position as it would be if you had made a closed fist. Angle the finger slightly upward to avoid hitting other strings. Immediately reset your finger back to the starting position and repeat.
Fingerstyle Guitar Basics: Lesson 7
Lesson 7: The Free Stroke and The “Touch, Rest, Move” Method
There are two main methods of right hand technique on the guitar, called “Free Strokes” and “Rest Strokes”. For now, we will focus on our free stroke technique” as they are more natural to learn and serve as the basis for a majority of modern finger style guitar playing. We will cover the Rest Stroke later on in this book.
As we learn our free stroke technique, the method to playing Fingerstyle guitar involves a three step method to achieve the balance between good tone and projection of sound. Practice this method with each finger while paying close attention to the technique. There should be no weight in your fingertip, as your knuckle will push your finger through the string.
The concept behind this technique is simple, yet takes a long time to develop in the player. Essentially, the goal is to relax the fingertip as we use the knuckle to “move” the finger through the string.
Touch: Place the fingertip and nail on the string. Your finger should be relaxed with a soft “C” shape. There should be no pressure in your fingertip and no weight resting on the string.
Rest: Push your finger from your knuckle and let your fingertip straighten out and rest on the string. There should be no pressure in your fingertip, and the string should not move from its resting position, but should cause the fingertip to bend, as if the string is stronger than your fingertip.
Move: Quickly move your finger through the string with your knuckle and back towards your palm. Your fingertip should be in the same position as it would be if you had made a closed fist. Angle the finger slightly upward to avoid hitting other strings. Immediately reset your finger back to the starting position and repeat.
Fingerstyle Guitar Basics: Lesson 8
Right-Hand Exercises
Practice the following exercise using the “Touch, Rest, Pluck” method. Be sure to work on each finger slowly and pay careful attention to each finger movement. You should spend about 2-3 minutes each practice session on each combination of fingerings to fully develop the technique.
It is extremely important to play each finger slowly and out of time at first because you are learning a new technique that takes time to fully develop. These exercises are not meant to be rushed through, but taken seriously and deliberately in order to understand the technique.
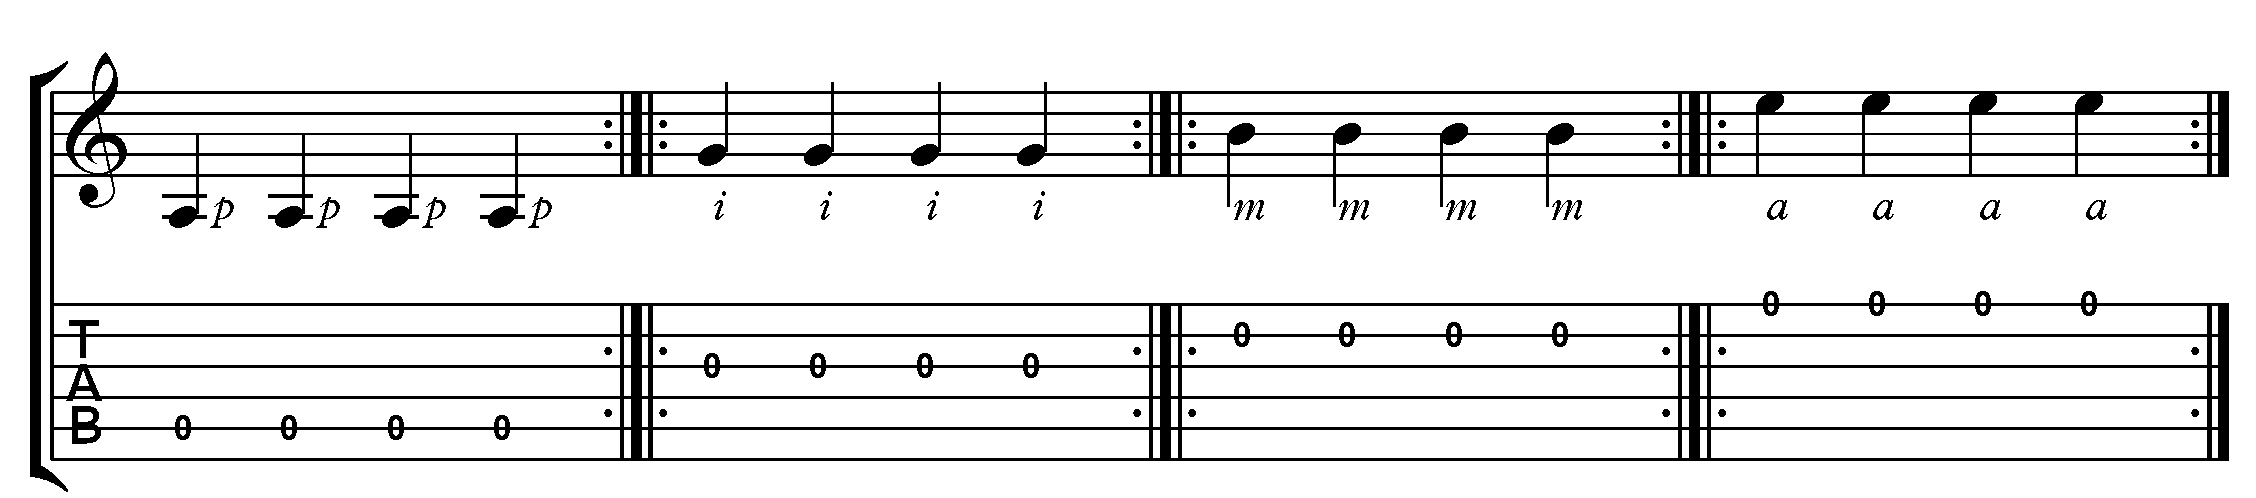
Exercise 1.1 - Individual Finger Exercises
With the exercise below, it is vital to develop finger independence, which means that only the finger playing a note is moving, while the other fingers remain touching their respective strings in the home position. Be sure not to move any other fingers while playing these exercises, and this will develop the independence needed to successfully play any possible combination of fingers required by the music .
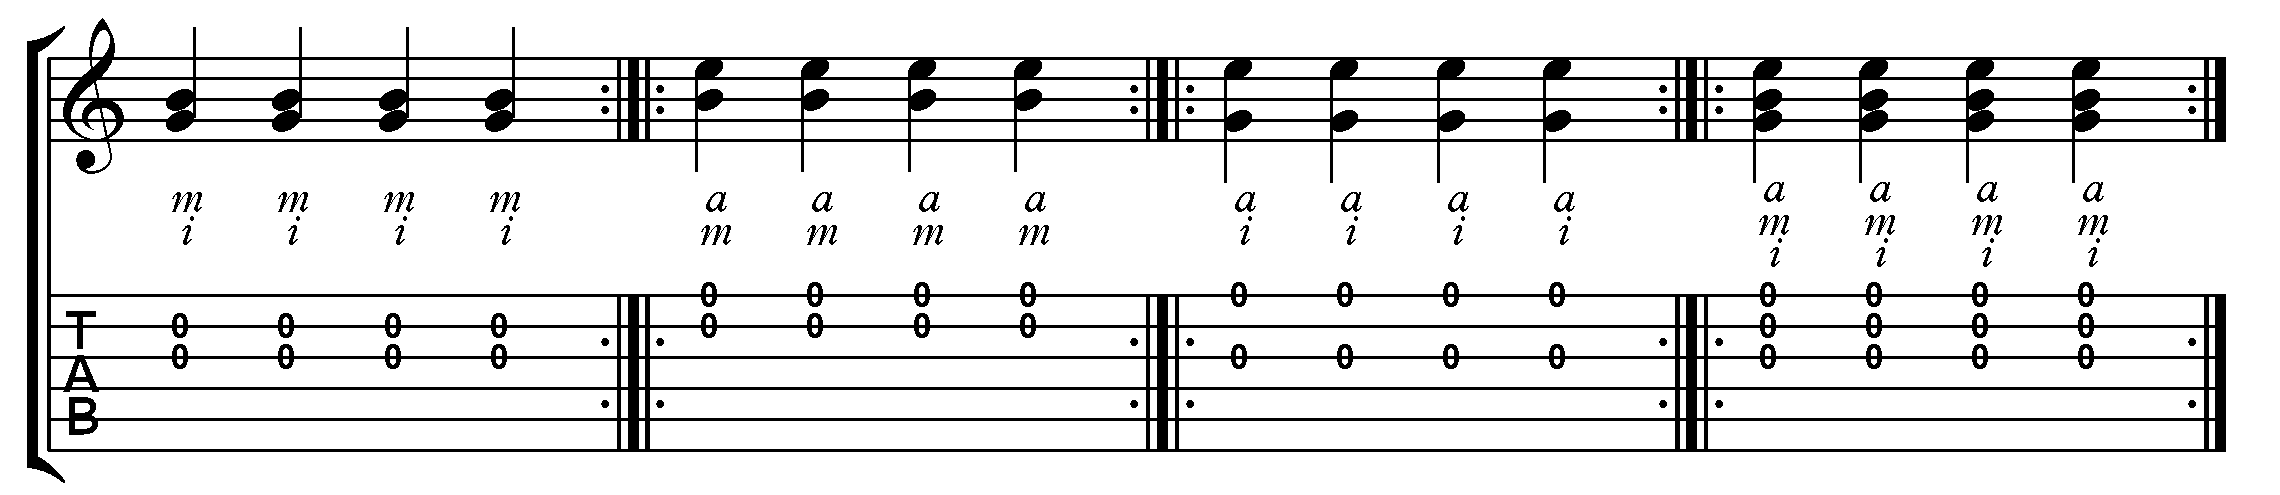
Exercise 1.2 - Playing in Pairs
The following exercises use combinations of the I, M, and A fingers in different combinations. If you find these exercises challenging, it is highly recommended to start with the lower finger first, and then add in the higher finger subsequently to get a feel for how they are used together, and then gradually reduce the time between fingers until they play simultaneously. Again, make sure only to move the fingers being used, and to have the others, including the thumb, resting on their strings when not in use.
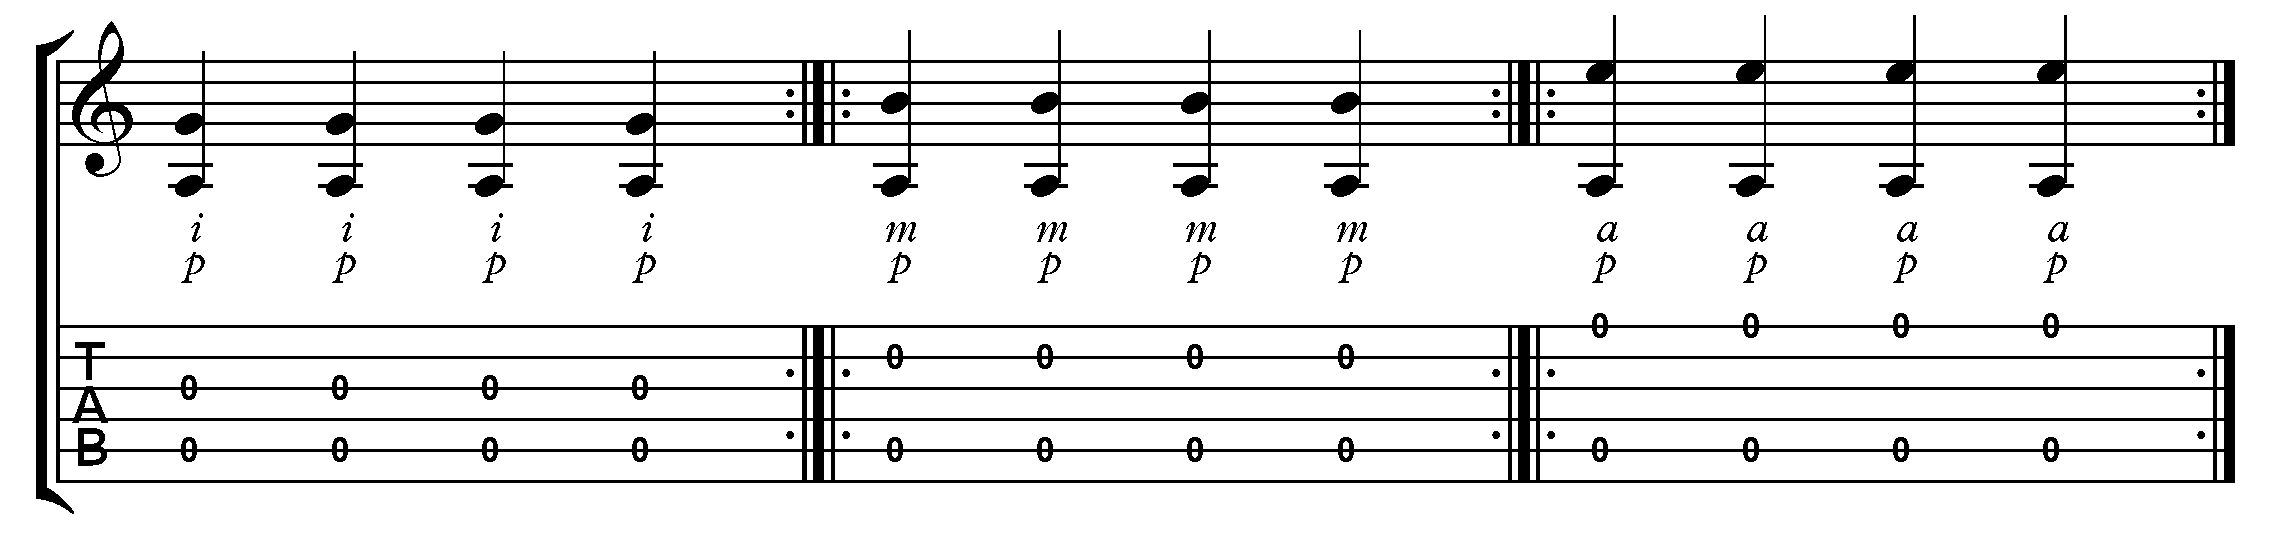
Exercise 1.3 - Adding The Thumb
Now we are going to add the thumb to each of our finger combinations. Make sure that the thumb and the other fingers do not collide with each other as they move through their strings. As with the exercises above, keep any fingers not used in the exercise resting on their strings. Only the fingers playing should be moving.
Exercise 1.4 - Adding The Thumb with Pairs
Now we are going to add the thumb to each of our finger pair combinations from exercise 2. Again, make sure that the thumb and the other fingers do not collide with each other as they move through their strings.
Each of these combinations should feel natural and comfortable before moving on to the next chapter. The fundamentals of the right hand will have an effect on each technique we learn from here, and so it is important to take as much time as necessary to learn complete right hand finger independence, and be in control of your right hand motion before moving on.
Fingerstyle Guitar Basics: Lesson 9
Left Hand Independence Exercises
As you will be playing multiple lines of music simultaneously with Fingerstyle guitar, the ability to move each finger independently, while holding down other fingers as part of a chord or line is vital to your success with this style.
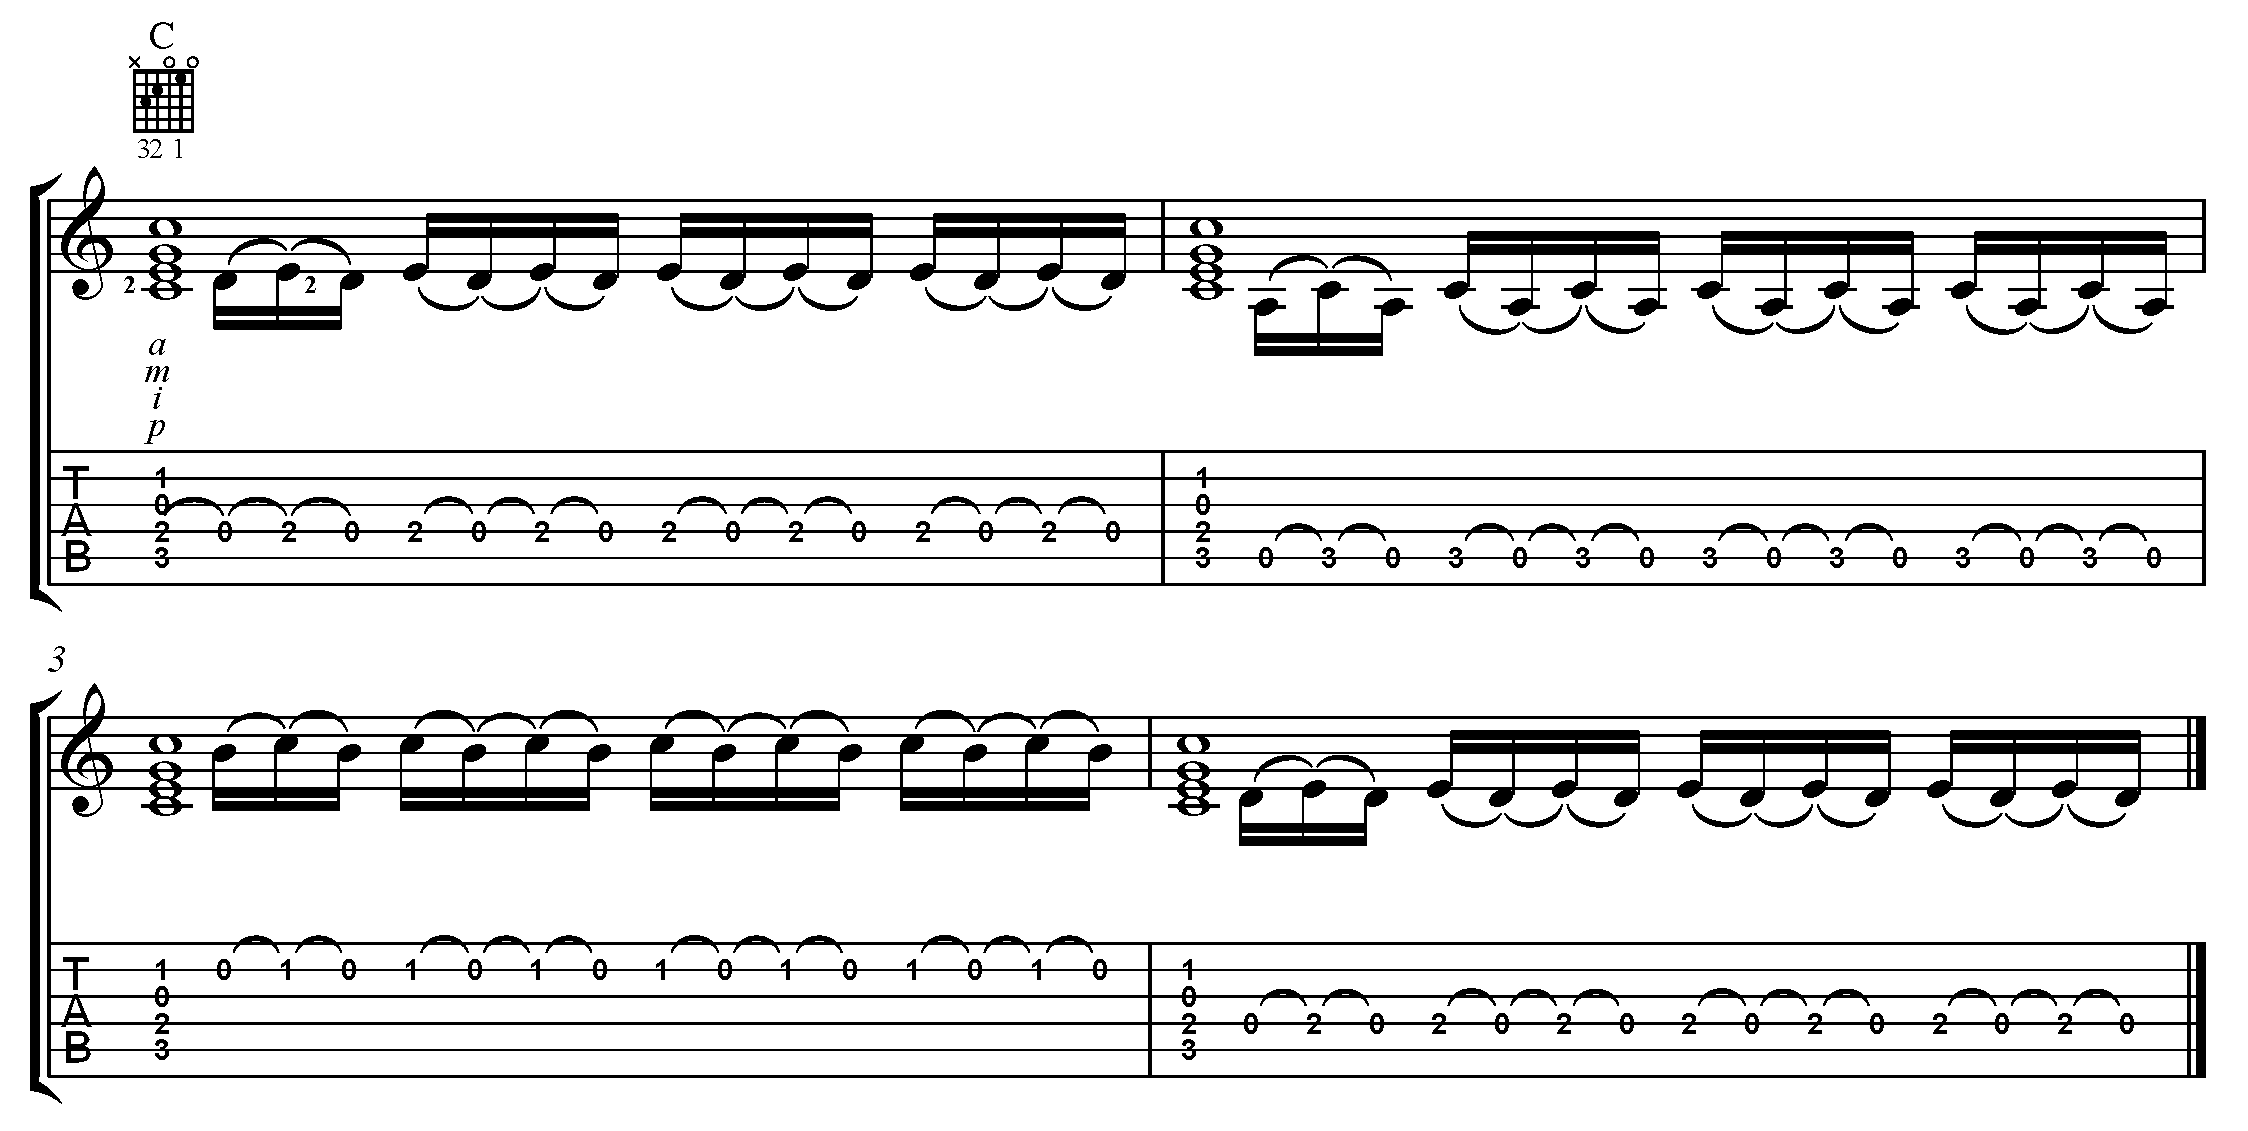
The goal with these exercises is to be able to play a C major chord, and then lift each finger off (called a pull-off) and back on the string (called a hammer-on) while the other notes of the chord remain on their respective strings.
This method will teach your left hand how to move your fingers independently in a way that allows for multiple lines to be executed simultaneously in the left hand, where one or two fingers might be holding down a chord, while the others are moving to create a melodic line in the other voice.
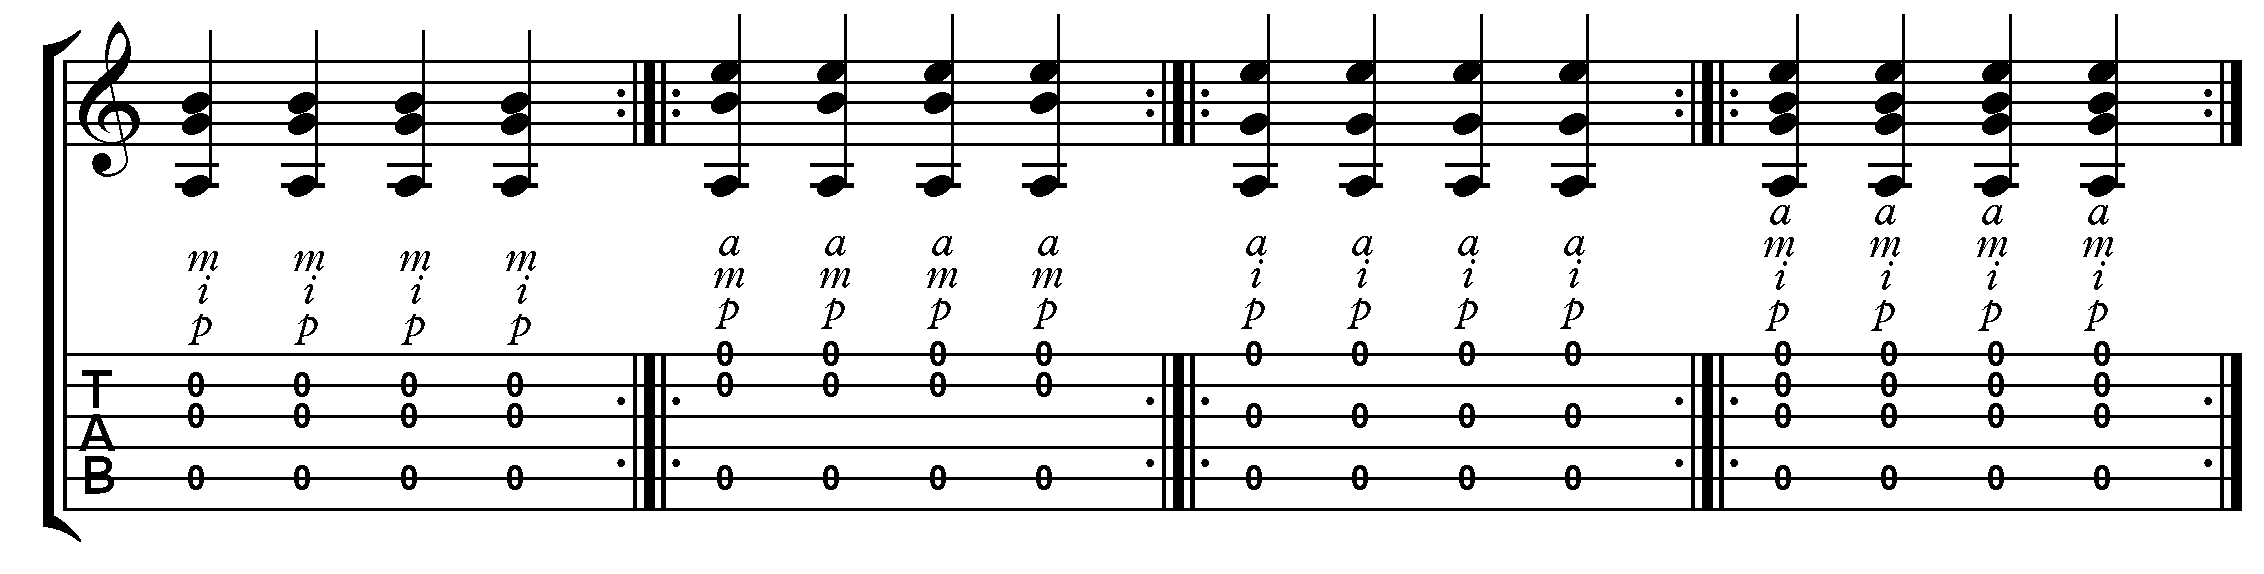
The following exercises will help you gain more dexterity and independence in your left hand. Make sure that the other notes of the chords are ringing while each finger is moving. Move each finger in a way that does not affect the other notes of the chord, or cause an adjacent string to stop ringing.
Exercise 2.1 - C Major Chord
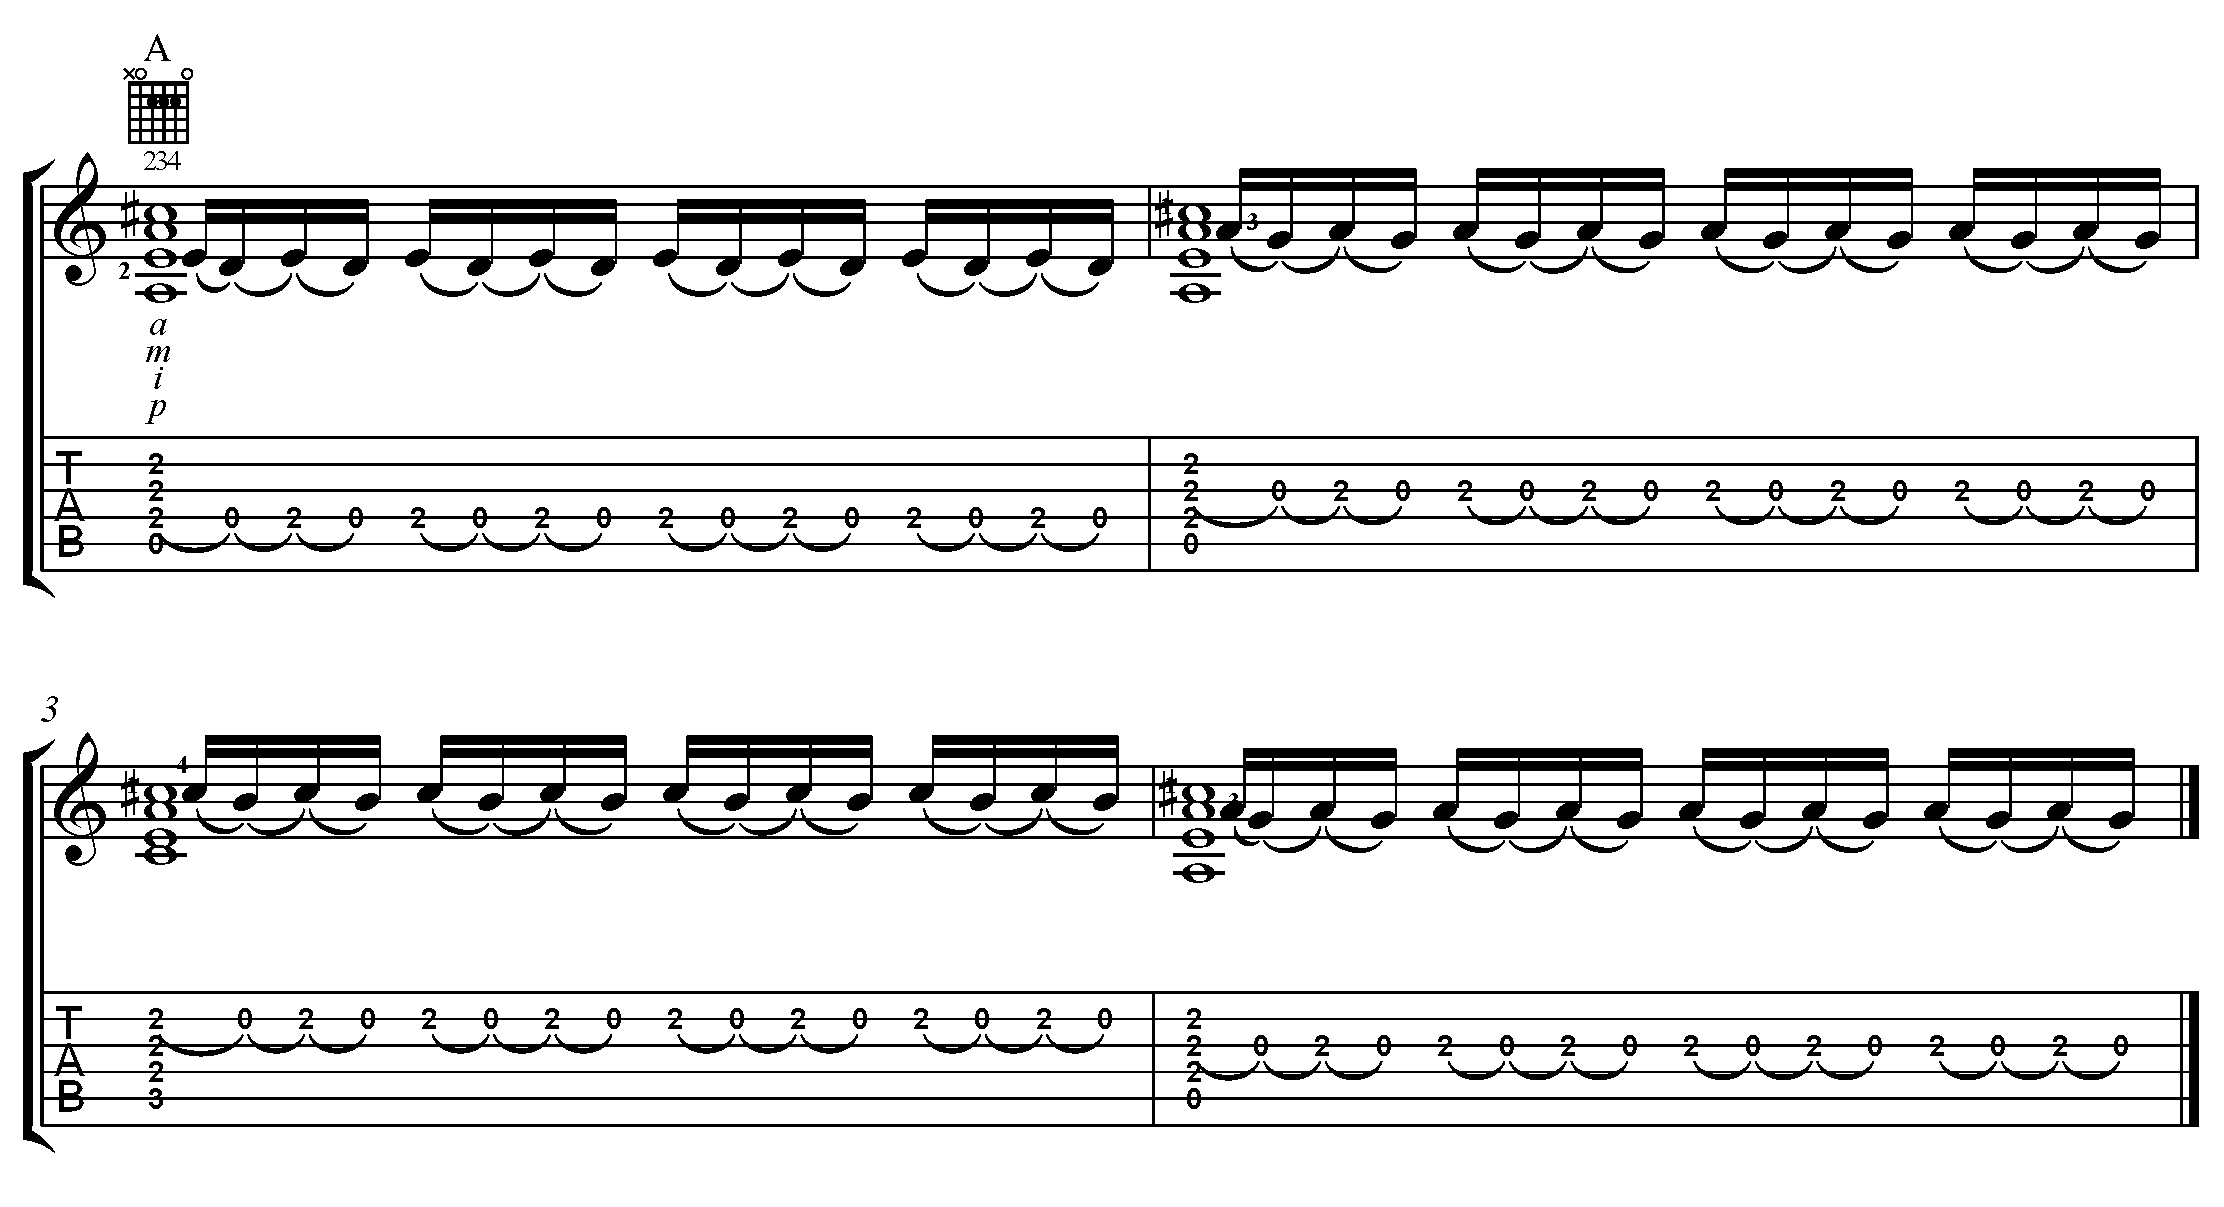
Exercise 2.2 - A Major Chord
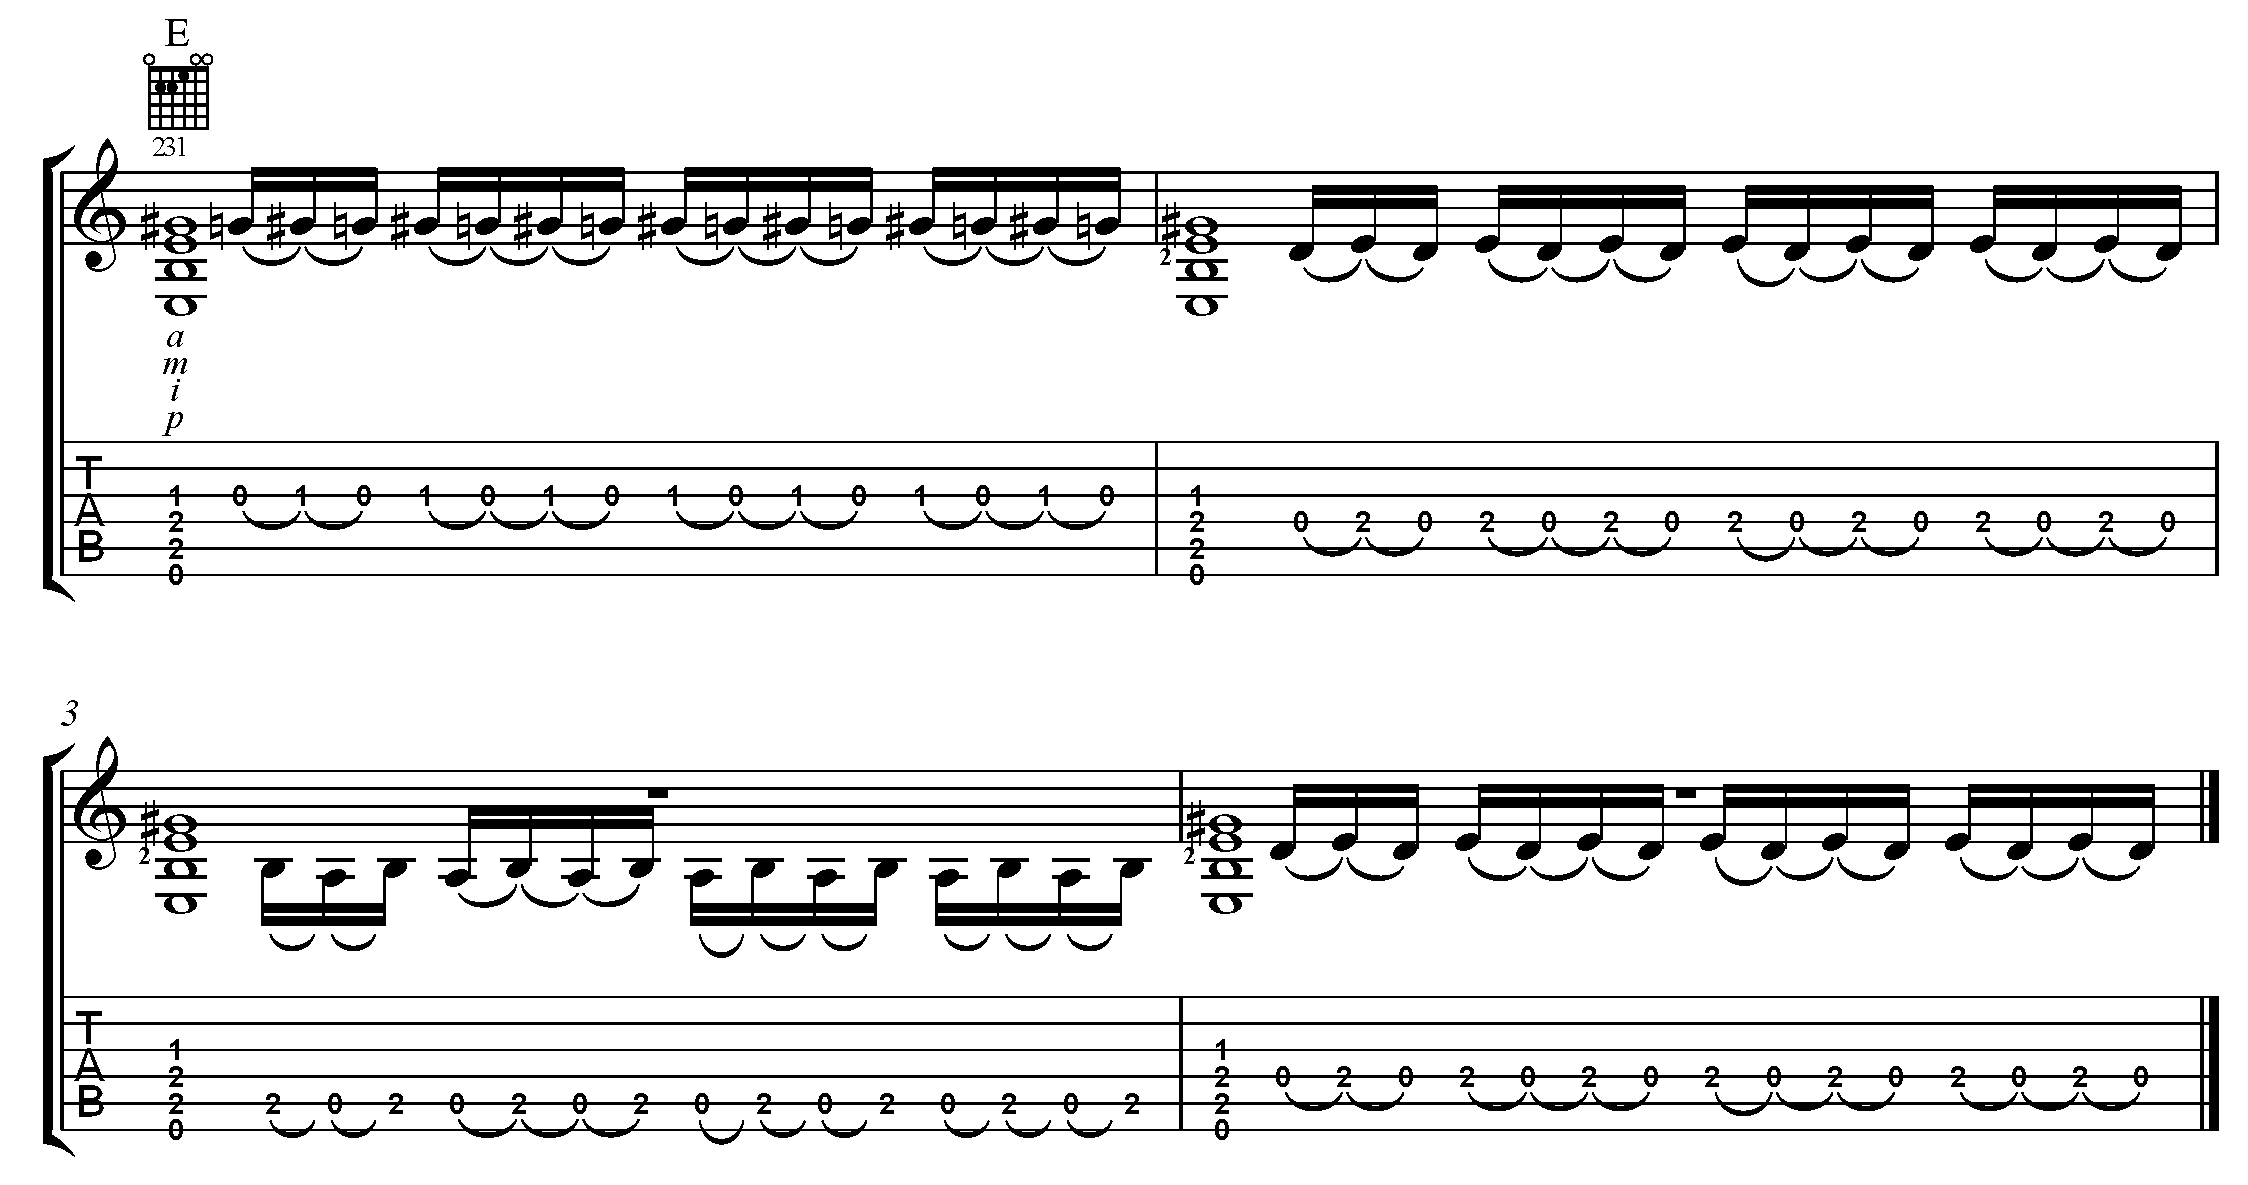
Exercise 2.3 - E Major Chord
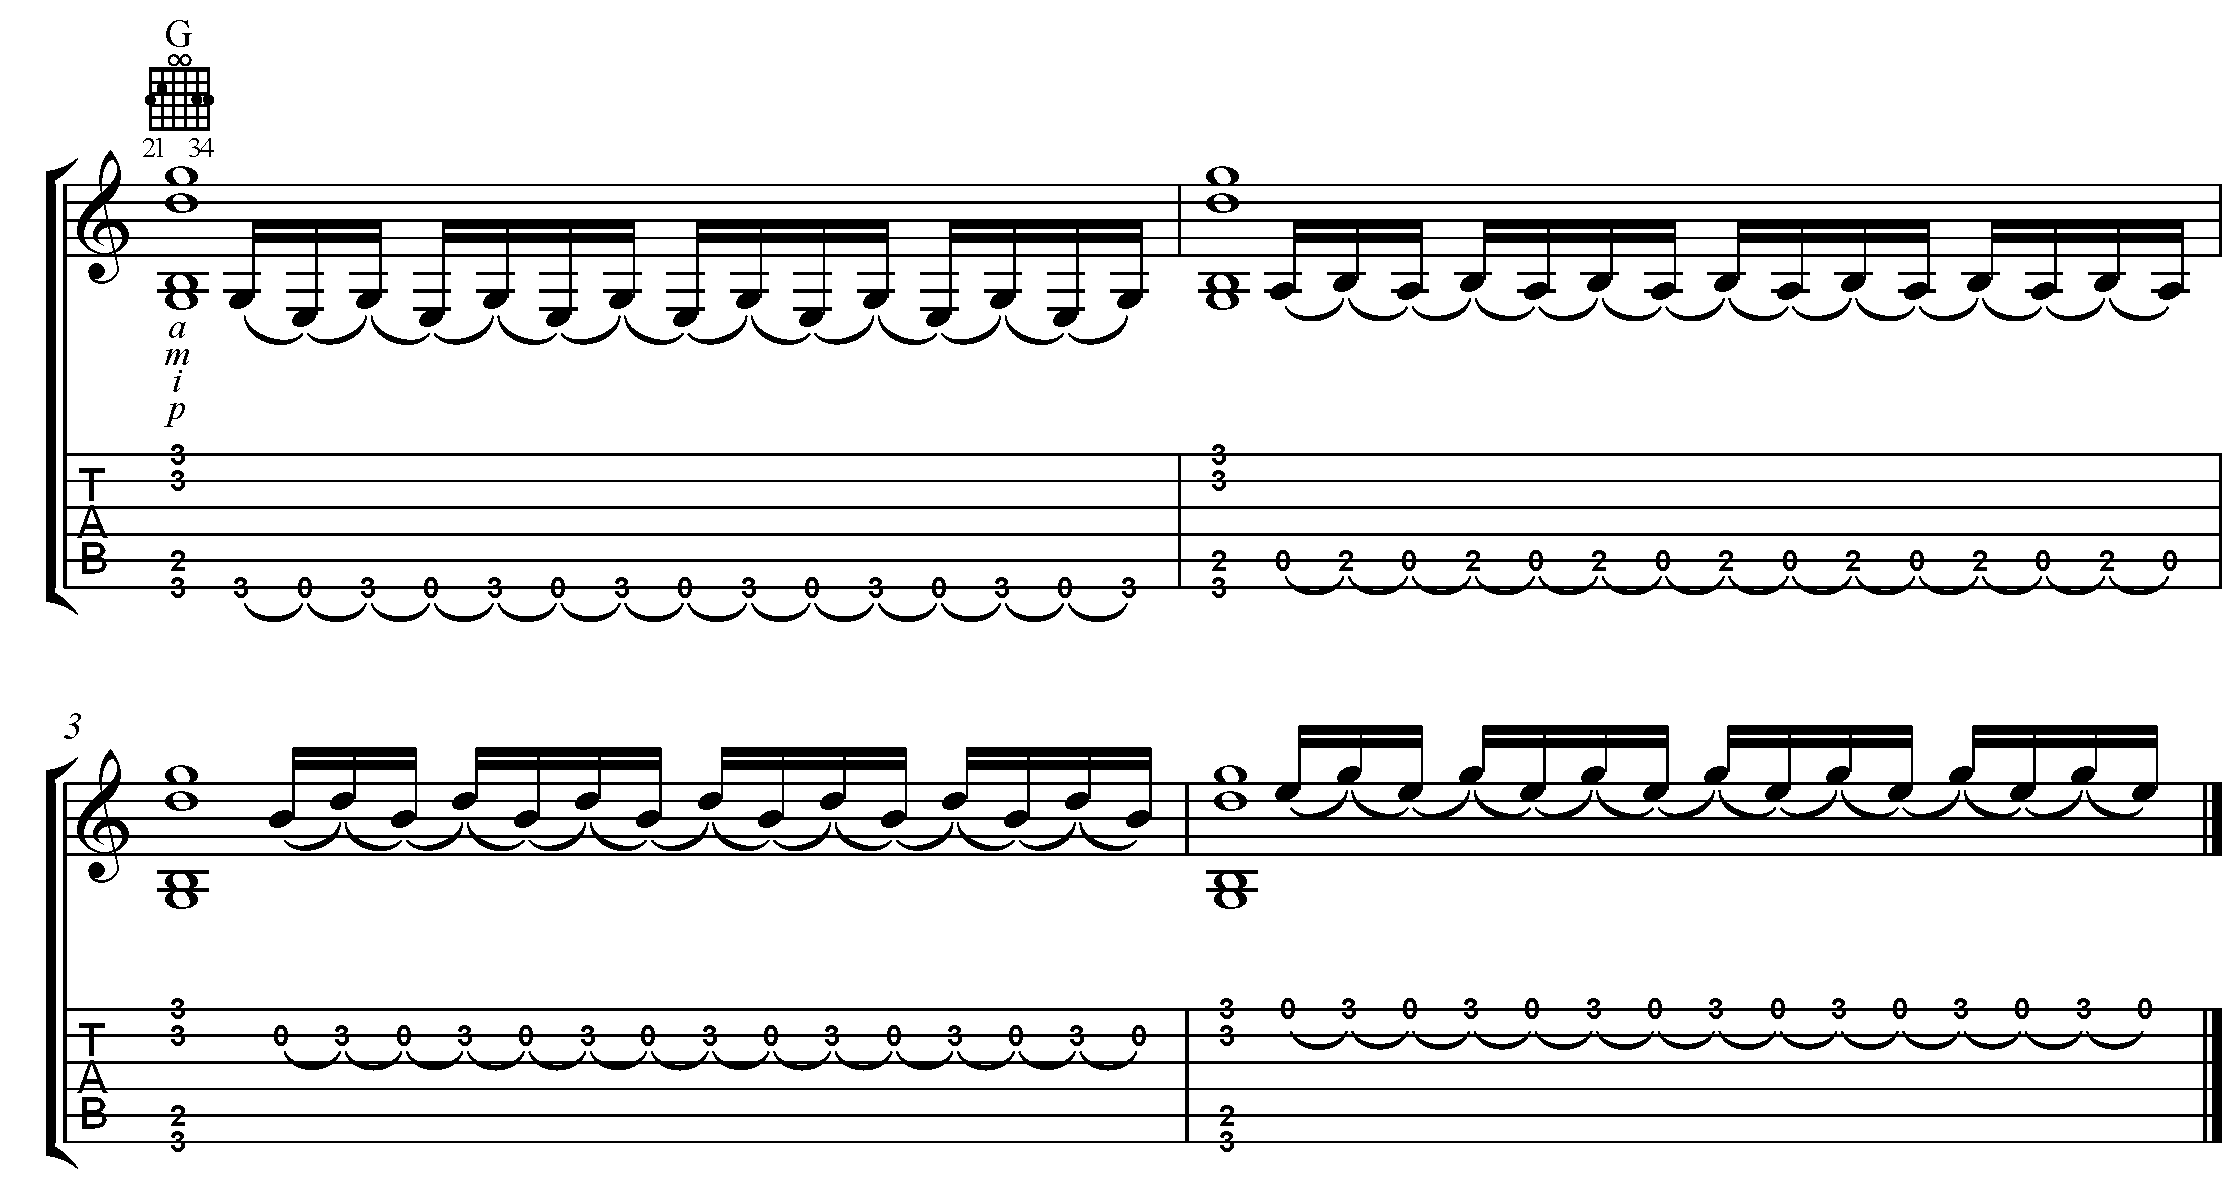
Exercise 2.4 - G Major Chord
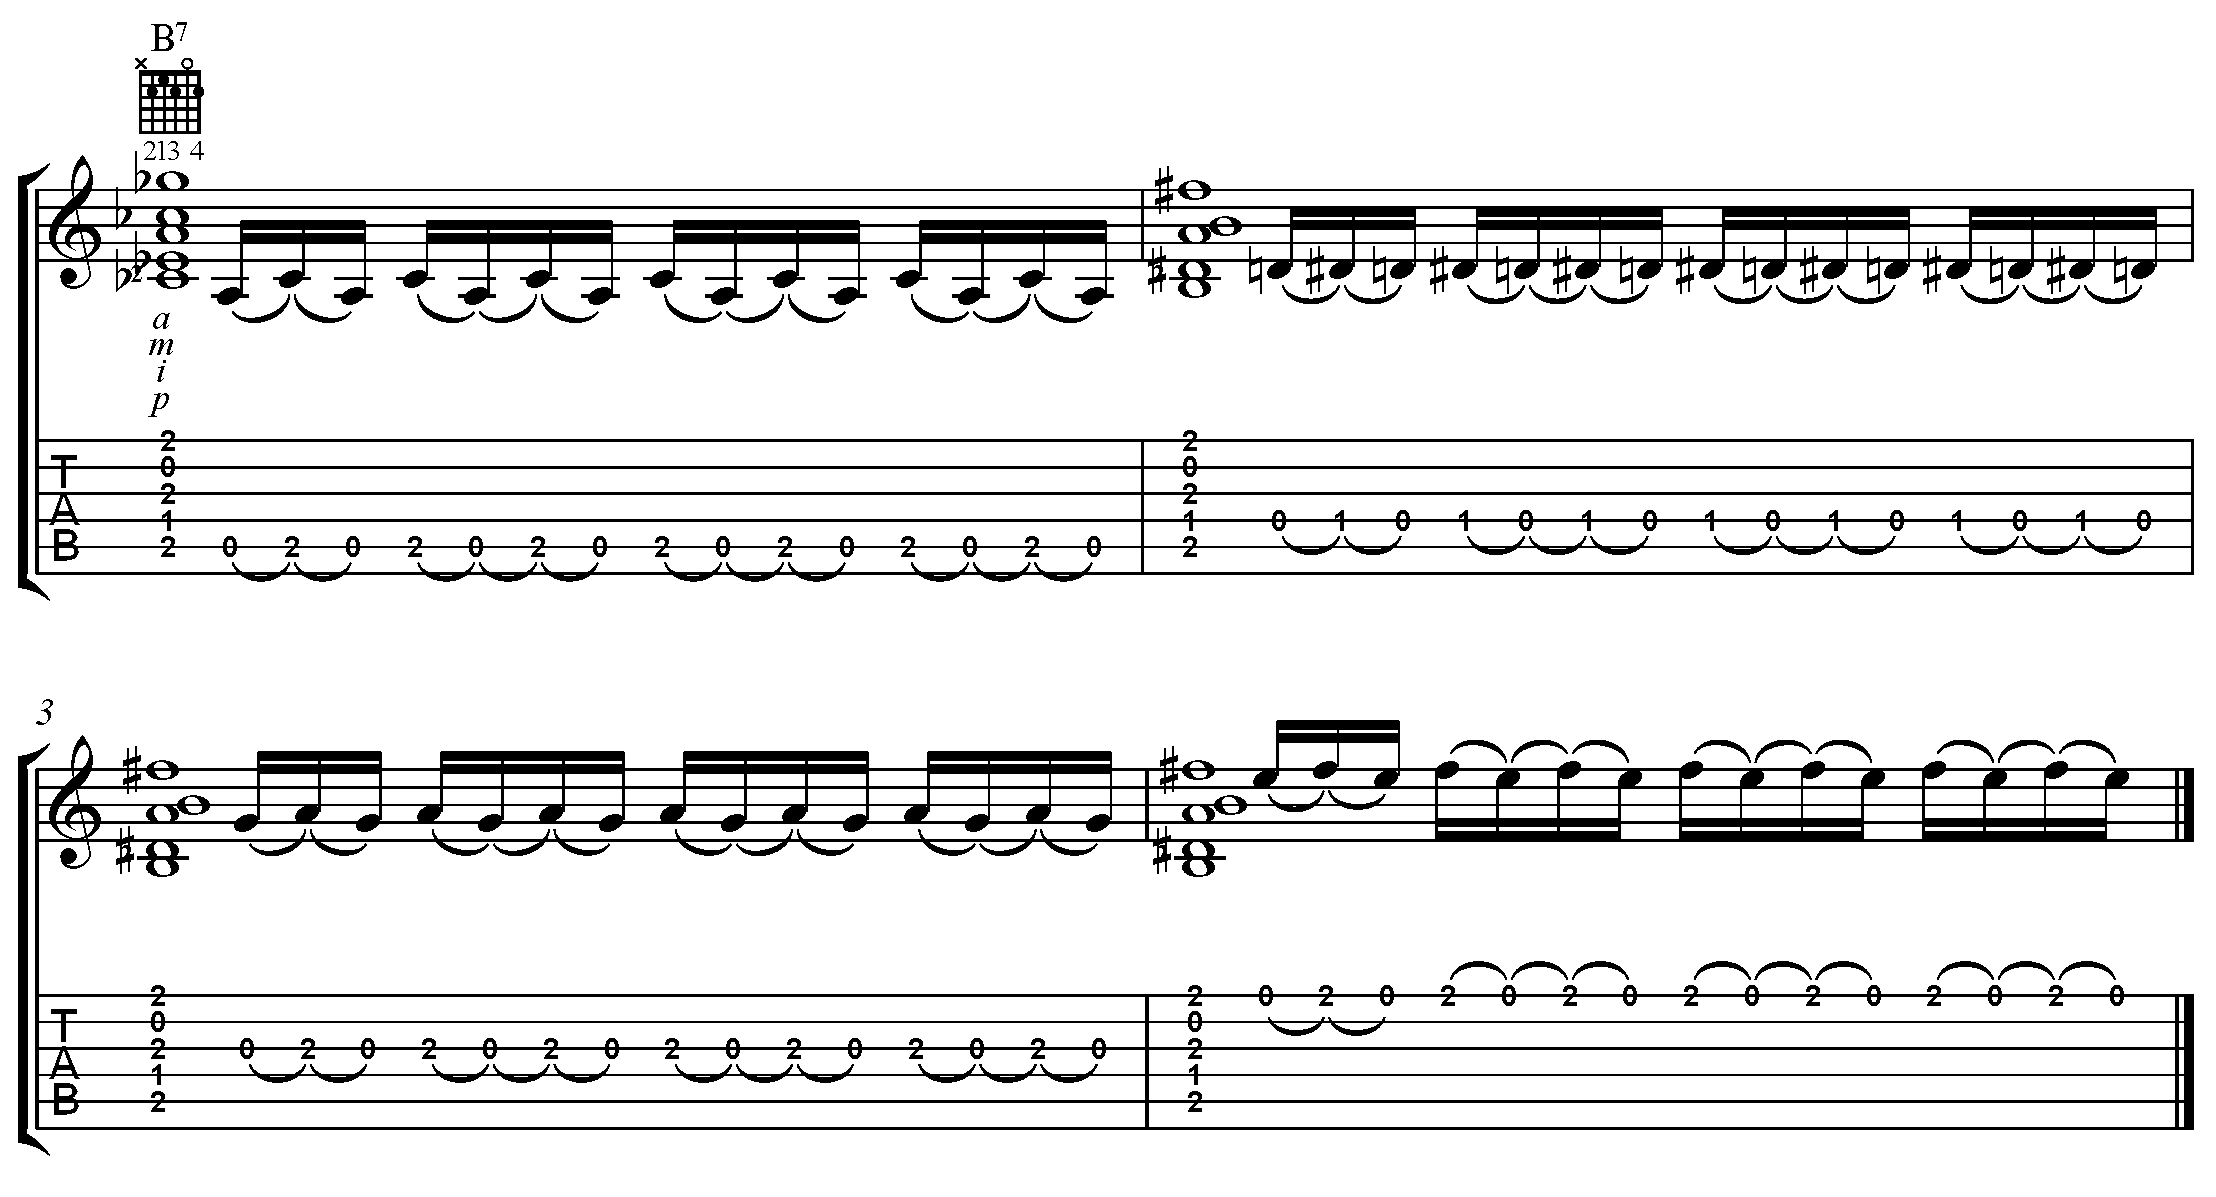
Exercise 2.5 - B7 Chord
Fingerstyle Guitar Basics: Lesson 10
Connected Finger Exercises
One of the most important concepts to learn when developing the right hand for Fingerstyle guitar laying is the concept of “connecting” your right hand fingers together when playing. What this means is that there should never be a space between one finger playing and another finger touching the string for the next note to be played. In short, there should never be a time where your right hand fingers are completely off the strings, unless the piece is finished.
In these exercises, the goal is to learn how to play one note with one finger, and then simultaneously place the next finger on the next string, and to continue this pattern throughout the exercise. For example, if the thumb plays a bass note on the 6th string, the index finger should immediately be placed on the 3rd string to prepare to play, and this alternation continues with each finger as needed.
This way, you are always “one note ahead” of the music in your right hand, so the next finger in the sequence is ready to play the next note in the exercise.
Practice the following exercises to develop your connected finger technique to further develop this concept in your right hand. We will start by using open strings only to keep the focus on our right hand for now.
Exercise 3.1 - Open Strings Forward
Exercise 3.2 - Open Strings Reverse
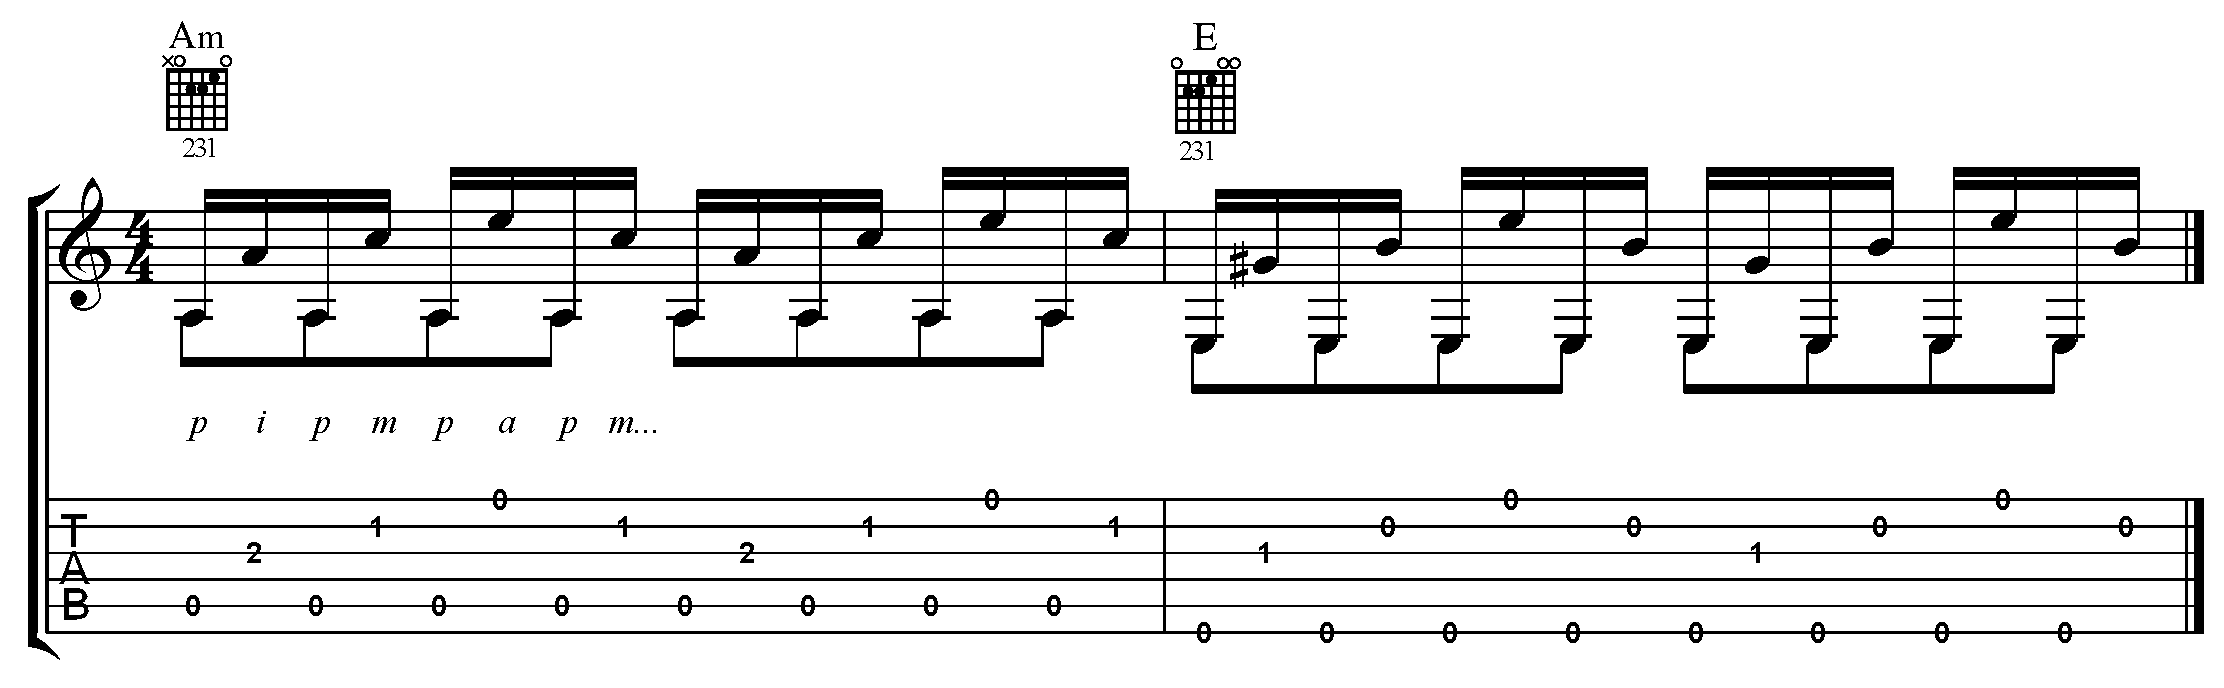
Now that we are familiar with the concept of the supported finger exercise, we will add chords in the right hand for the next exercises. When adding chords, place the fingers in the order that they are played by the right hand progression, this means that you do not want to put the chord down in its entirety as you would in pick-style playing and strumming, but rather we will build the notes in the chord as needed by the order of the right hand pattern. This will take some getting used to, but its an extremely important part of our left hand technique.
Exercise 3.3 - Am and E Chords
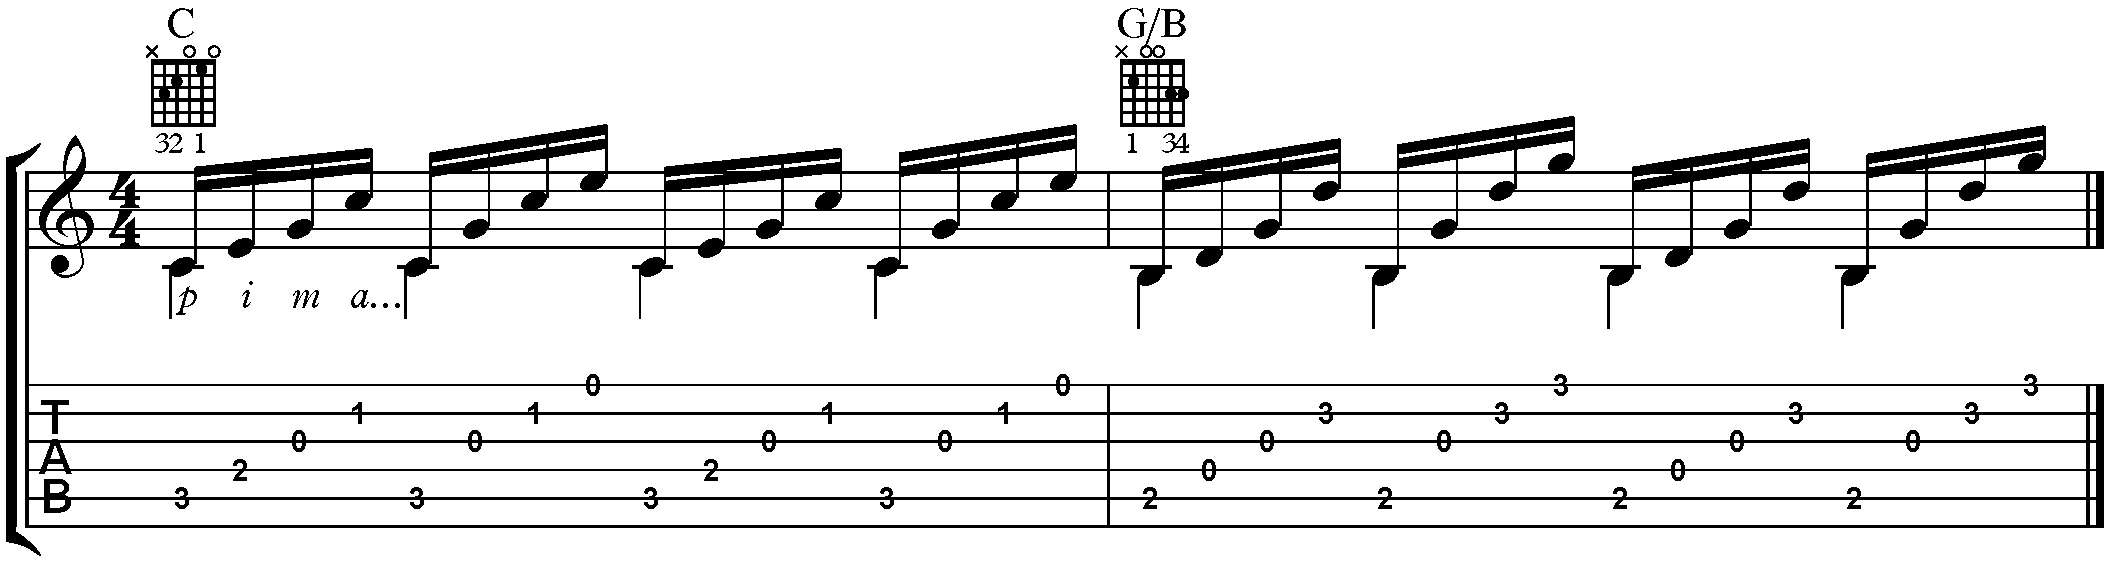
Exercise 3.4 - C and G/B Chords

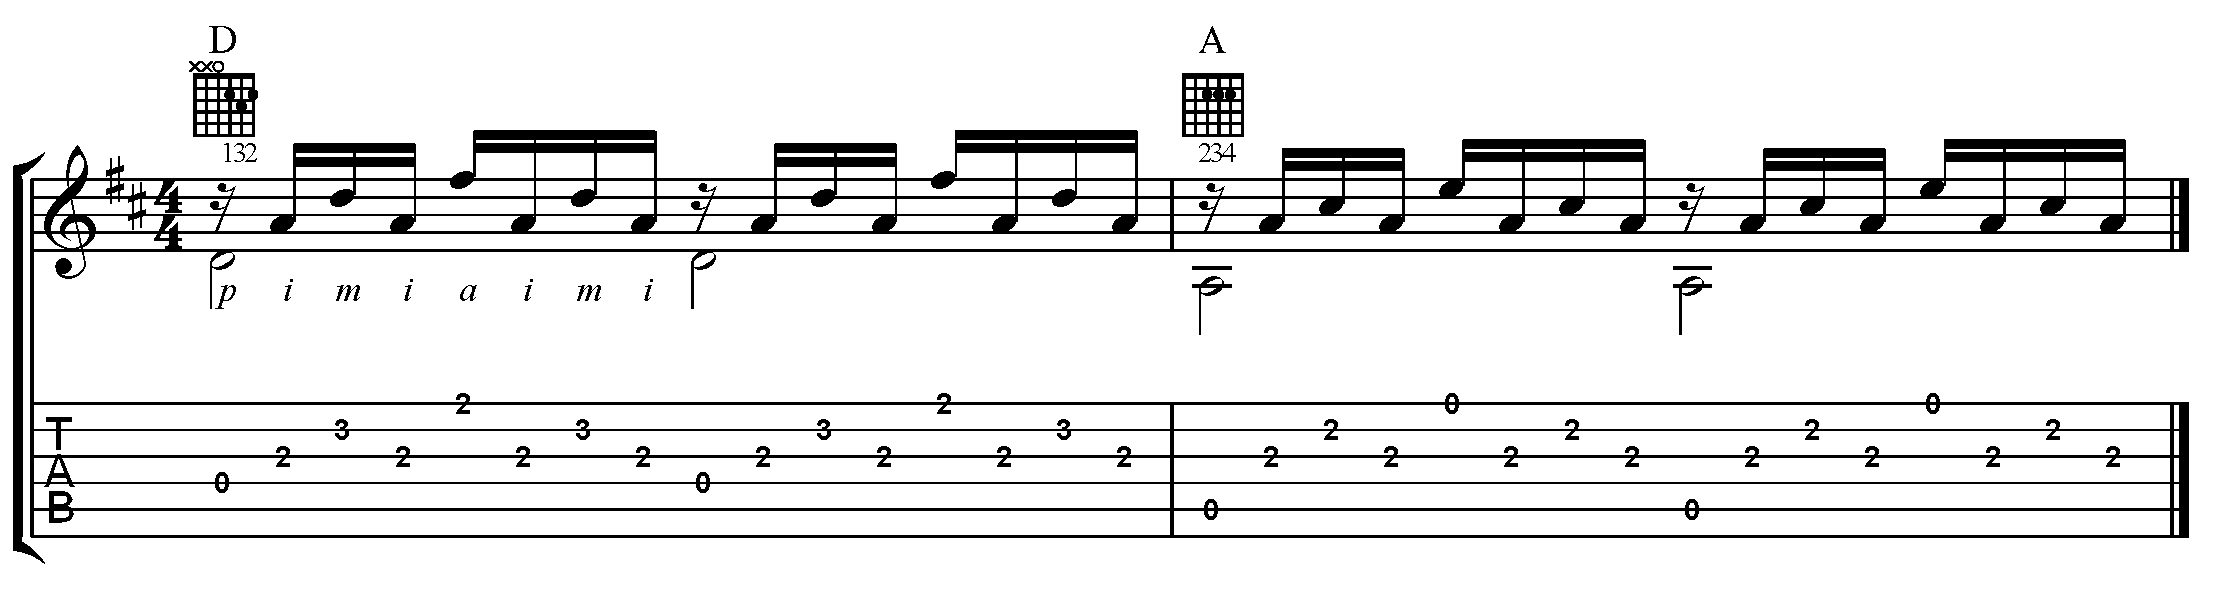
Exercise 3.5 - D and A Chords
Fingerstyle Guitar Basics: Lesson 11
Forward Arpeggio Exercises
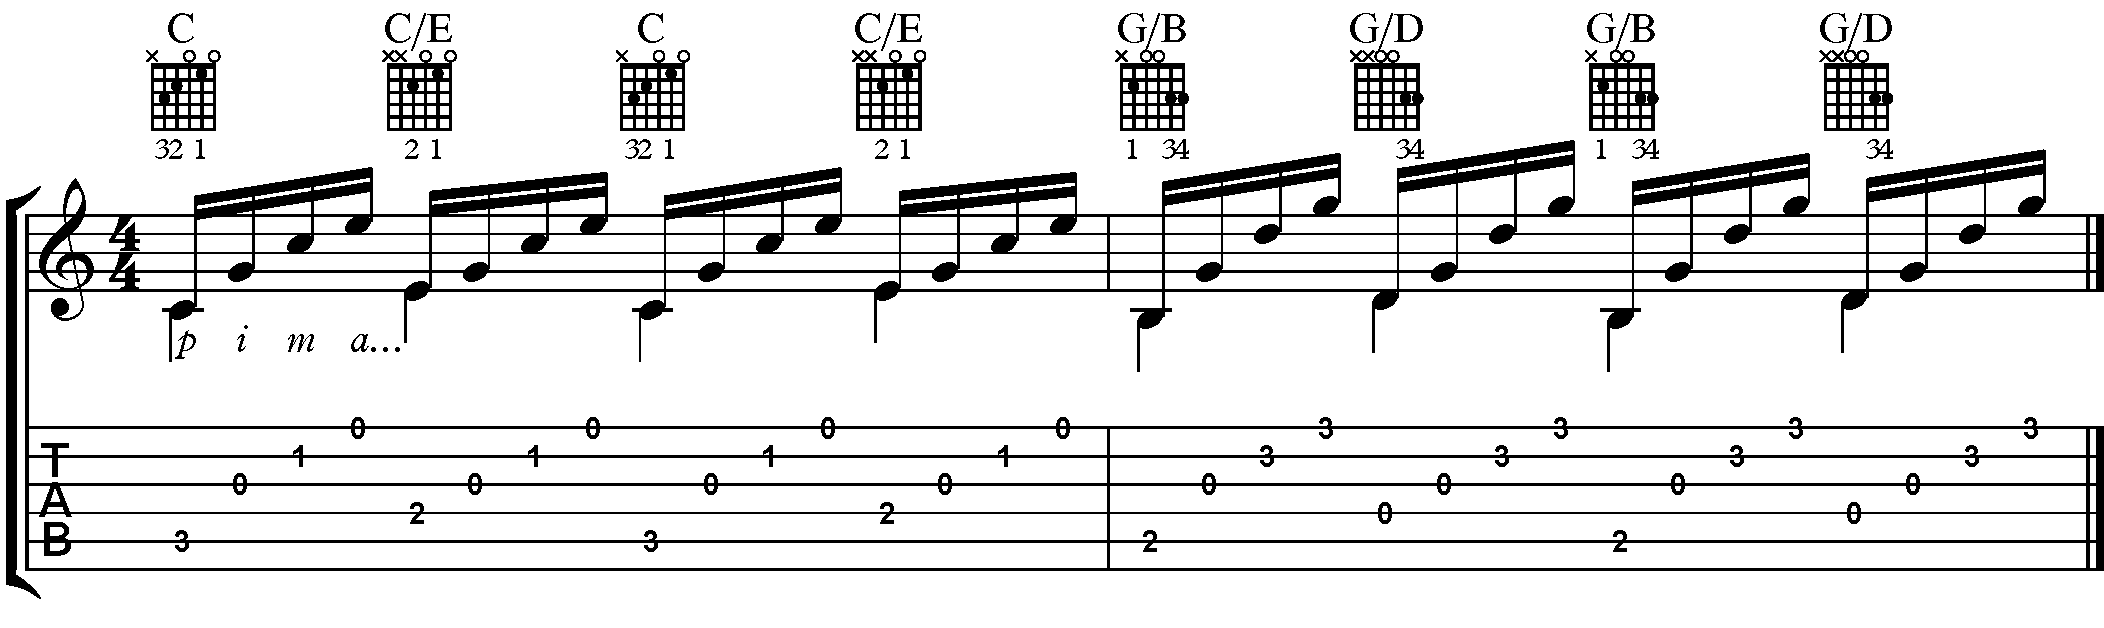
To successfully play forward arpeggios, we need to separate our thumb from our three fingers. As soon as our thumb plays a bass strings, our index, middle, and ring fingers (depending on the number of notes played) will immediately and simultaneously touch the remaining strings of the arpeggio in a “spring loaded” motion. This sets up the next three notes of the arpeggio and allows for increased speed and accuracy. After the last finger plays, the thumb will immediately return to the bass note ready to start the arpeggio over again.
This alternation takes time and patience to execute correctly, and it is imperative to practice this alternation before attempting the following exercises. Don’t worry about the chord progression at first and work only on the right hand. You can add the left hand chord progression in once you are comfortable with the technique.
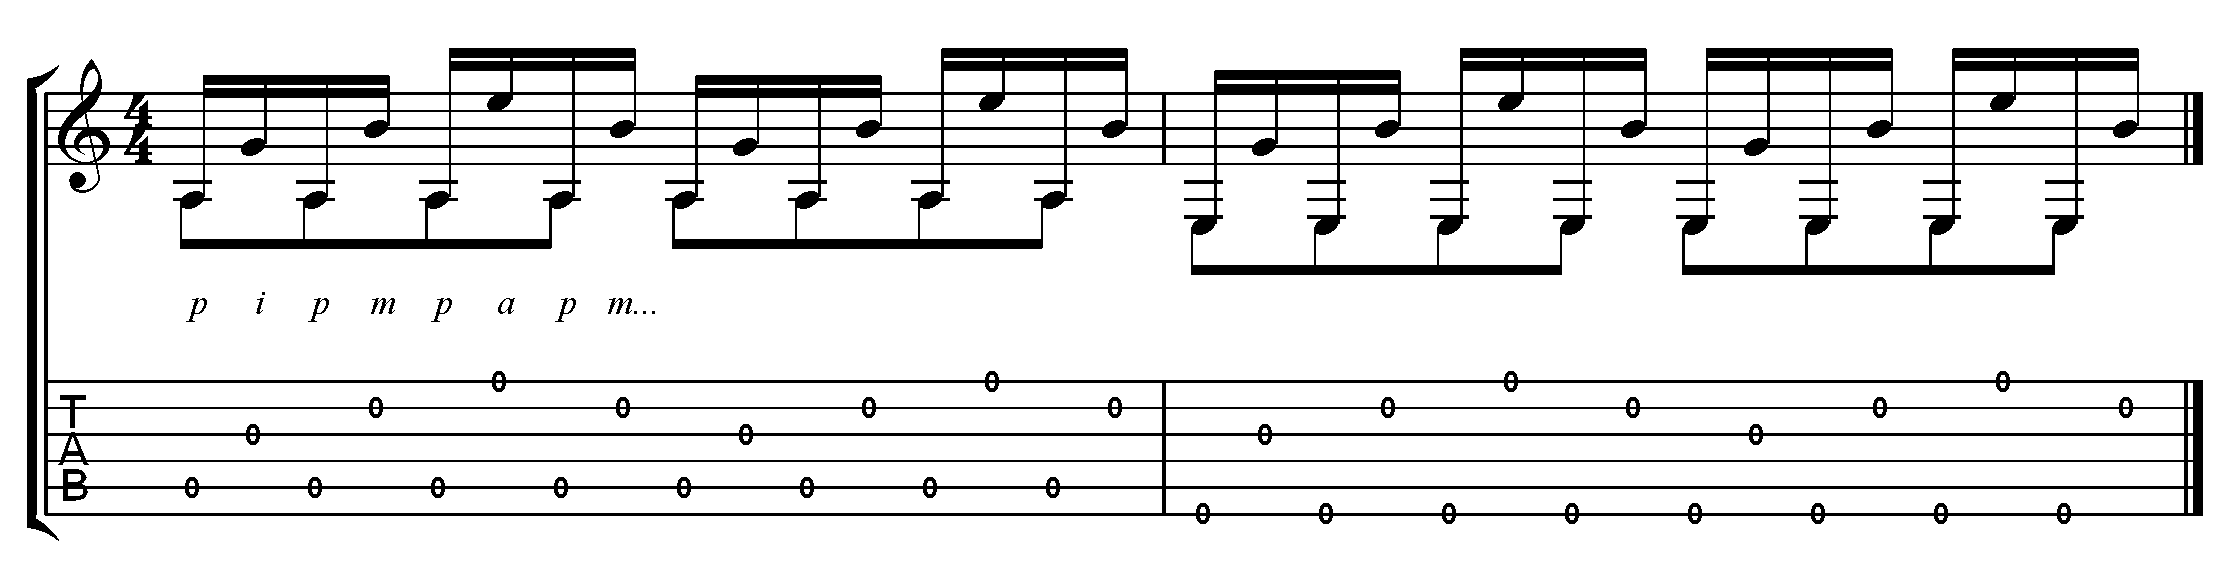
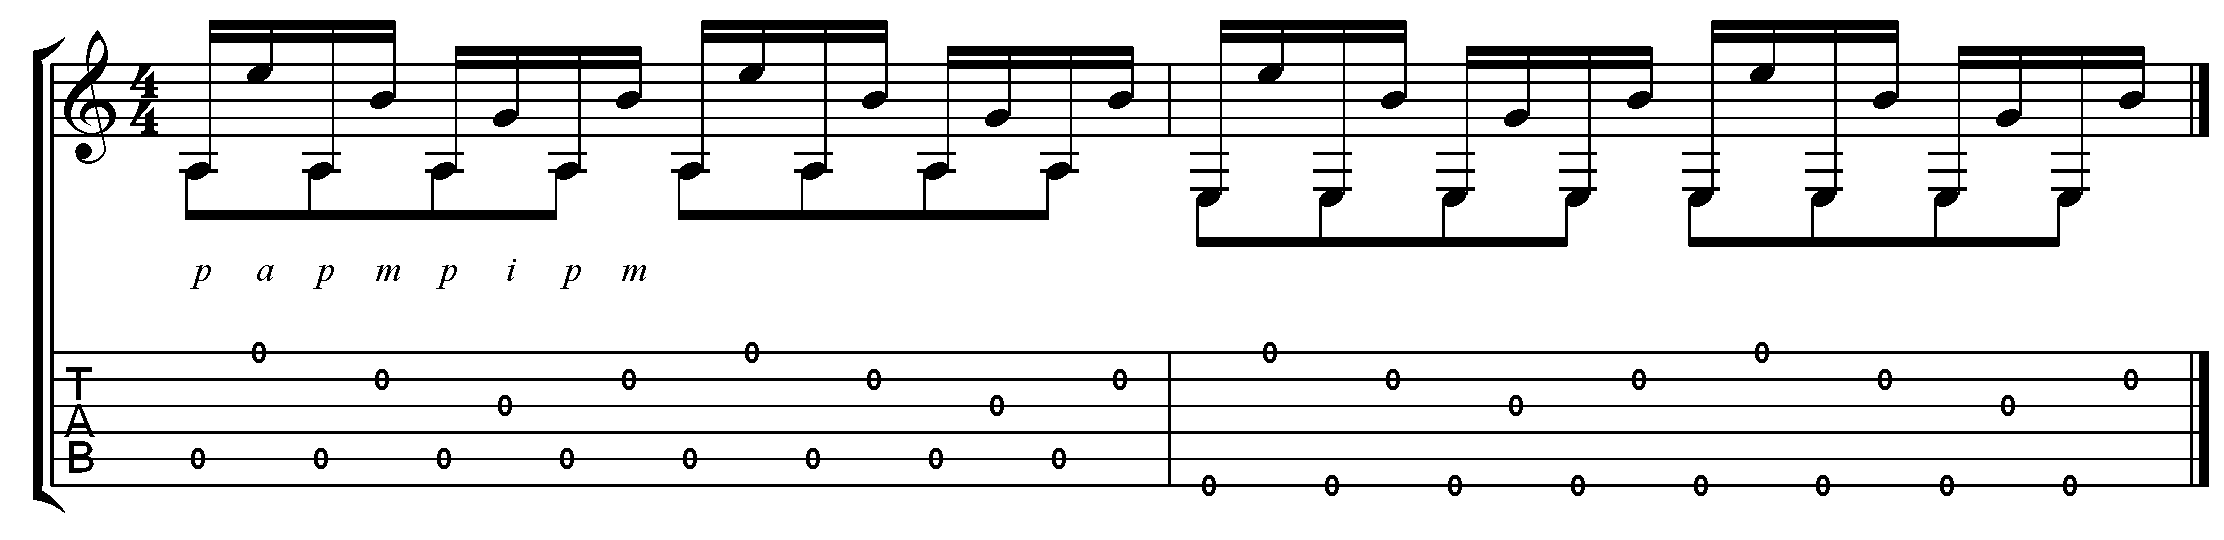
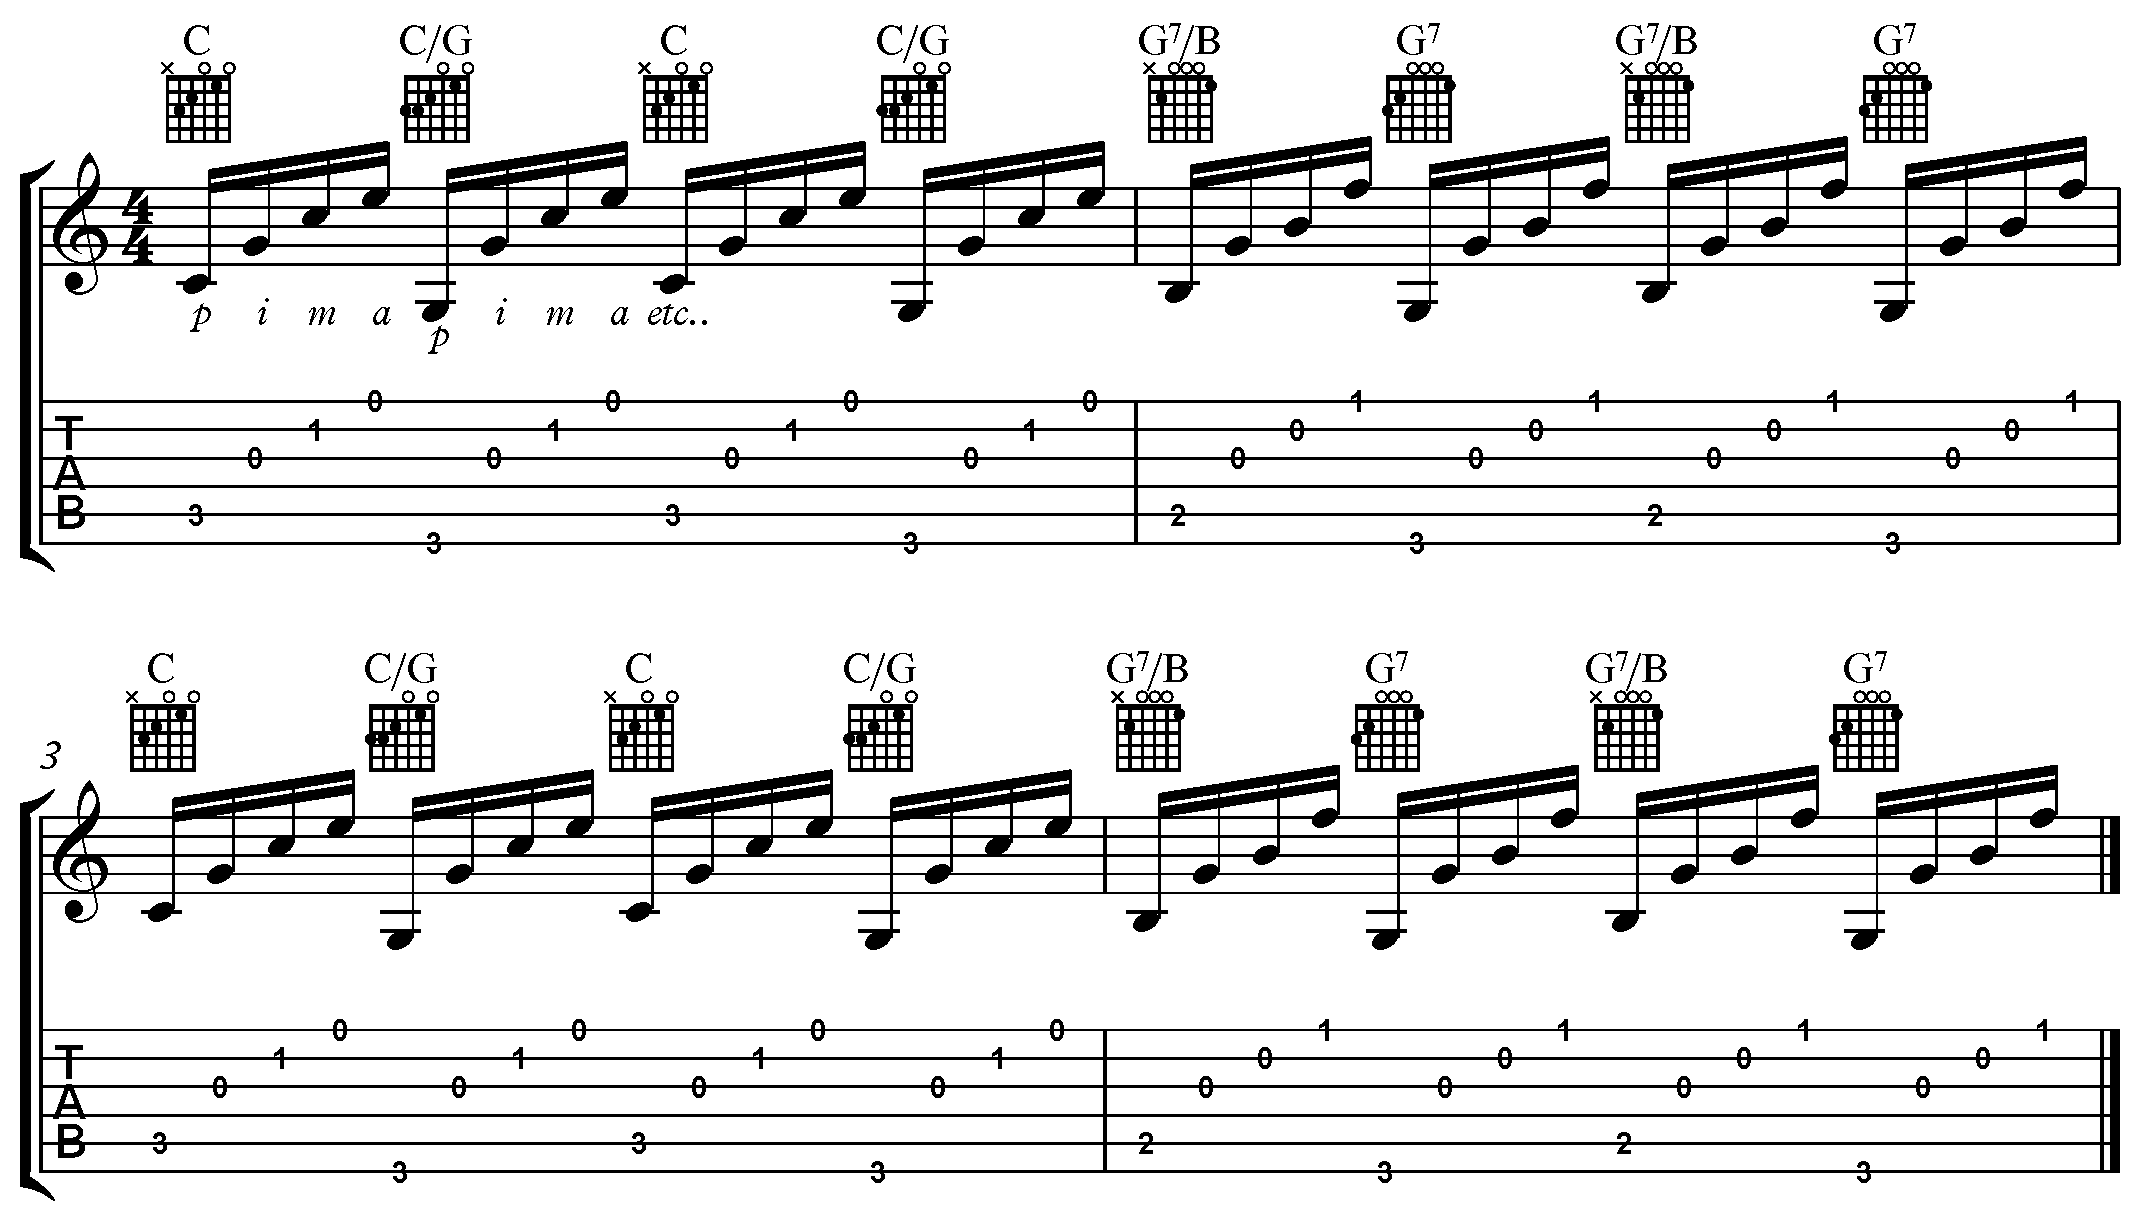
Exercise 4.1 - Forward Arpeggios (P-I-M-A)
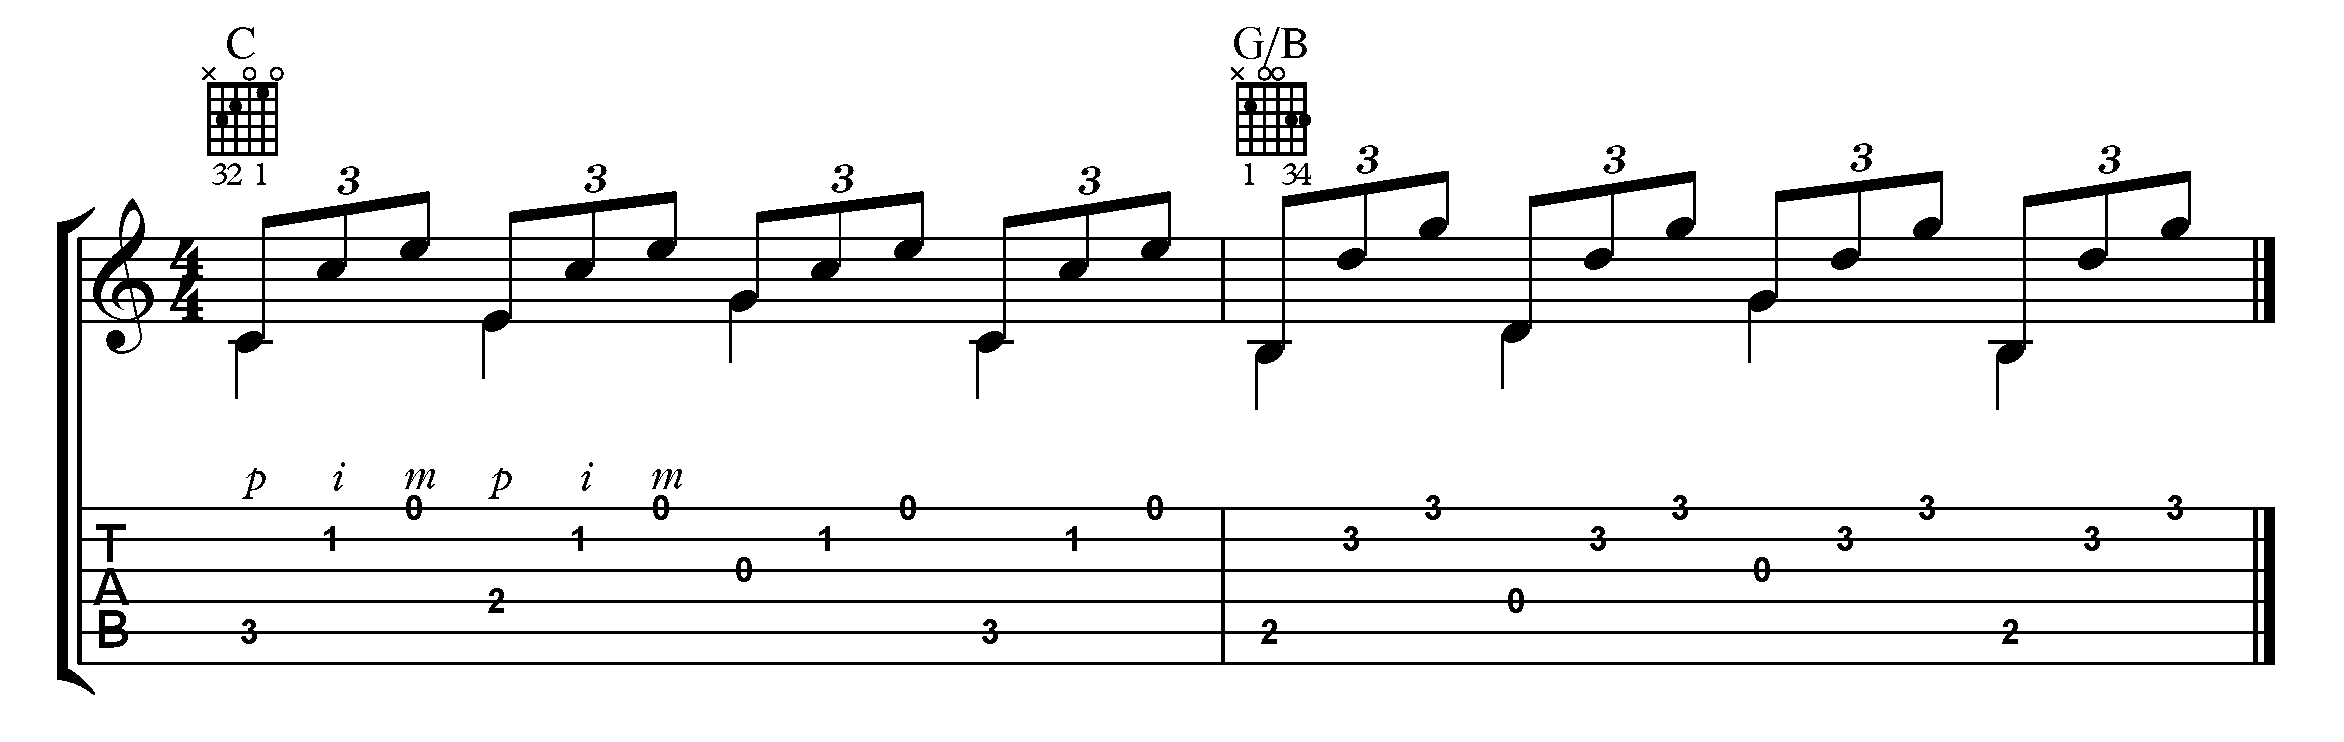
Exercise 4.2 - Forward Arpeggios (P-I-M)
Exercise 4.3 - Forward Arpeggios With Alternating String Sets
Exercise 4.4 - Forward Arpeggios With Alternating Bass Notes
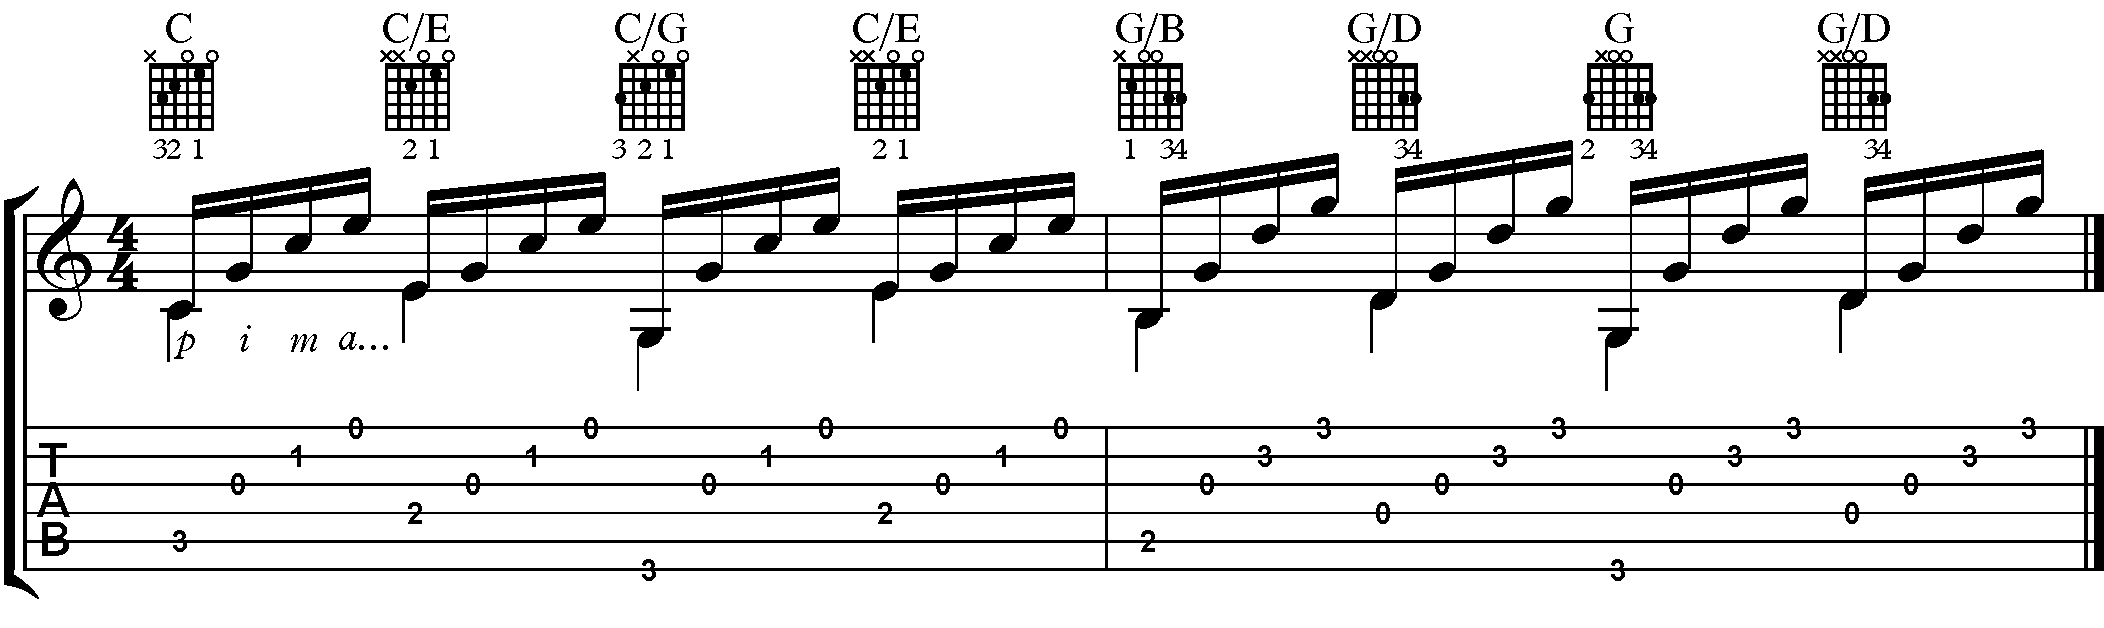
Exercise 4.5 - Forward Arpeggios With Alternating Bass Notes
Fingerstyle Guitar Basics: Lesson 12
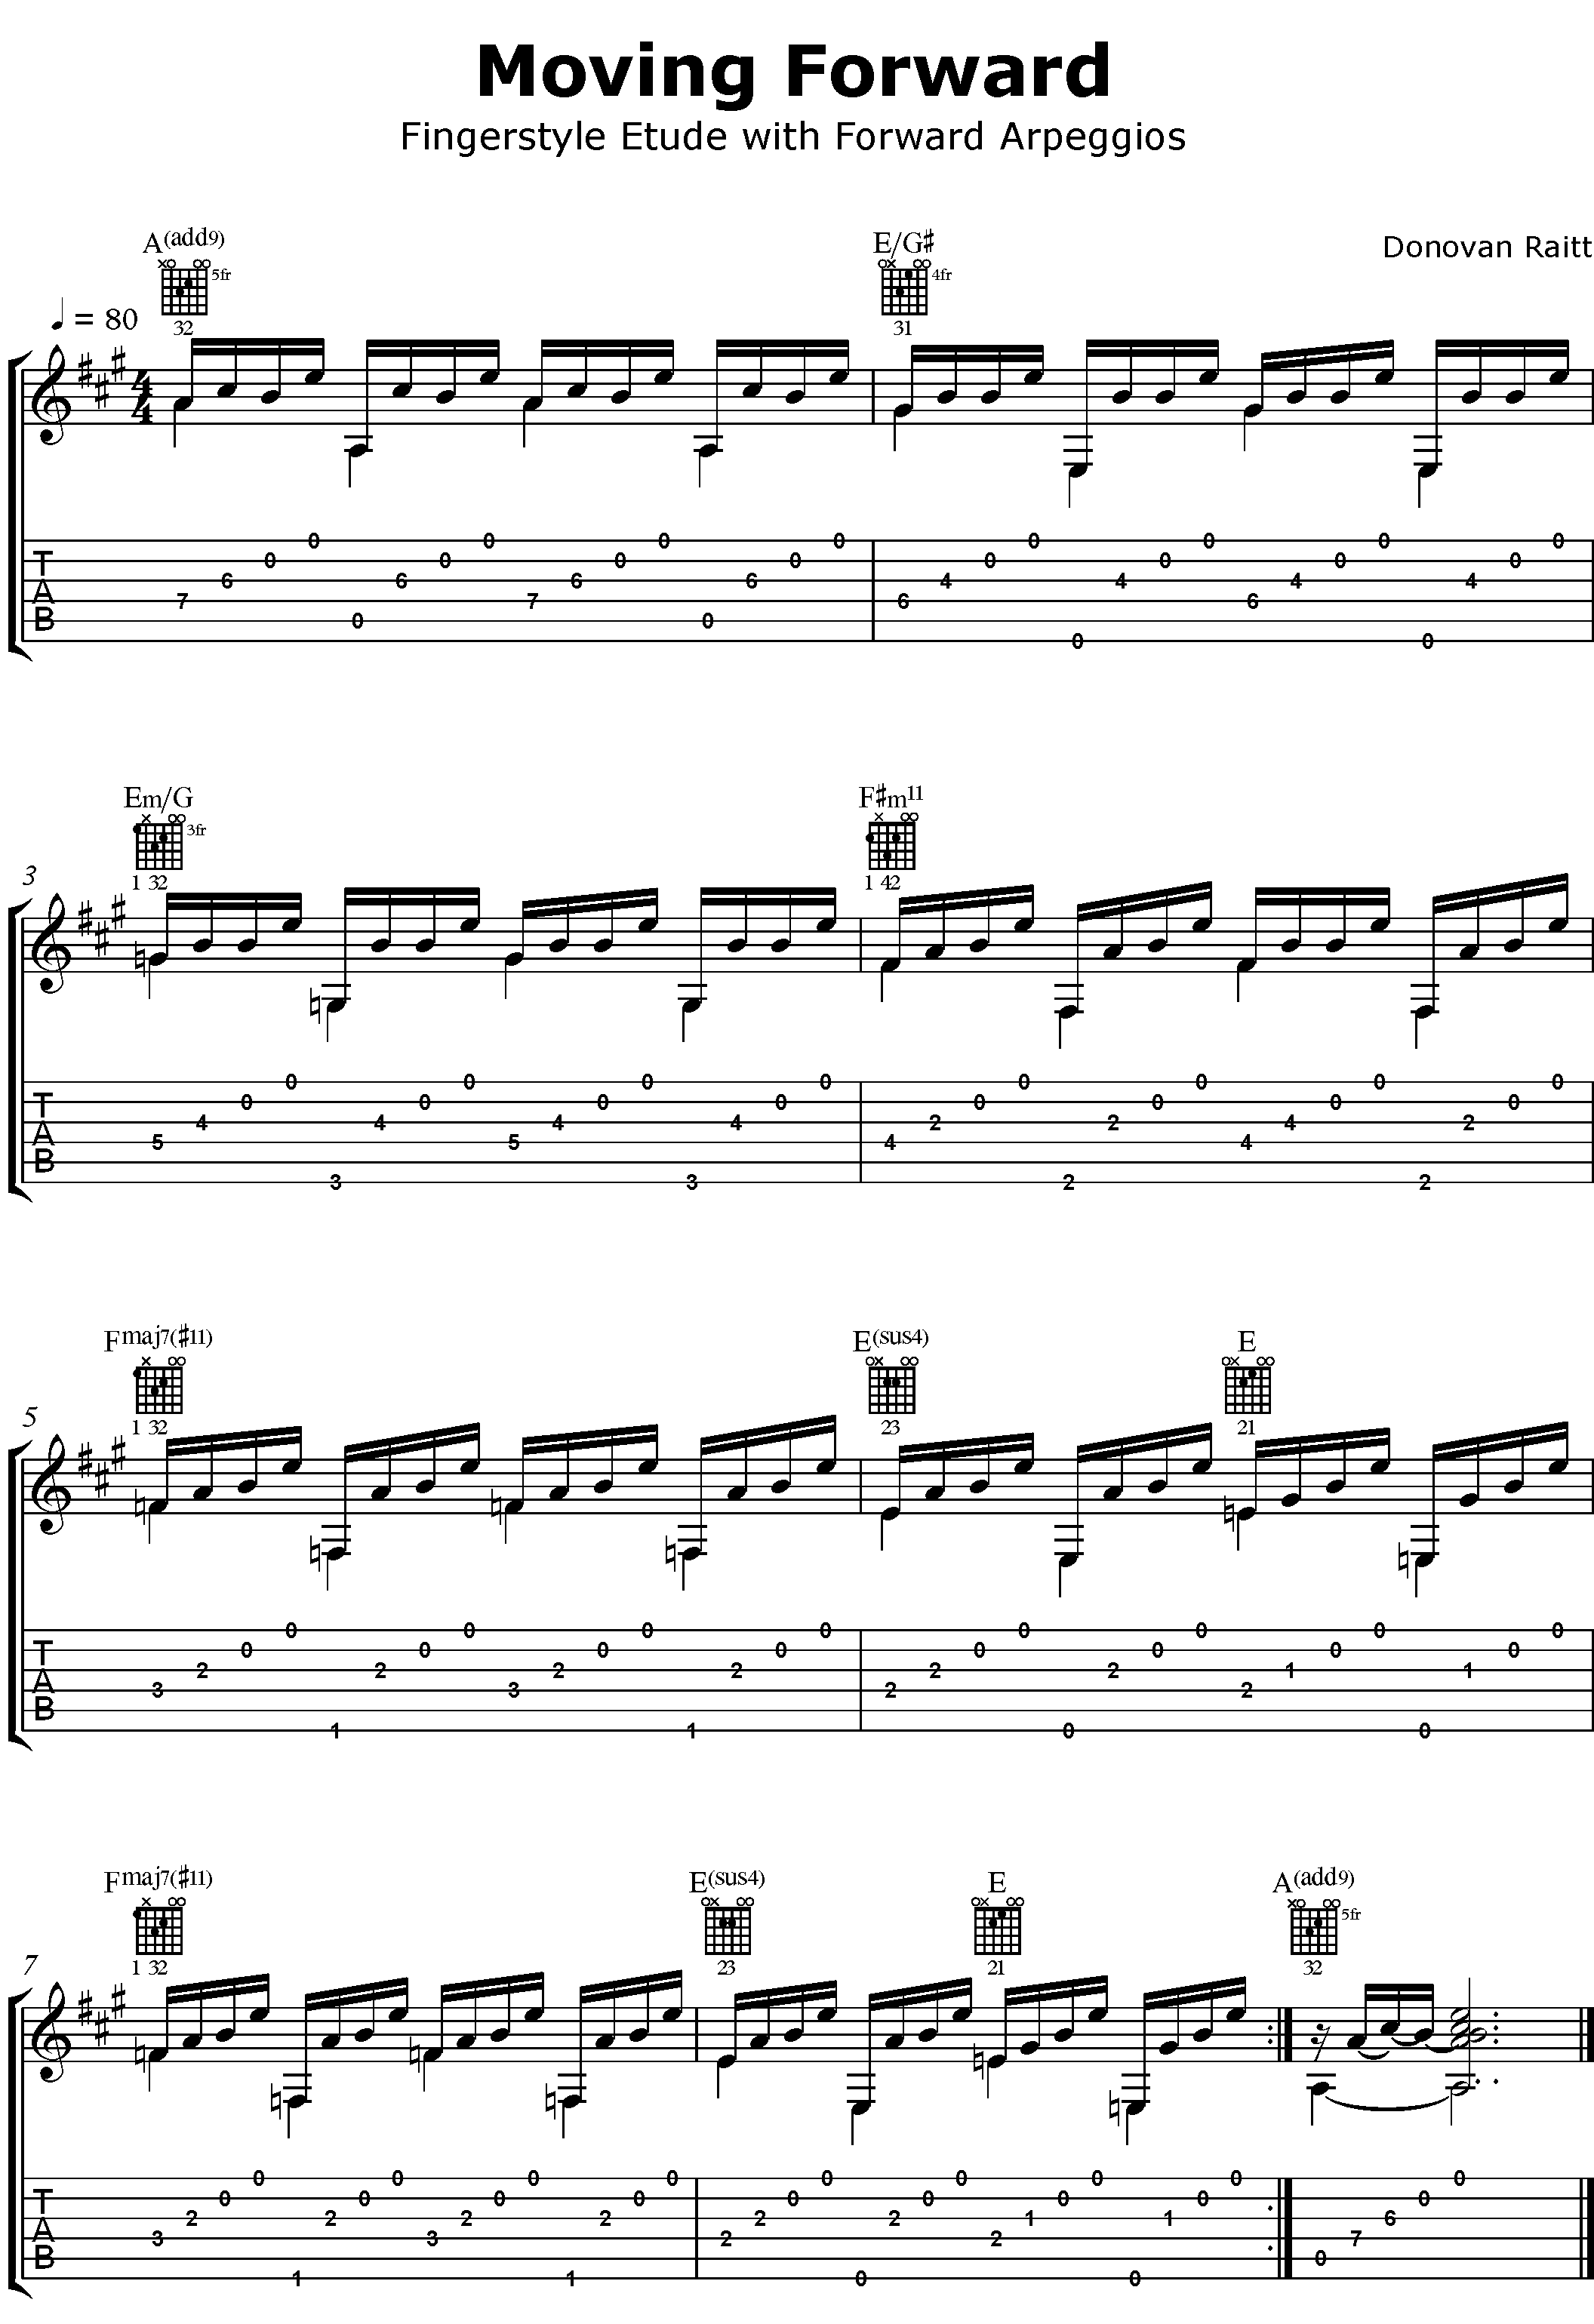
Forward Arpeggio Etude: Moving Forward

In-Person and Online Guitar Lessons In Aliso Viejo, Anaheim, Brea, Buena Park, Costa Mesa, Cypress, Dana Point, Fountain Valley, Fullerton, Garden Grove, Huntington Beach, Irvine, La Habra, La Palma, Laguna Beach, Laguna Hills, Laguna Niguel, Laguna Woods, Lake Forest, Los Alamitos, Mission Viejo, Newport Beach, Orange, Placentia, Rancho Santa Margarita, San Clemente, San Juan Capistrano, Santa Ana, Seal Beach, Stanton, Tustin, Villa Park, Westminster, Yorba Linda